Miter Gauge
The original miter guage is pretty bad. The bar it is on can rattle around, and the one stop it has is supposed to be 90 degrees, but isn't.
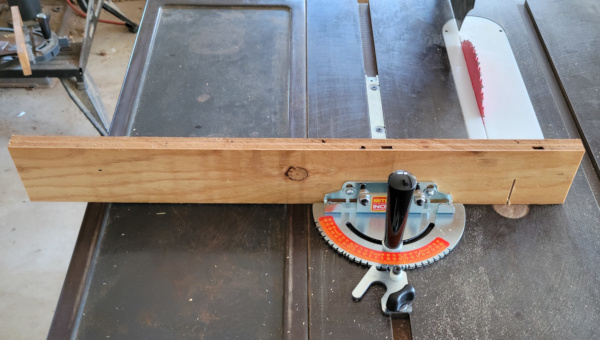
Not a lot of DIY for this. I bought an Incra V27 Miter Gauge. It does indeed fit in the slightly less than 3/4 inch miter slots on the Craftsman 113.
I found a scrap of plywood which isn't the greatest quality, but which sure seemed flat against the top of the saw, and I screwed it on to the gauge:
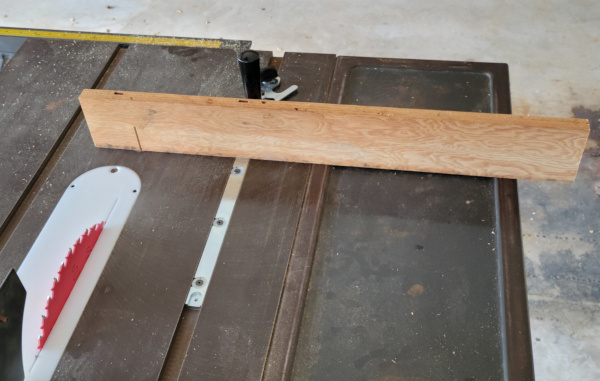
Hopefully Incra ships this thing already properly aligned with the miter bar, and since I spent a while aligning the blade with the miter bar, it should be square, but let's do the 5 cut test with an old hunk of shelf I had laying around.
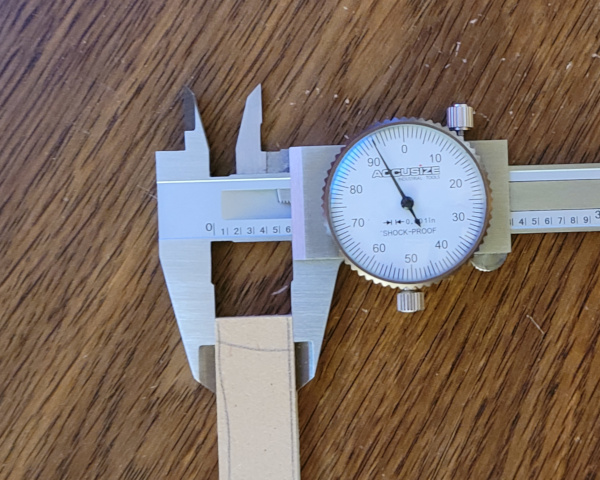
It isn't perfect. The front width of the 5th cut off strip is 0.673 inches and the back width is 0.658. Not sure I'm up to the task of adjusting it by the tiny amount that needs to perfect it. (If I do want to do some arithmetic, I should also record that the cut piece I measured was 8 5/8 inches long - that gives 0.000435 inches out per inch.)
Using my machinist square on the wood I cut, all the corners seem perfectly square, and measuring the diagonals also gives me the same reading on the tape measure, so I'm calling this close enough. It is certainly far superior to the old gauge.
The machinist square also says the face is perpendicular to the table, so I think I'm good to go.
Maybe someday I'll come up with a jig to make microscopic adjustments and get the reading perfect, but probably no point in that till I get a better fence than just a piece of plywood.
(I can imagine clamping both ends of the fence in position, loosening the screws that allow adjustment, then inserting a thin shim, reclamping, and tightening the screws. That might allow tiny enough adjustments.)
Meanwhile, I put some plastic triangles on it and I get mixed results with them reading perfect in one direction and out of alignment in the other. Perhaps the plywood isn't as flat as it seemed :-).
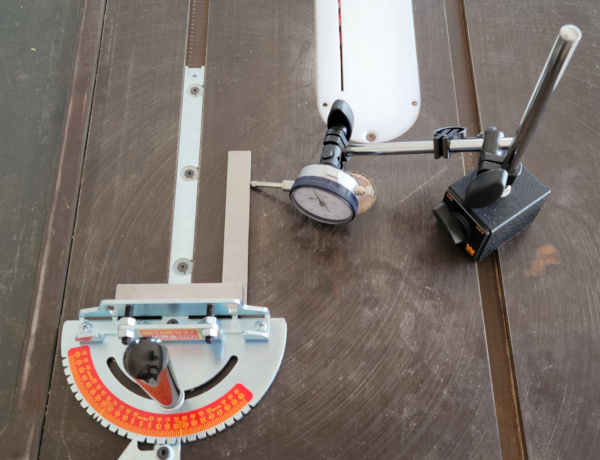
Found another video with a completely different technique for squaring the miter gauge. Preliminary tests look moderately OK, but I need to fool around with the dial indicator position more to make it easier to read as I slide the square.
The dial indicator does indicate about 3 or 4 thousandths out of square over the 6 inch length of the best square I have.
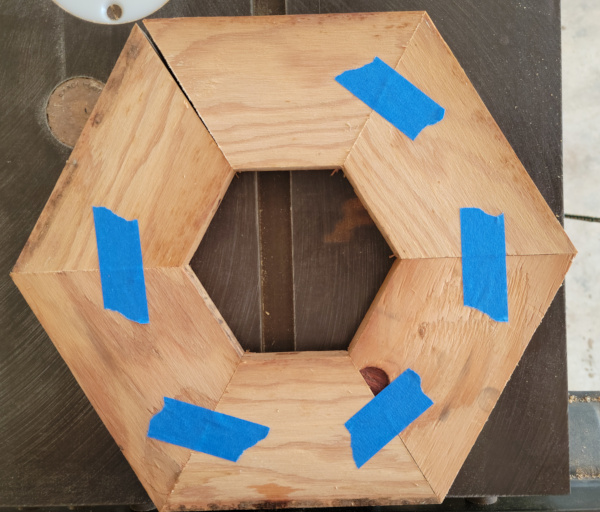
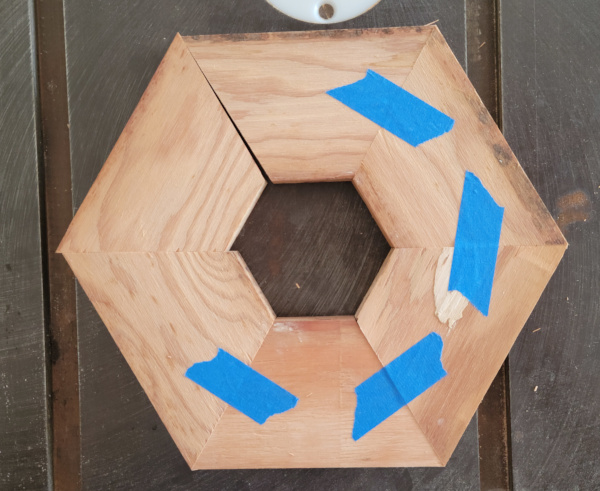
Another test for a miter gauge can be found here, this one accumulates even more error than the 5 cut method by making 12 cuts to form a hexagram:
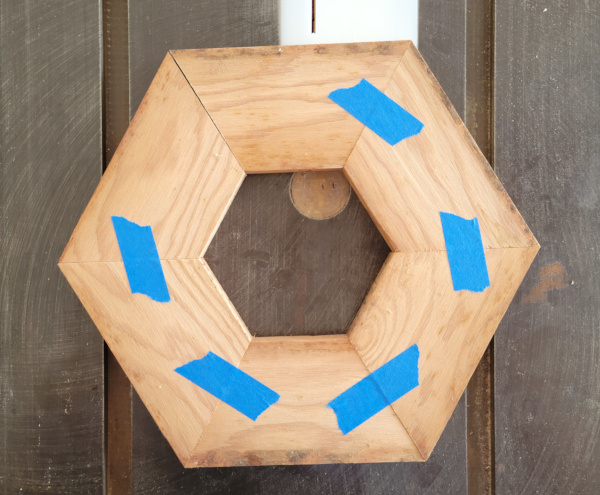
The final piece clearly has a gap (the joint not taped), so another confirmation that the gauge isn't perfectly square.
So all these techniques show me what's wrong, but none of them show me how to make the microscopic adjustments I need for getting it perfect. I guess I could try clamping a straight edge to the face so I can move the end a tiny bit and sneak up on better alignment (unscrewing and screwing the adjusting bolts between each test).
Here's the way I'm adjusting it a teensy bit at a time:
The magswitch fence comes in handy for this as well as a fence. I can lock it down, move the miter gauge back a bit, then move it forward till one end of the level is against the fence and the other end is a tiny bit off the fence, so I only make a small change in the angle at any one time.
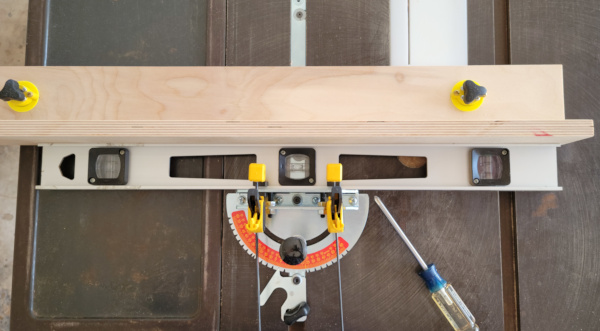
Using the dial indicator and machinist square technique (because it is simple and requires no test cuts), I finally got it to read zero deviation along the length of my 6 inch machinist square. Here's the basic test rig:
I guess it is time to trim a bit off all my hexagon pieces and see if they fit together perfectly now.
Well, that's discouraging, it is worse now:
I can only hope this is because I had to do some kludgery to extend the pieces far enough to reach the blade, not because the alignment is really worse.
Must be the klunky way I cut (I gotta get a real miter fence), with no change to the alignment, just re-trimming the boards one more time, I get an error on the inside rather than outside:
Give up today, maybe try the 5 cut technique tomorrow and see if it is just as far off...
AAUGH! I'm so confused. I got a new very accurate square that is bigger and easier to run past the dial indicator, also got a decent miter fence that attaches securely, got the dial indicator fluctuating only 1 or 2 thousands over the entire length of the square, then did the 5 cut test again and it is farther off than ever. What is going on?
By the way, here's the super accurate square I got:
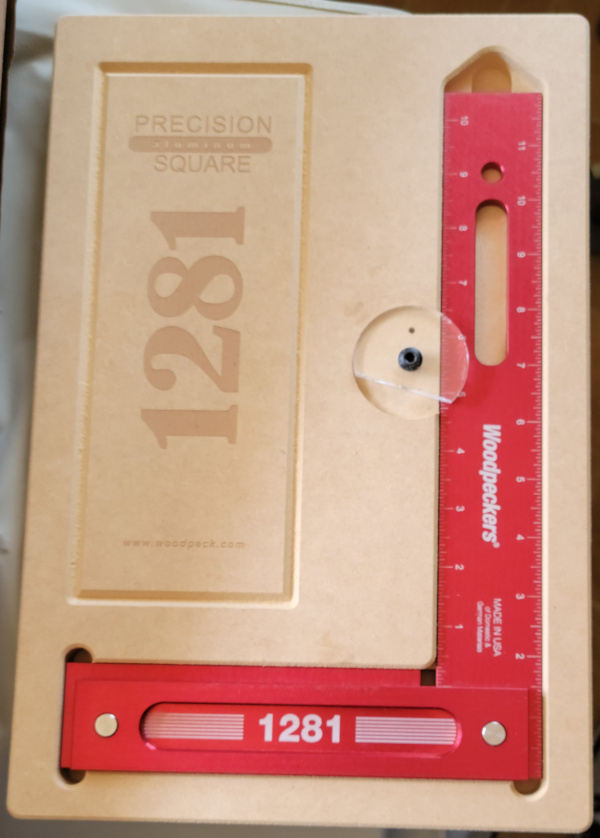
(I'm a sucker for being able to exactly determine how screwed up something I made is :-). I've checked it against both my machinist squares (and vice-veras) and they all say the others are square, so I think I believe anything I check with this is square if it says so. (The cheap framing square I got at Home Depot does not show up perfectly square, but I think I know which one I believe.)
More and more I'm starting to believe that I just got distracted and didn't do the 5 cut test correctly. I'll do it again when I get a chance and be more careful.
Testing again, here's the front edge of the 5th cut:
Here's the trailing edge:

The cut off stick is 11 1/8 inches long.
So I guess I'm off by 6 thousandths on that final cut.
If the online 5 cut calculator is correct, I need to move the far end of the fence back by 0.00172 inches. I guess maybe I can insert a feeler between the aluminum fence and my aluminum level used as a straight edge and perhaps achieve that.
Nope. I either used it backwards or my technique for adjustments sucks. It seems to be worse now. Let's try to fix it.
I only seem to make it worse. Perhaps I could do fine adjustments with light taps and the dial indicator to tell me how much I moved? Anyway, for now the best I can do seems to be clamping the square to the miter bar and gauge, then tightening the screws. Be nice to get it perfectly aligned, but it may be beyond my skill to make such tiny adjustments.
The bigger miter fence and the bigger square also allowed me to note that the face of the gauge isn't actually exactly vertical to the top of the saw. There's an adjustment for that as well I should probably try (after checking to see that the fence itself isn't screwed up - it should be OK, it's an aluminum extrusion).
Fixing the face was easy. Apparently it was manufactured perfectly square and was OK till they tightened the adjusting nuts at the factory. As soon as I backed off the outside nuts, it relaxed into perfect alignment. Screwed in the inside nuts a bit so they touched the adjusting plate, then tightened the outside nuts again, this time it stayed square to the table top. Can't insert a thin feeler at the top or the bottom of the square resting against the face.
Meanwhile, I'm trying out a new way to make tiny adjustments to the gauge angle:
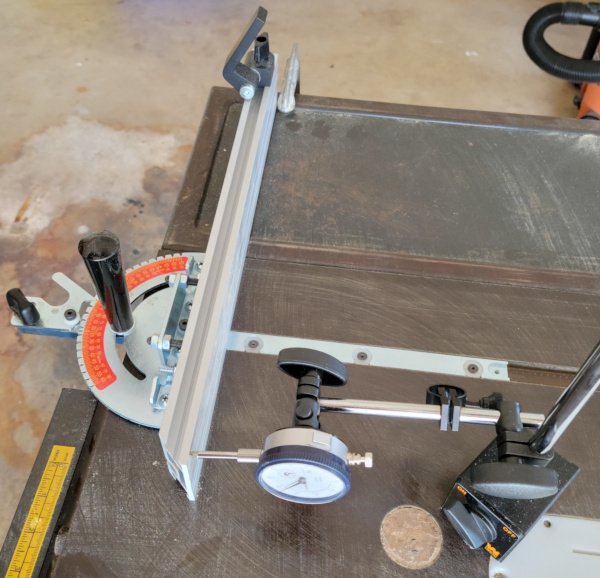
I've got a C clamp on the table saw at the far end I can hold the aluminum fence against, and the dial indicator at the near end resting on the face. I can loosen the adjusting screws on the gauge and use tiny taps on the end to move just a smidge (a smidge I can monitor on the dial indicator). I think I can creep up on perfection this way, but it takes time to retest after every nudge. (And all my attempts to calculate how much to move seem to be futile :-).
At some point I should see a transition to the far end of the final cut being larger rather than smaller than the near end, then I'll know I'm darn close to perfection (or if it never happens, I'll know I've been adjusting the wrong way the whole time :-).
Finally made that transition tapping the end towards me, and I seem to be pretty darn close now. If I get ambitious maybe do just one tap away. The dial indicator rig does seem to work better than the previous nonsense with the magswitch fence.
...But trying to make it better only made it worse. I'm giving up on perfection. The most reliable way to set it seems to be using the big old square against the fence and the miter bar. Easily reproducable and pretty accurate even if not perfect according to the 5 cut test.
See my other Craftsman 113 projects.