Belt and Pulleys
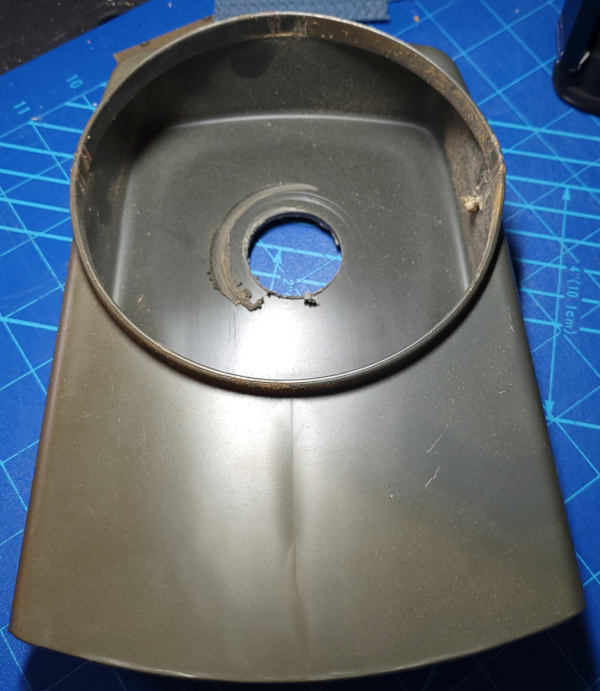
As you can see from this, I've definitely experienced the key coming out of the drive shaft (in this case the loose pulley cutting a nice hole in the plastic belt guard):

Fortunately the key was laying right under the saw instead of flying off to a dark corner. (Doesn't that violate Murphy's law?)
So when I watched this video about CRAFTSMAN TABLE SAW PULLEY AND LINK BELT UPGRADE, I decided to go ahead and do that. Couldn't be as much trouble as the blade alignment was [So I thought...].
The parts are here, but I won't try to install them till the next time I drag the saw out to work on it. The most difficult bit might be getting the set screw off the arbor pulley inside the saw [Nah, the set screws came right out]. The video also mentions needing to sand a bit off the metal keys to fit in the new pulleys, so I'll see how that goes.
What fun! I'm trying to get the new pulleys on and the old pulley on the arbor shaft really doesn't want to shift (naturally, the one deep inside the saw is the stubborn one). Tried penetrating fluid and it had no apparent effect. Out of desperation, I tried heating the pulley with my propane torch, and was able to shift it quite a bit, but the more I shift it, the farther away it gets from the arbor I was using to pry against. The best pry tool so far has been a large wrench I can fit over the shaft so as to pry on two sides of the pulley at once.
Possibly I've heated up the shaft as well as the pulley now, so I'm letting it cool down before trying again. I may also be able to tilt the blade and get more room to work on the pulley. If I get enough room that way, I might be able to improvise a gear puller.
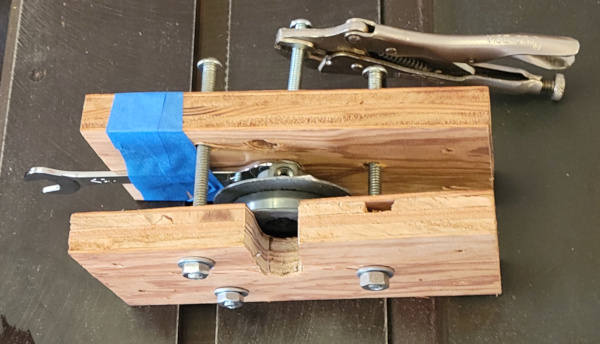
I got one more good push after tilting the blade to get more room and heating the pulley again, but couldn't make any additional progress, so it was indeed time to improvise a gear puller:

As you can see the old gear is still trapped in the gear puller, so it worked. The slot in one piece of plywood slips over the shaft behind the pulley (which would have been impossible without the earlier shifting, so it wasn't wasted effort), the three bolts are tightened up, then the center bolt is rotated to pull the pulley off by driving the bolt against the center of the drive shaft.
I have one of my thin wrenches taped to the inside to hold the nut the center bolt goes through.
Turns out that even with the blade tilted, I couldn't rotate the vise grips on the center bolt, but fortunately, I could rotate the entire gear puller contraption while holding the vise grips.
A few alarming pops as the gear jumps a bit, and then it finally came off the shaft. Whew! Something always makes a simple job take forever.
The arbor shaft has a slot that holds a half moon shaped key (the motor shaft was just a striaght key), and it had a few gouges on it from the set screw that made it reluctant to fit in the new pulley, but a few seconds of sanding cleaned off the high spots.
A bigger problem was the arbor shaft. Spent quite a while with WD-40 and a Scotch-Brite pad cleaning it up enough for the new pulley to slide on without trouble.
Used the old belt and a straight piece of aluminum against the face of the motor and along the belt to see if it was straight and tap the arbor pulley in till it did look straight. Tightened all the set screws, and I'm ready for the new belt (later).
[I suppose if I was really ambitious I could 3D print a thing to sit in the pulley and hold a nice straight rod and see if the rod is dead center in the matching pulley (or even hold a laser pointer), but this looks pretty good.]
This seems to be the best video about link belts and has details missed in a lot of others about how to fit and install:
Should you put a link belt on your saw?
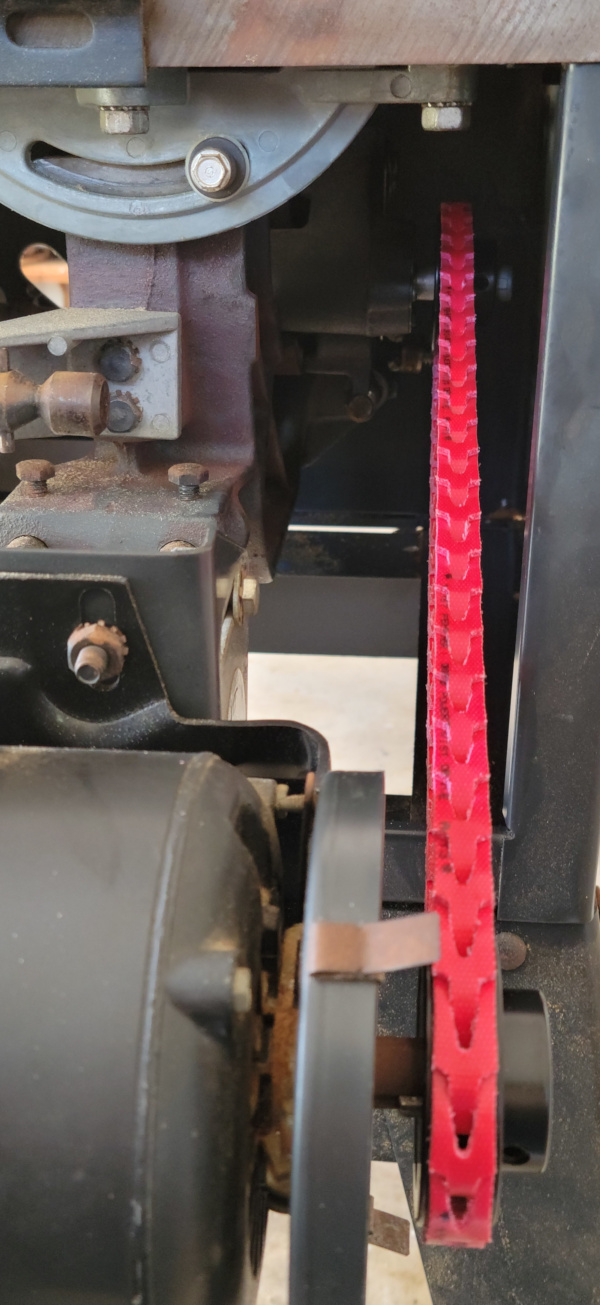
New belt is now on saw:

FYI: I did put the belt guard back on after taking this photo. Getting the right length for the belt was a challenge. For the record, I wound up removing 9 links from my 48 inch belt to get the motor resting about in the middle of the slot the bolt slides in as the motor is raised and lowered. If the belt stretches a bit, it will have room.
Ignore the videos where people just use their fingers to insert and remove links from the belt. Needle nose pliers are essential if you haven't spent years doing finger work in the gym :-).
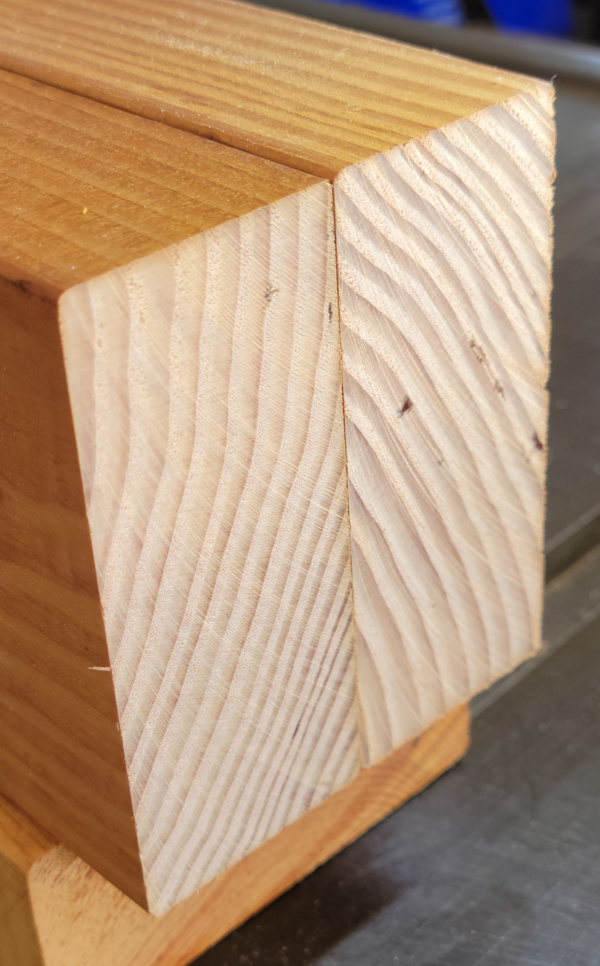
On the chance that the rumored lower vibration with a link belt would translate to a smoother cut, I crosscut another piece of the same 2x4 I tried after the blade alignment. No sun to shine across the pieces, but the old belt cut the far 2x4 and the new belt cut the near one. Not a lot of difference:

I wouldn't say the new belt is any quieter, but the noise is higher pitched.
I guess this job is finally done.
See my other Craftsman 113 projects.