Printer Room
I went ahead and ordered an MMU3 for my MK4 on Oct. 4, 2023. Be interesting to see when it finally ships. The info in the order estimates sometime in Nov. Meanwhile, I'm preparing for the MMU by working on some projects that will be useful in general, but especially useful after adding the MMU. [Update: The MMU3 kit arrived on Apr. 26, 2024! See MMU3 Saga.]
I've got a plastic bin which can hold 5 spools of filament and I've attached 5 PTFE tube connectors to feed filament out of the bin:
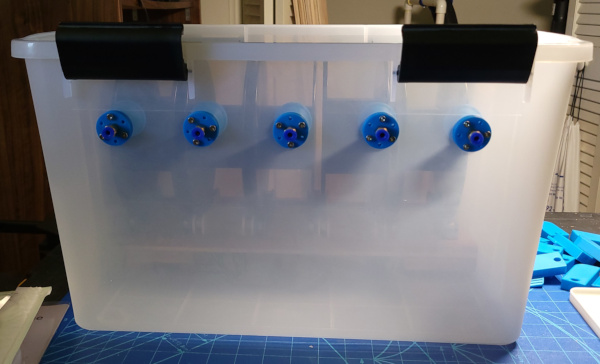

The bin has a gasket and snaps to secure the lid, so it should be pretty air tight. I can add dessicant in the bin to keep the humidity down.
I designed the little funnels to make it simpler to guide the filament into the 2mm hole and first used them in my Cereal Container Spool Roller. They seem to work well. I use the same rollers I used in the cereal continer as well, but five sets of them this time.
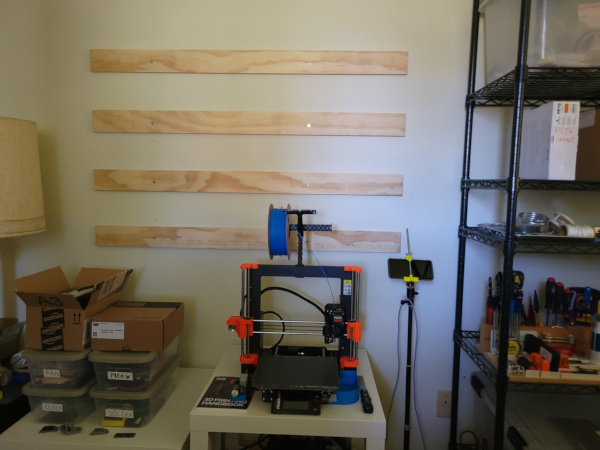
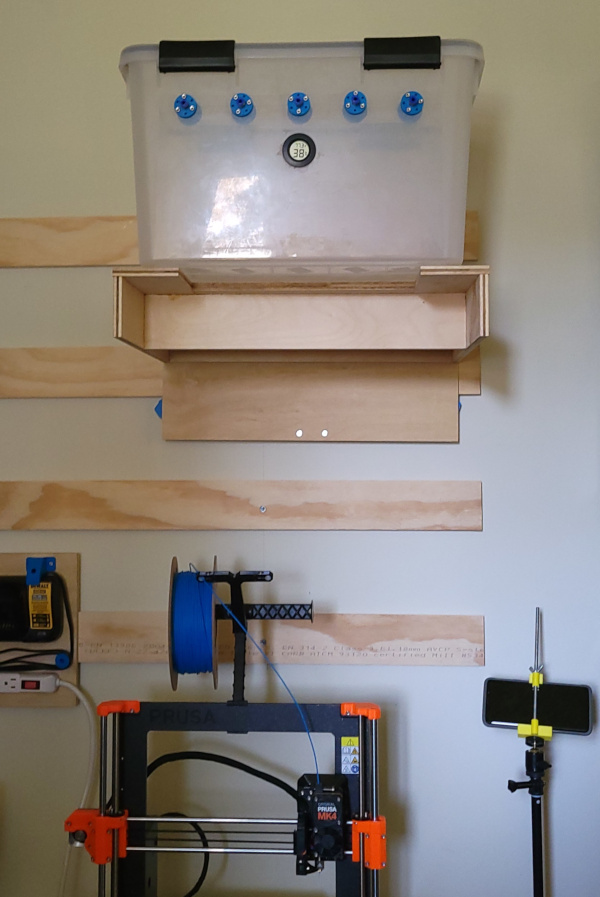
To mount the bin above the MK4, I'm in the process of getting a few french cleat strips mounted on the wall behind it and I can build a holder for the bin as the first thing to hang on the cleats (but probably not the last). It may well be more convenient to have the filament fed out of the bottom of the bin, so I'll make the mount to just support the bin across the middle and leave the front and back open in case I want to move the filament output.
Got the cleats mounted:
Doesn't look special from that angle, but the "cleatyness" is the magic of the 45 degree angle at the top:
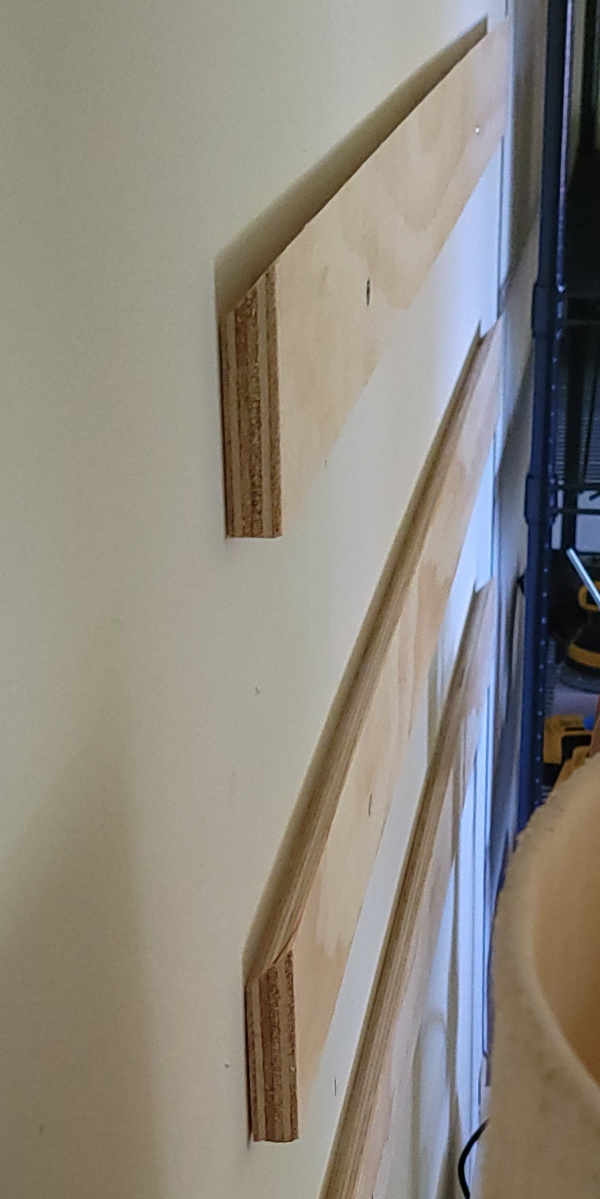
If I put a matching downward pointing cleat on the back of the bin mount, I can place it on any cleat on the wall.
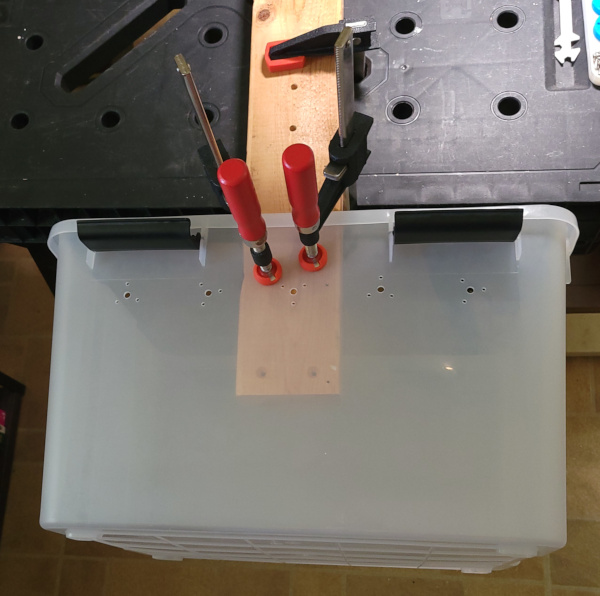
Continuing to work on the bin itself, I'm getting ready to use a 42mm forstner bit to drill a hole in the bin for a humidity and temperature sensor to go. Worried about the possibility of the attempt to drill going horribly wrong, I rigged up the most secure set of clamps on the bin I could devise. I'll see how it goes...
And I was right to worry about disaster...
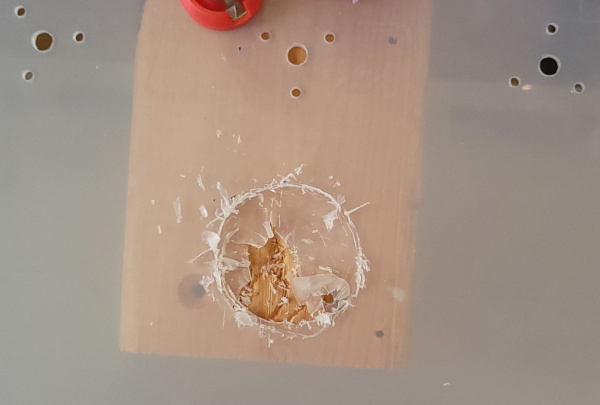
Switched to drilling lots of tiny holes around the edge, then cleaning up with xacto and dremel sanding drum. Not too bad a final result:
If I need holes in this sort of bin in the future, I'll just start with lots of tiny holes, xacto, and dremel :-). (Or maybe see if I can mount the whole thing on my drill press, which might work lots better.)
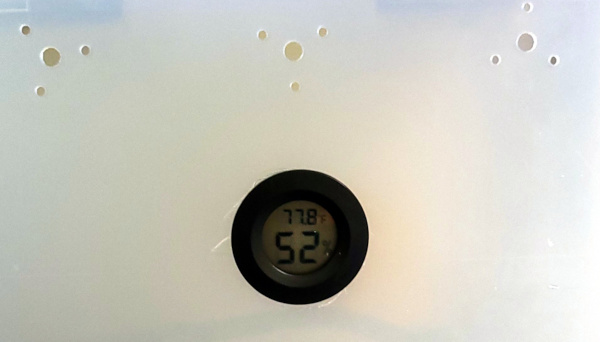
On the plus side, I got all the funnels screwed back on, tossed in a fine mesh bag of dessicant, sealed the top, and a couple of hours later, the inside of the bin now reads 30% humidity instead of 52%, so the concept seems to be valid.
While the bin was conveniently empty, I went ahead and drilled holes in the bottom for moving the funnels to one side or the other depending on what seems best, I just have tape over the unused holes now to keep the outside humidity from getting in.
The french cleat mount for the bin will be a little complicated, so I couldn't resist first building a simple mount for my DeWalt batteries and charger:
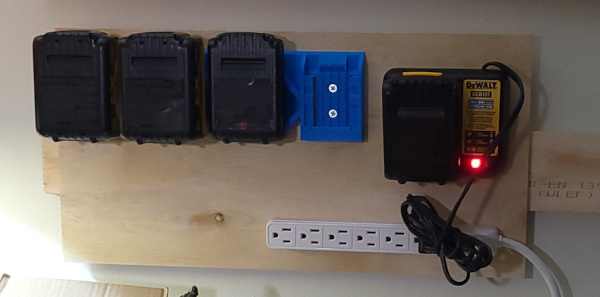
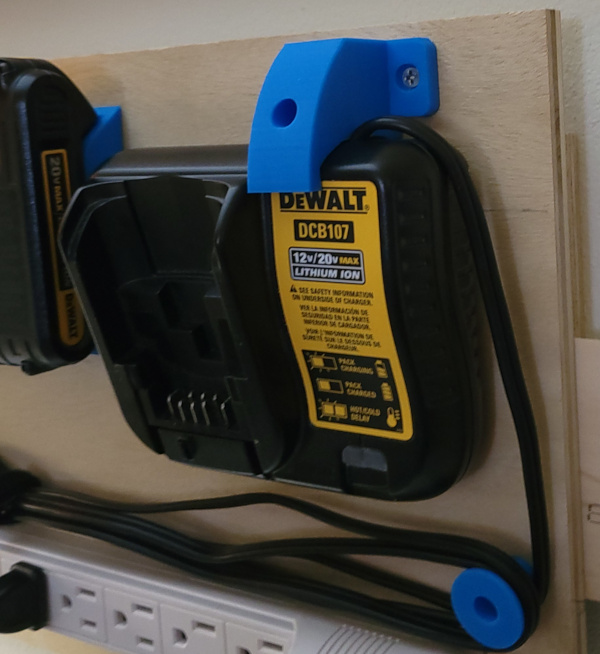
I used this Dewalt battery holder from printables (I used the "bestfit" version and it seemed to work well once I carved off some sagging filament in the bridge where the battery clips into the holder). More improvements to come...
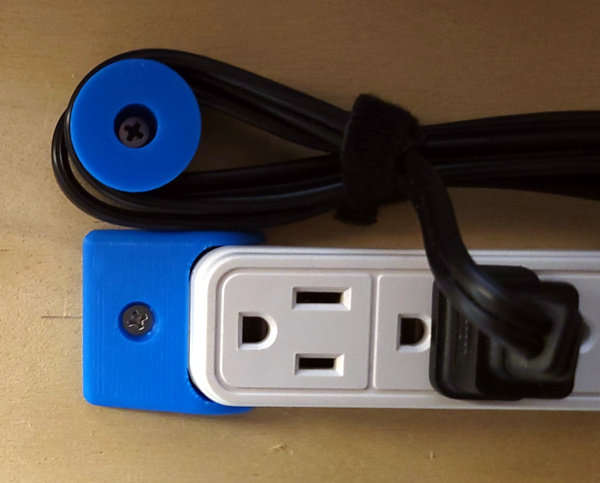
Posts for winding the charger power cord were simple, I've got them installed and the cord wound and secured with a velcro tie:
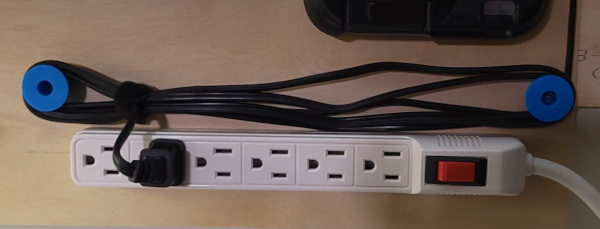
The power switch isn't hidden under the cord any longer :-).
The mounting holes for the power strip are secured on the screws by sliding the strip right, so if I secure the left end of the strip so it can't move, the strip won't fall off the board:
The DeWalt (DB107) charger wants to slip off of the drywall screws it sits on if you look at it hard. All it has to do is slide up a bit. I've completed the last of my improvements with this heavy duty stop to secure the charger in place so it can't move:
The finished battery collection cleat now looks like:
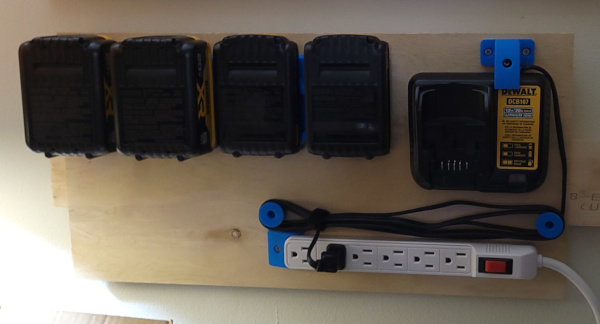
I didn't mention it above, but behind the board, I have these french cleat locks, so with everything locked down, I can remove batteries from the holders or the charger with one hand, no need to hold everything down with the other :-).
There is space in the lower left corner if I think of anything else to add someday...
Time to start designing and building the french cleat shelf the filament bin will sit on above the MK4. I'm using the measure twice, then prototype in cardboard before cutting principle:
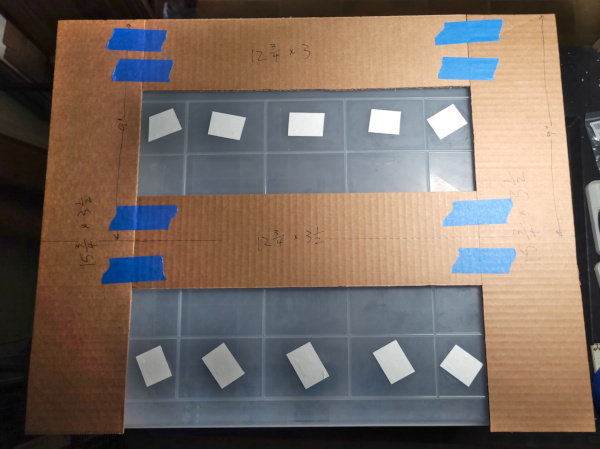
I can see that the sizes I computed for the parts do indeed allow enough space for the filament holes on the bottom and keeps the bin far enough away from the wall that I'll be able to open the clasps to get inside the bin to add or remove filament. I'll want to 3D print some parts to lock the feet in place and grab the sides of the bin so it is unlikely to slide around.
The cardboard has now become plywood, glue, and screws:
This is just a test fit. It could be lower, especially once I remove the filament holder on the MK4. Looks like I will want to feed the filament out of the bottom rather than the front. I still want to 3D print some parts to hold the bin on the shelf so it isn't as likely to slide off.
I've removed the Prusa filament holder, switched the bin outputs to bottom, and installed the PLA I've been using in the bin and successfully printed a test part:
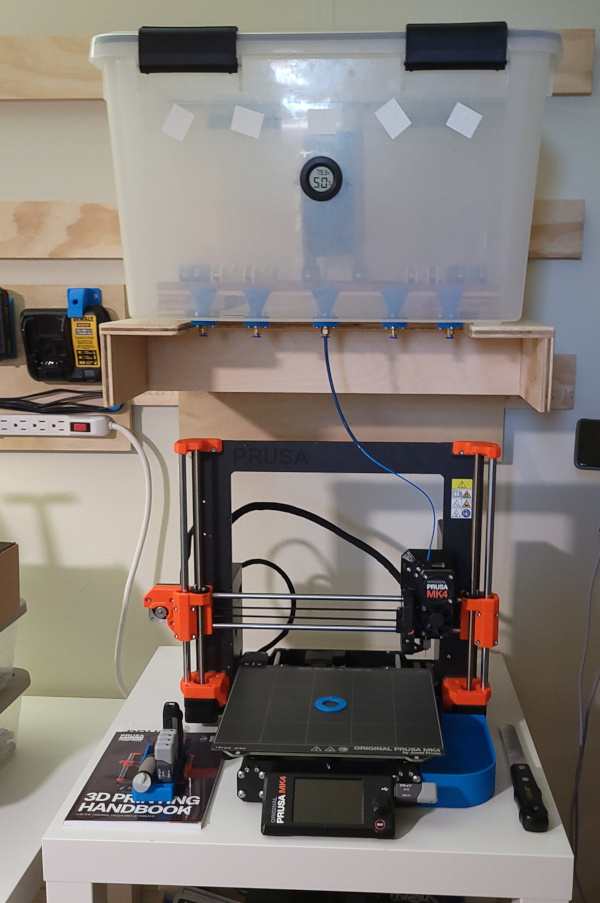
I have a short piece of PTFE tube installed on the bin output to reduce the friction from rubbing on the inside of the connector (the friction was suprisingly high without the PTFE). Everything seems to work like always, but now my filament is in a lower humidity environment and it will hold five spools when I get the MMU3.
Note: The dessicant says you can dry it in the microwave on defrost for 10 minutes. Take it out of the mesh bag and put it in a ceramic dish next time: The bags melt :-). Another hint: Put a cover on the dish, a few of the pellets seem to act like popcorn and go flying.
The next things to design and print are the parts to hold the bin more securely on the shelf.
Now I have some parts to wrap around the feet on the plastic bin:
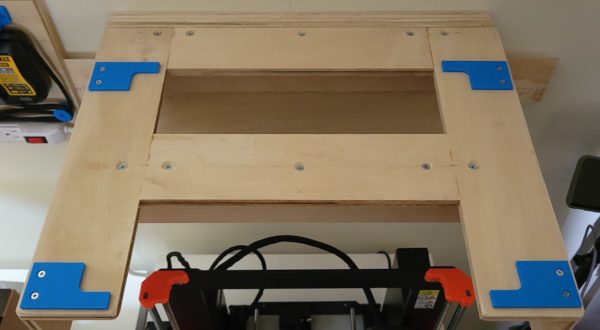
They seem to make the bin very secure. I had thought about something to nest in the indentations in the side of the bin, but that doesn't seem necessary.
I've now gotten more filament added to the bin (the white I ordered is back ordered, so only red, green, blue, and black for now):
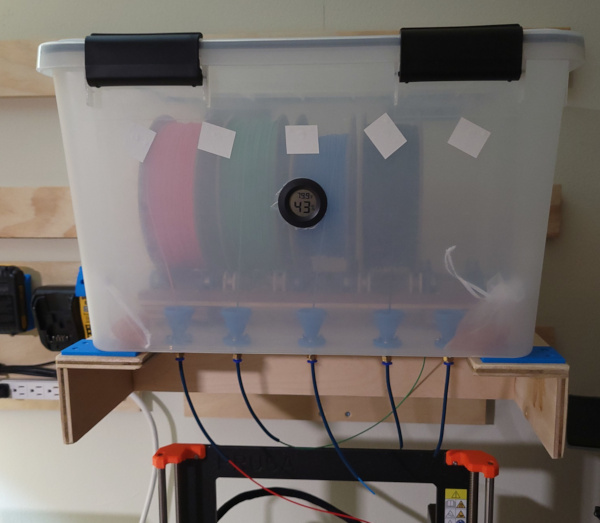
The bin seems just as solid with the weight of additional spools, and test prints with all the new colors seem to work so the filament feeding from different locations isn't a problem:

I've added lights to the printer now so I can see better.
I've just spiffed up the filament bin a bit by getting as much grease out of the bearings as possible and replacing it with light oil to make the spools easier to rotate. I also switched to 3mm inside diameter PTFE and PC4-M10 fittings where I can run the PTFE all the way through the fitting, so the only thing in the path of the filament now is just PTFE. It certainly works with these changes, maybe it even works better :-).