Gotchas
Trying to get things tweaked and adjusted so they work consistently, I (naturally) had lots of problems.
I kept having the nozzle wind up way too close to the printbed so it couldn't extrude filament while the extruder kept trying to push more filament out, resulting in the PTFE tube popping out of the extruder, once the filament got so carbonized that the nozzle clogged.
Another huge source of confusion: If I try to reboot the smoothieboard by power cycling, but I left the USB cable plugged into a live source, it doesn't actually reread the config at all. A true reboot requires removal of the USB cable as well as power cycling.
Techniques I have now learned:
After the tube pops out, I can wait for things to cool down (very important, otherwise might pull the filament out of the E3D). Then unscrew the cap on the extruder and retract the filament to drag the tube back into the extruder. Once it is in far enough, I can extrude again and this time pop loose the little cone that the tube runs through as well as the tube. I can shove the cone up the tube to get it out of the way and retract again to drag the tube down as far as it is supposed to go into the extruder (just above the hobbed gear on the stepper motor), then reseat the cone and screw the cap back on (till the next time :-).
When working on the clog, I discovered various useful techniques:
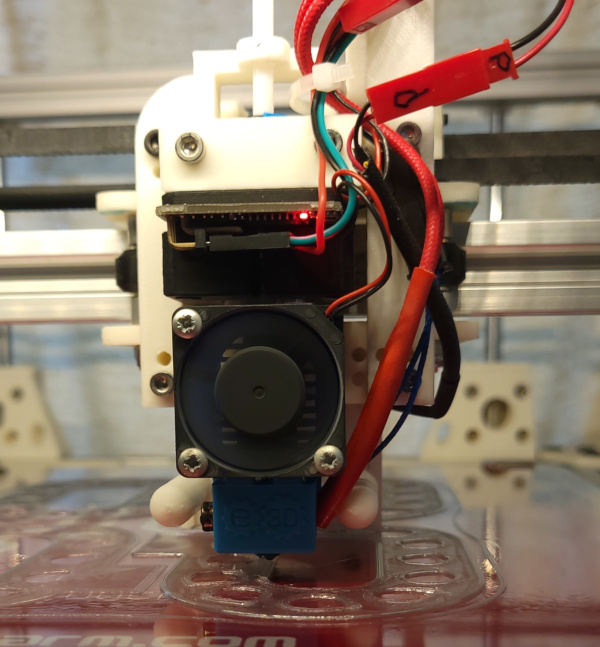
- To unscrew the heat break from the heat sink, make sure the nozzle is jammed against it (like it is supposed to be) inside the heater block, then unscrew the heater block from the heat sink, and it will unscrew the heat break with it.
- To extract the filament stuck inside the heat break, shove a short piece of PTFE tubing down inside the E3D so that filament sticks out the end of the PTFE, then heat things up and pull on the filament. The gooey bits at the hot end won't get stuck up in the E3D because the PTFE tube will protect it. (What if the filament is broken off inside the heat break so you can't pull on it? No idea - I haven't had to solve that problem yet :-).
- To unscrew the nozzle, hold the heat block with pliers and use 7mm wrench to loosen the nozzle.
- To unclog the nozzle, I used an acupuncture needle shoved in the pointy end of the heated up nozzle rotated and shoved back and forth a few times. I got the needles in this kit from amazon and it seemed to work well. I had it off the mount and laying on the printbed so I could see the end well with a powerful flashlight.
After learning all these tricks, I was still trying to figure out why the dang printbed was always too close no matter what adjustments I made. I finally looked really close and discovered the printbed moved up to jam against the nozzle as soon as it started printing.
After much interpreting of gcode, I finally figured out that the custom startup code I wrote homes the Z axis, but neglected to tell the smoothieboard that Z was indeed at home (apparently it can't figure that out for itself). Added a G92 Z0; at the end of my startup code, and suddenly it started lowering the bed to make room for the first layer instead of raising it. Works much better now.
Ran into mysterious new problem: I got the new bowden connector installed on the extruder and the Orion installed on the X carriage and got everything put back together, and after a small amount of printing, it suddenly acted like the filament path was blocked somewhere. It could no longer extrude, the extruder motor and hobbed gear just made horrible noises (but by golly, the new bowden connector didn't blow out). I gave up and came back to it the next day, and pulled the bowden tube loose checked everything, manually pushed some filament through the hot end, there were no problems to be found anywhere. Every individual bit worked fine, so I got it all back together and it worked perfectly again. I have no idea what the problem was (which leaves open the possibility it will happen again since I didn't fix anything). I guess there are some things man was not meant to know.
One thing I learned: It is easier to get the tube into the extruder if I leave filament running out the top, then I can just slide the tube over the filament to guide it into place. I've also got lines drawn on the tube to tell me how far it should go in, so I don't have to open the side and peer in at the hobbed gear to see the tube poking through the hole. (It is also easier to get new filament loaded by running it out the top without the tube, then sliding the tube over it).
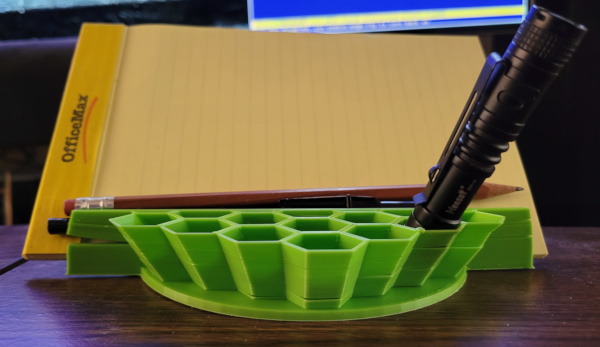
ABS has lots of problems on big prints with layers splitting as it cools. A heated or at least enclosed case is one solution for this, but a case for Jiggit would be huge. I tried printing a large thing that would have been a desk organizer if it had finished, but when I checked on it after a few hours there was lots of layer separation, so I killed it (but it can still sorta organize things):
PETG filament is supposed to print much better, having an infinitely smaller shrinkage rate when cooling than ABS. I've ordered some and I'll see what happens when I try it.
I got the PETG filament and loaded it up and printed my little single wall cube, and it seemed to print OK, but it was much easier to split the wall layers in the final print than the ABS version. I should bump the extruder temperature up and try again to see if I can find the best value (I used 245 for this first print which was in the middle of the manufacturer recommended 230 to 260 range). I tried 250 instead of 245, and the wall on the cube seems about as strong as the ABS version, so I guess I'll stick with 250.
I've also got some "Magigoo" ordered (back ordered, unfortunately) which is supposed to make it easier to remove PETG from glass. I probably want it before I try to print anything really large. It was more difficult to get the PETG cube off the glass than the ABS cube. Now I've canceled the Magigoo order and ordered some Layerneer bed weld instead, it was in stock and had equally good reviews.
A software gotcha: There is a fantastic amount of gushing press for "cura", so I keep trying to use it and going back to RepetierHost. My latest experience was trying to transfer all my new startup code to cura to be able to print with the Orion bed probe. I see the code I added in the printer definition, but cura is obviously not running it. I'm pretty sure I'm going to completely give up on cura.
Well, I'm printing a slightly redesigned desk organizer (since I had time to work on it more) in PETG with the Layerneer coating on the bed. I'll see what it looks like after a few hours, but I noticed another gotcha: The fan just barely clipped the swiss clip I have holding the bed on. Maybe I should move them farther out towards the corners (fortunately it only happened on the othermost layer of the skirt, after that it had moved far enough in to avoid it).
I've noticed another problem during the first couple of layers: Sometimes the nozzle will dig into the plastic and accumulate a blob which eventually comes off somewhere else. Once the blob was hard enough when the nozzle came back around that it hit the blob hard enough to cause a slight layer shift (nothing worth stopping the print for). I tend to suspect this is due to the bed not being quite level rather than over extruding because it seemed to mostly stop after the 2nd layer (by the time the nozzle scraped everything level :-). It also only seemed to happen in one area, which would mean that part of the bed was the part that is too high. There may still be some slight over extruding causing the occasional (much smaller) blobbing now that it is a few layers up. On the good side there is zero sign so far of curling up or layer splitting (though it will be a while before the same number of layers are printed as in my first attempt in ABS).
I started a new project to revisit my magnet capture gadgets I first made on the solidoodle. This time I wanted to print single objects with the magnet embedded rather than two pieces I needed to glue together. The simplest way to do this was to switch to using Repetier Server so it can process an @pause edited into the gcode file.
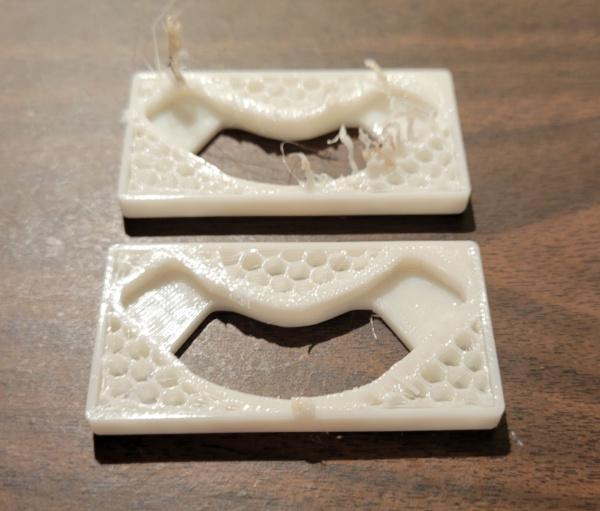
First problem is that I can slice the model and preview it to see exactly which layer prints the bridge over the hole where the magnet fits, but the gcode file doesn't have comments saying which bit of code goes with which layer. Have to look for G1 Zn.nn commands to say what level to move Z to, but that makes it slightly difficult to correlate with layer numbers if you aren't careful enough (which I wasn't on the first try). It started printing the bridge over the hole before pausing for me to insert the magnet. So the first try didn't work, I stopped it and at least used it to verify the magnet fit in the hole (after cutting all the parts of the bridge it printed before stopping).
I got the pause inserted at what I thought was the right place for the second try, but apparently the magnet was too close to the nozzle and the filament didn't want to lay down on the cold steel, so instead it got all balled up into a big mess. Another print to stop. Here's try 1 and try 2:
The third try finally worked after adding an extra layer to the depth of the magnet hole, and making sure it was tapped down level. (More on that over in the Good Print Gallery).
YIKES! New gotcha - the hot end keeps overheating after it has printed a while. I switched to a different mosfet, but that make no difference. I can only imagine there is something internally wrong with the heater cartridge, so I've ordered a new one and will be out of commission for a few days till it arrives and I can get the connector I'm using soldered on and replace the cartridge. I was able to run PID tuning which worked fine, no runaway heating, but it goes crazy a few layers into a print. Since this is just a theory, I hope it works. (Meanwhile, I'm printing my second vac attachment on the old solidoodle so I can finish up my Ridgid vacuum modification).
Update: I remembered I had an old E3D kit I never installed on the solidoodle, and it had a 40W heater cartridge that was compatible, so I got it installed and it has managed to print my little single wall calibration cube correctly, but that doesn't take very long. I guess I should get everything adjustable tweaked to perfection and try printing another big wet/dry vac attachment to see if it makes it all the way through the 5 hour print now. When the part I ordered comes in, I can put it with the old E3D kit where I stole the one I'm using now... It has made it through 10 layers on the part it wasn't able to to print 3 layers on previously, so I guess the new heater cartridge really fixed it. Now I know one symptom of a bad cartridge :-).
I've documented a new mystery in a separate web page.
New bug - after working fine for years, it keeps printing some random amout of time, then saying there was a temperature overrun. Looks like a thermistor problem, so I'm buying a kit with a new thermistor, heater block, and nice silicone sock to keep filament threads from melting all over the block. The new thermistor comes with a connector already attached, so I cut Jiggit's thermistor cable and crimped on the pins to match the new connector. Just as well I did that, because when I was poking around on the old connector, the cable on one side broke loose. Almost certainly that was the source of my intermittant failures. Got the new connector installed, everything put back together, ran PID tuning again, and leveled the bed. It has been printing the big parts I tried to print before with no problem.