Captured Magnets
I'm not putting this on thingiverse since it is way too specific to the parts I have, but here's the README and the download link for all the files:
Openscad designs for capturing powerful magnets (from old busted disk
drives) inside printed pieces that can be used to stick things to
refrigerators (at least ones with steel panels).

Naming conventions:

magN - each mag directory contains the files need to print
the parts for one magnet (mag1, mag2, maybe more some day).

frame - I call the metal the magnet is glued to the "frame"

mag - I call the actual magnet (attached to the frame) "mag"

back - The piece that has the shaped hole the magnet fits
into is the "back".

front - the piece that goes on top of the back and contains a
mounting slot for whatever custom thing is to be mounted to that
magnet.

Design technique:

Scan the magnets with flatbed scanner, process them in gimp to
eventually generate svg files that openscad can import to form
the shapes for the holes the magnet fits in. Gimp features
used: Lasso tool (with single clicks, not dragging), grow
selection, selection to path, export path (as svg). Also layer
flipping, rotation, movement, etc.
I have a couple of mostly flat magnets salvaged from broken disk drives. They are very powerful and stick to the refrigerator something fierce. They would be great for holding things on hooks if only there were a convenient way to attach something to them.
So the plan I came up with was to capture them in a 3d printed sandwich with some way to mount things on the front 3d printed piece. (I could get really daring and pause the print so I could put the magnet in, then continue printing, but not only is that tricky, who knows what metal parts might interact with the magnet, so I'll stick to two parts and glue).
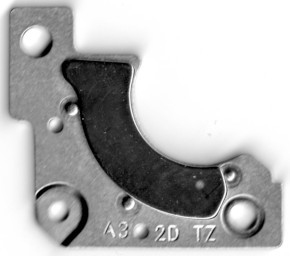
The plan started with using my flatbed scanner to capture images of both sides of the two magnets I'll be using:
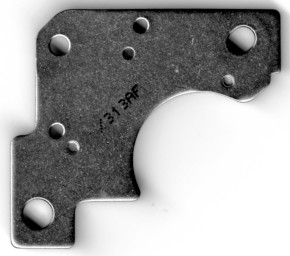
To translate the scans into openscad, I first use the gimp lasso tool to select around the outside of the magnet (using single click to draw line segments around it, no way I could drag the mouse accurately). The first magnet, I didn't include the holes in the selection, and I had to come back and grab them a different way later. Probably best to include the holes to begin with so they remain in the correct relative position at all times.
Once you have the selection the way you want it, it would probably make the most sense to cut it out and make a separate image where you can flood fill the selection and then later come back and simply do a select color to retrieve it and do any additional manipulations.
To get the selection into openscad, find the To Path entry in the select menu and convert it to a path. Now you need the toolbox window for paths. You probably don't have it visible, so you need to poke around till you can make it visible (I used the little arrow at the top of the layers toolbox to add a tab with paths).
Once you find the hidden paths window, you can then right click on the path you just made (probably labeled Selection) and choose export and pick SVG format.
Now you can import the svg file into openscad where you can use linear_extrude to make it as thick as you like, subtract it from a cube, etc.
With enough fooling around with test prints, you can eventually get a model that has a magnet size hole you can drop the magnet into.
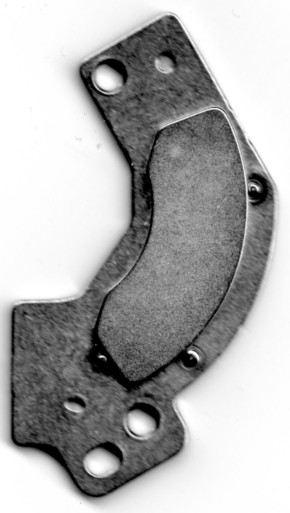
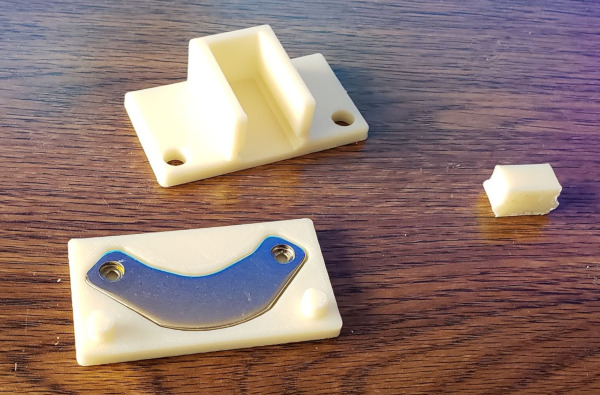
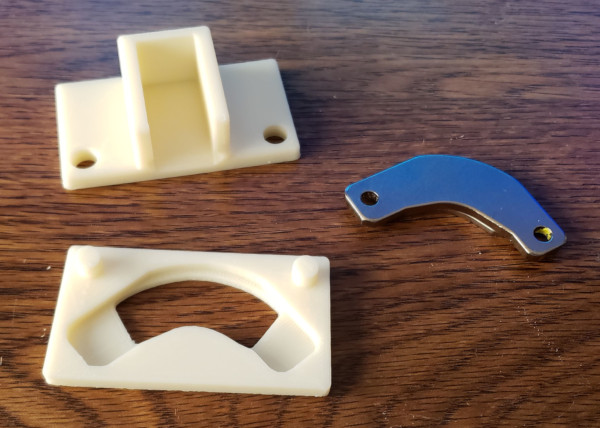
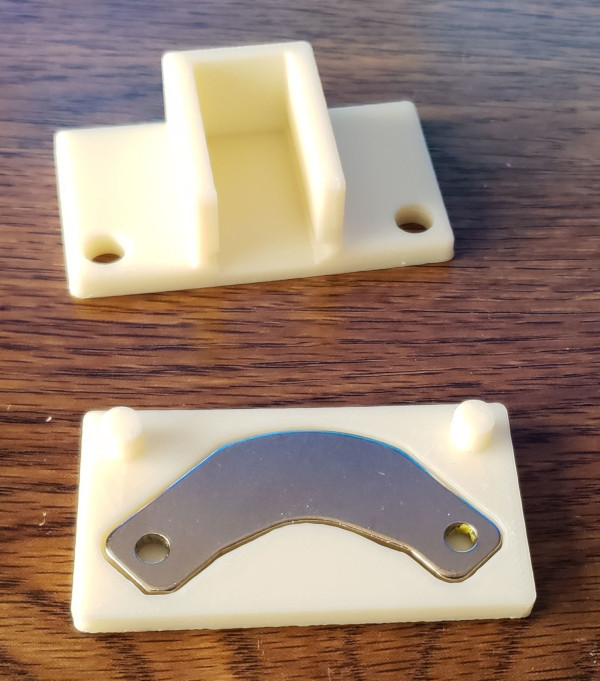
Do the same with the shape of the magnet and use the holes as reference marks to line the two shapes up, and you have a hole the complete magnet shape fits into. Add some posts through the magnet holes and other extrusions and you've got positive alignment for printing a top piece.
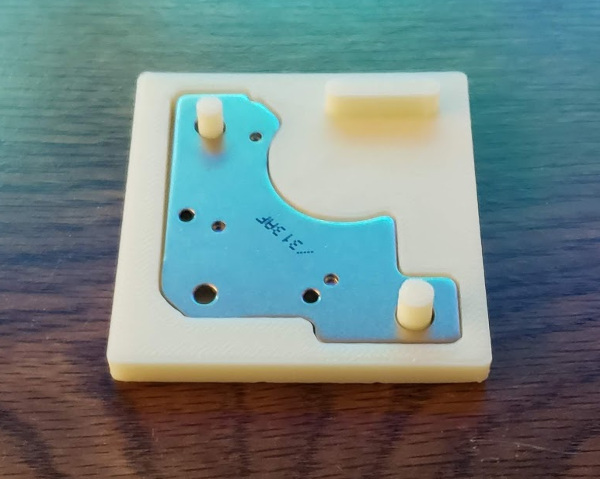
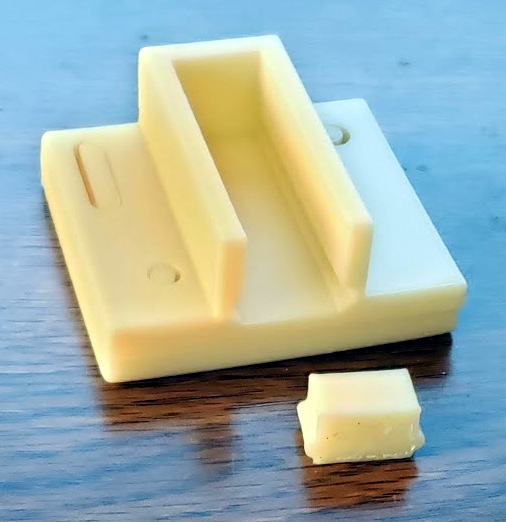
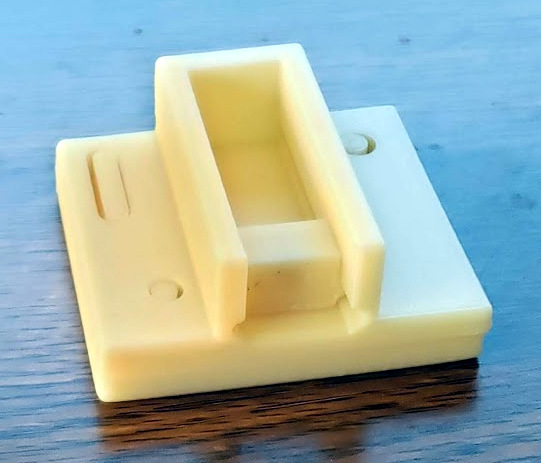
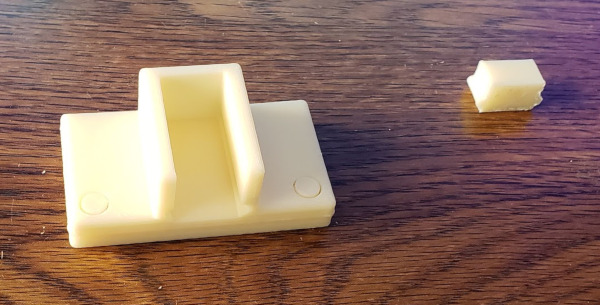
Here's the top piece printed showing the mounting slot I invented with a little test piece in the shape of the connector showing it slides into the slot.
Next up, the next magnet, hopefully using previous experience to do a quicker job...
I found a flatter and less complex magnet in my junk, so I'm switching to it for magnet #2. First lesson: Fill the holes with nice yellow play-doh so I can see them better in the scans and they aren't obscured by shadows from the angle the scanner lights them up.
Lesson 2: Flip one of the images over and use gimp to adjust them so the front and back images match exactly in the jpeg files. That way all the dimensions and alignments will be the same when I pick data off either side. Do this by pasting images together as layers, making one layer slightly transparent, moving the layer so one hole is directly centered over the corresponding hole in the other layer, then using the layer rotation tool to rotate around the hole that is centered till the other hole is also centered. Now both layers are aligned the same so anything I pick off front or back will have the same relative positions. Save this as an xcf file so I can come back to it as needed.
After creating an svg file, I can later reload it, convert it to a selection, then use tools like the grow selection tool to make it bigger. After my initial test print, growing the selection by 10 pixels seemed to work well to make things big enough for the magnet to fit, and it was much simpler than all the "wiggling" I did on the first magnet.
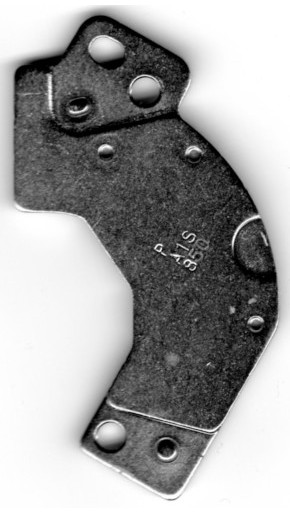
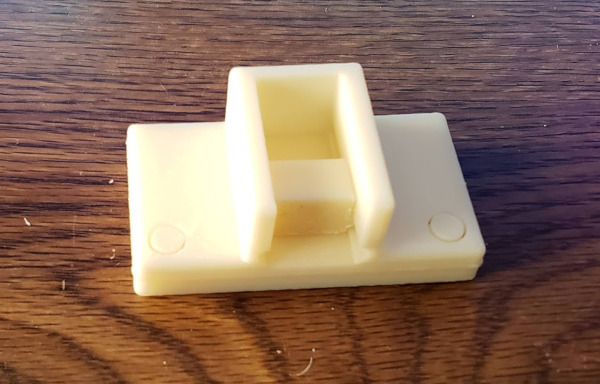
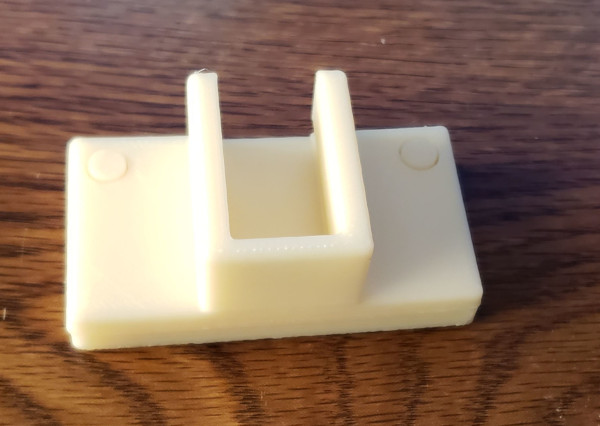
The second magnet went much better with my experience from the first. The pieces go together with no filing or sanding and everything fits perfectly:
For the ultimate experiment to determine if my procedures are sound, I scanned a third magnet (very similar, but not identical to mag2). I copied all the mag2 files, changed the names to mag3, used the new svg files I made (with the selection grown by 10 pixels) and changed a few constants for thickness and positions, but made no test prints, just went for the front and back pieces printed at the same time. Incredibly, it worked perfectly:
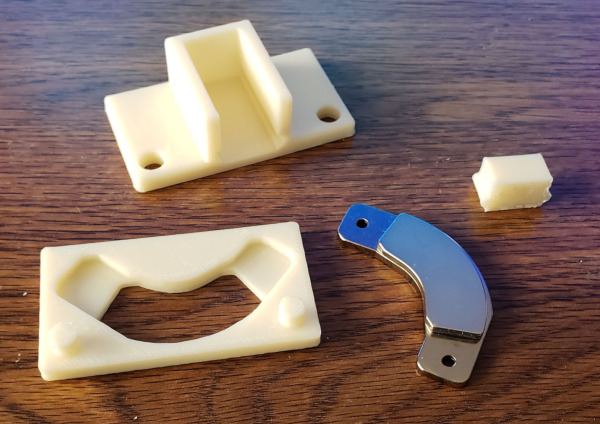
I figured it was time to actually try out the magnets. I designed a completely overkill hook-like object to go with mag1. The intent was to be able to hang a dish towel so it wouldn't constantly fall off (which always happened with the old hook). Here's the pitiful old hook:
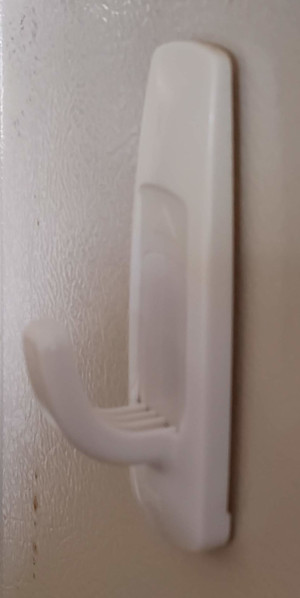
Have to try and wedge as much towel as possible into the hook, and it falls off frequently no matter how careful I am.
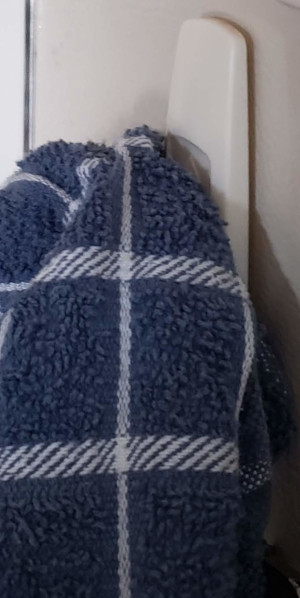
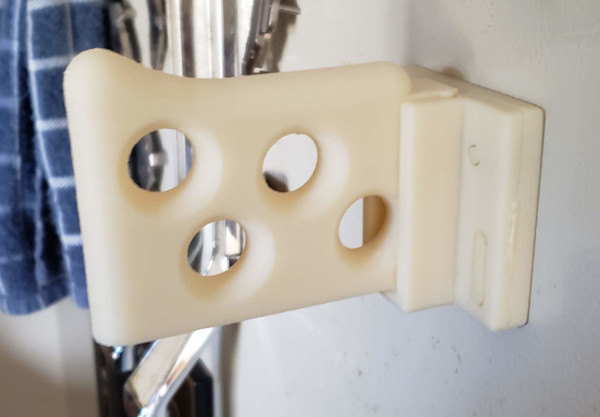
Here's the new and improved hook on the captured magnet:
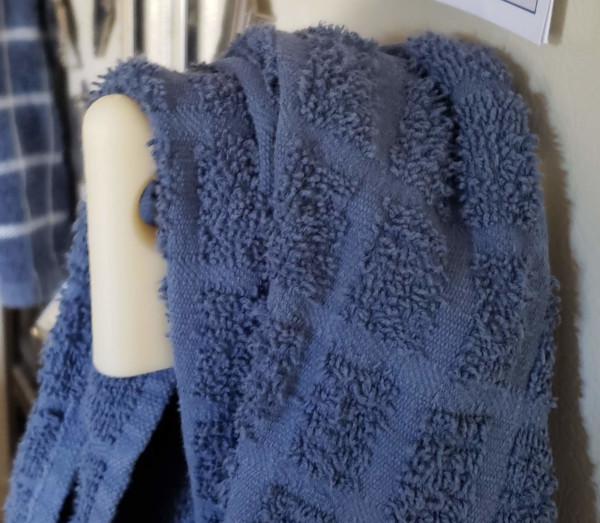
As you can see, this towel fits on the hook without needing to scrunch it up.
Since I printed this vertically for strength, it took about 3 hours, giving me plenty of time to use the two part Gorilla epoxy I got to glue the mag1 pieces together while the hook printed.
All the holes and rounded edges are mostly decorative (and also use less plastic). I figured I might as well take time on the model since it was going to take forever to print. I suppose I could hang something else from the holes, but have no plans for that.
P.S. The hook directory in the tar file contains the openscad for this hook.
Go back to my main Solidoodle page.