Adventures in PLA
My new magnetic build plate won't survive very long at the 100 degree temperatures required for printing ABS, so I've abandoned ABS in favor for PLA (still haven't worked up the energy to try TPU).
Did bed leveling with the dial indicator and adjusted initial Z zero height with a crisp dollar bill till it would just move under nozzle when homed to Z zero.
I've been working on getting all the settings dialed in correctly to work with PLA, and it has been a challenge, with some things working great off the bat, and other things hardly working at all.
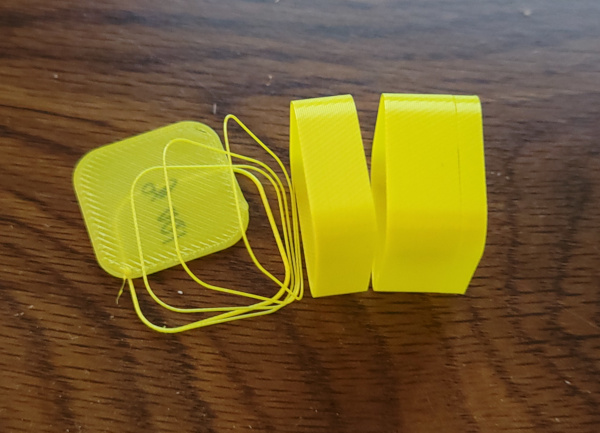
I first printed my single wall vase to check out the bed level and wall thickness. Measuring the thickness it printed the bottom versus the theoretical 0.3mm thickness it is supposed to be, I get 0.356mm. The M3 adjustment screw for the Z stop is 0.5mm pitch, so if I'm 0.056mm too high, I want to turn the screw about 40 degrees (which is just a bit - I don't have a way to measure that accurately so I go with "a bit"). New prints seem to do quite well after that, so I guess I have the bed level set pretty well.
In the wild goose chase department, I measured the wall thickness of the vase and came up with 0.654mm which is a lot bigger than the 0.48mm walls I expected, but if I set the flow rate down to 73.4%, I get under extrusion artifacts on everything else I print.
I found this thread which probably indicates the problem is intractable :-), so I just went back to 100% flow till I have a better reason to change..
One problem is that the layers pull apart really easily in my vase, almost like I'm printing a slinky rather than a vase..
I suspect my cooling fan may work too well, dropping the fan down to 60% and the print temperature up to 210 degrees produced a vase that wouldn't trivially pull apart.
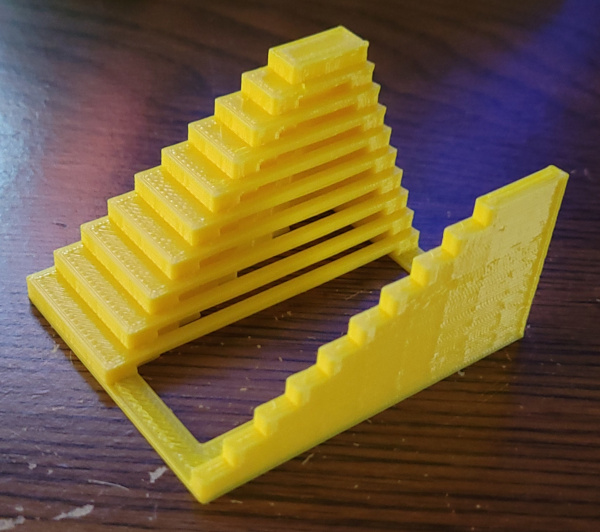
I printed a bridge torture test which worked incredibly well on the first try.
The thing that caused the most pain was the string tests I printed, not because they had strings, but because the towers were all over the place, nothing like cylinders or pyramids, just filament in a vague sort of interpretive shape to artistically represent a cylinder :-).
Since stringing is affected by retraction, perhaps the retraction setting is too big. Let's turn it off and try printing the stringing test again. Here's the previous abstract art versus new zero retraction:
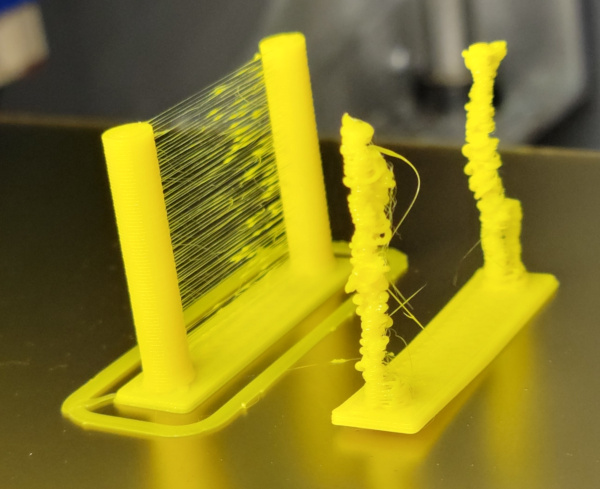
Ah-HA! I get strings now, but I also get perfect cylinders for each tower.
Turning retraction back on, but making distance 2 instead of the 6.5 cura default.

Wow! Much better stringing. I can see a few extremely gossamer threads that (mostly) didn't make it between the towers, but are just hanging free. On the other hand the towers didn't print as well. They aren't as screwed up as before, but still irregular in places from top to bottom.
I see most settings mentioned on the internet say they use 40mm/sec for retraction. The default in cura is 25, so let's bump that to 40 and see what happens.
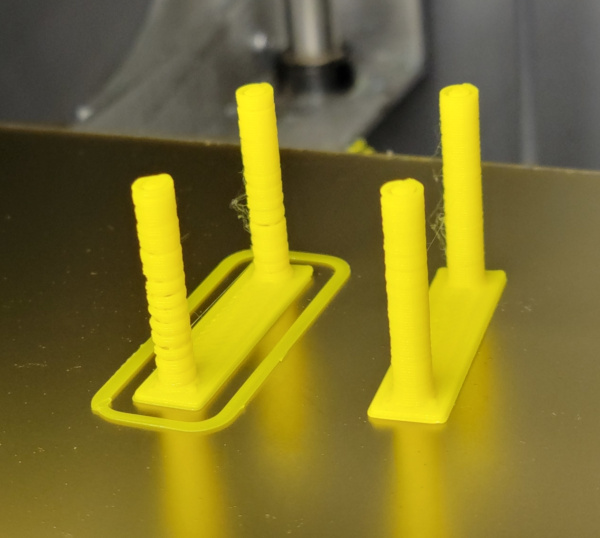
Yikes! Higher retraction speed made it worse, maybe drop down to 20 instead of 25?

At last, perfection! No stringing and smooth cylinders as well!
This works so well, can I drop retraction down to 1 and still get no strings? Let's find out:

Looks terrific, no strings at all, and the cylinders may even be a tiny bit smoother.
Somewhere in all the above experiments I dropped print speed from 60 to 40. Can I bump it back up and still get the same results?

Looks just as good at 60 as it did at 40, I think I can leave it there.
Time to try the nano test print again (which never generated anything other than a ball of string previously :-).
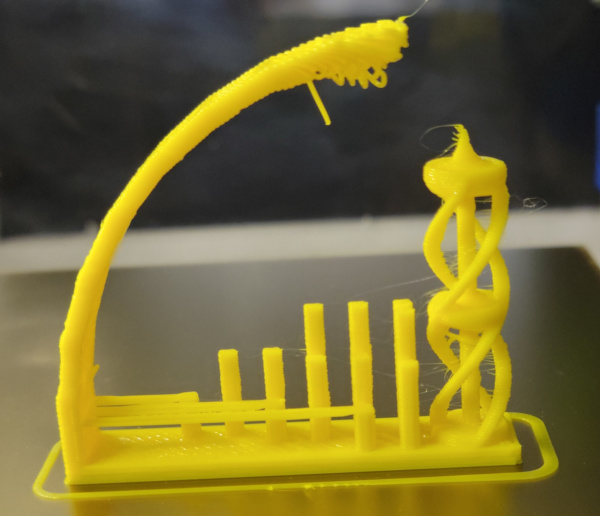
Extreme overhangs are a problem, it screws up starting at 70 degrees, and there are a few sort of gossamer strings on the tiny tri-helix thing, but lots better than just a ball of string.
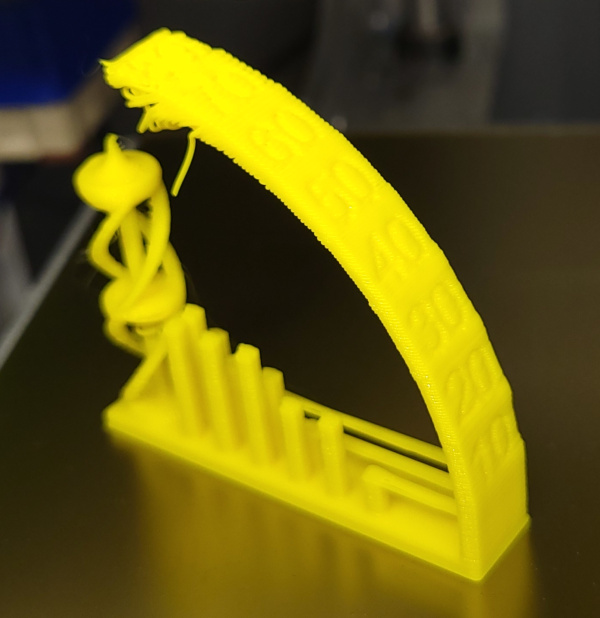
The numbers on the overhang test even come out quite nice.
It must be 3D Benchy time!
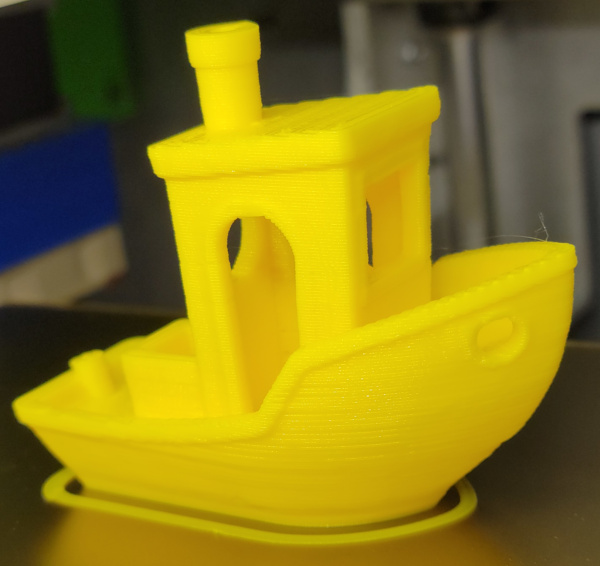
A pretty good looking benchy. If I get close I can find flaws, but not many. I think I'm pretty well dialed in now.
As long as I'm checking calibration, I should probably build a test for X and Y steps. I know what the max bed area is in the new configuration, so I can cut a card abput 10mm smaller than that (to leave 5mm on each side) and punch holes and such in it then scan it and turn it into an stl file. After printing, I can see how well the print matches the exact dimensions of the card. For Z steps, I can check how accurate the max travel of the dial indicator is.
Turns out this was a good exercise since I apparently screwed up the bed geometry info in the firmware. A couple of tries later and I may have it correctly printing on the bed instead of off the back or side. It also wrenched the cross bars out of alignment when trying to print into an immovable object, but I seem to have gotten them wrenched back :-).
It looks like X is good, but Y is moving slightly too far. Let's pick some positions off the scan of the original card and the printed copy and see how far off it is.
On the original card, the top hole center is at pixel 185 and the bottom hole is a 2846. So that is 2661 pixels between holes.
On the printed copy, the top hole is at 176, and the bottom hole center is at 2859, which is a separation of 2683.
So I should multiply Y steps/mm by 0.9918 to get the new value (unless I figured that exactly backwards).
The Y axis steps is currently 89.44, so I want to make it 88.71 (the X is currently set to 88.7, so it makes sense they should be closer to identical). Change that in the eeprom and in the Marlin source so it will automagically get the right value next time I update firmware.
Let's print the card again, hopefully for the last time. Here's the printed copy:

And here's the card on top of it with the holes lined up perfectly:

Looks like I finally have the geometry right in both cura and the firmware, and I can print accurate dimensions.
More calibration is calling me. This time a temperature tower:

There were a lot of complicated instructions about using fancy scripts to insert the temperature changes, but I found it simpler just to search for Z movement to expected level and insert the temp setting commands with emacs.
I cranked the fan back up to 100%, but still got the ends of overhangs curling up. I'm thinking the least curled overhang is at 190, so I'm trying a new vase with 190 and 100% fan to see if it still falls apart
New vase seems perfectly strong. Maybe something else was wrong with the first one I printed, but 190 seems like a perfectly fine print temperature and 100% fan seems fine as well.
References
The bridge test I printed is thing 9804.
The stringing test I printed is thing 2450004.
The nano test is thing 4777912.
3D Benchy is thing 763622.
The temperature tower is thing 2729076
Setting Changes
The settings I changed in the printer profile and PLA material profile to get these results (starting with the Cura default definition for 0.3mm fast print and generic PLA).
| Name | New Value | Original Value |
|---|---|---|
| Retraction Disance | 1.0 mm | 6.5 mm |
| Retraction Speed | 20.0 mm/sec | 25.0 mm/sec |
| Default Printing Temperature | 190 ℃ | 200 ℃ |
| Default Build Plate Temperature | 70 ℃ | 60 ℃ |
Go back to my main Solidoodle page.