Wheels
I am officially sick of draging the saw around, I must get wheels added. I've been thinking about how to do this for a while now, and believe I've come up with what may be the simplest possible solution, not as easy to use as some of the contraptions I've seen on the internet, but easy to build and when the wheels aren't in use the saw will sit on the original feet.
I did an approximate visualization in OpenSCAD and here is what it looks like with the wheels deployed:

(Very stylized casters, just the wheels and mounting plate :-).
Front, side, and back views. Three total pieces of wood, two door hinges, and two casters for one side of the saw. Mirror image on the other side. Note in the side view that the caster is about 1/4 inch below the existing legs. In real life it would be on the floor and the leg tilted up.
To deploy the wheels, the idea is to attach a bungee cord (I'm sure I can find a good place) that wants to pull out the bottom board with the wheels. Then lift up the side of the saw (which is much easier than dragging the whole saw) and the wheels should pop out.
Folding them back up to put the saw back on its feet simply requires the bungee cord be attached to pull on the other side, then lifting the saw will fold the feet up and you can set it on the floor.
Do the same operation for the other side to get both sides up or down.
As a bonus, I only need one bungee cord to move around to different places.
I need to make sure the hinges are far enough inside they don't run into the legs, and make sure the bottom board with the casters can swing freely without hitting the legs.
There are some existing holes in the legs, but they are too near the bottom of the leg to mount the top board, so I'll want to drill new holes for it.
The legs are (on average) at an 11.5 degree angle, so I'll need to rip an 11.5 degree wedge off several pieces. The casters I got are too wide to screw to the edge of a two by four, so the bottom piece is designed with an extra extension added.
I've added an 11.5 degree rip across the top support, which isn't necessary for the wheels, but will make an ideal place to put a shelf and add some storage for blades, the alignment jigs, the bungee cord, etc. (not to mention sawdust collection).
Trying to get one side done today, here's the front view of what I have so far:
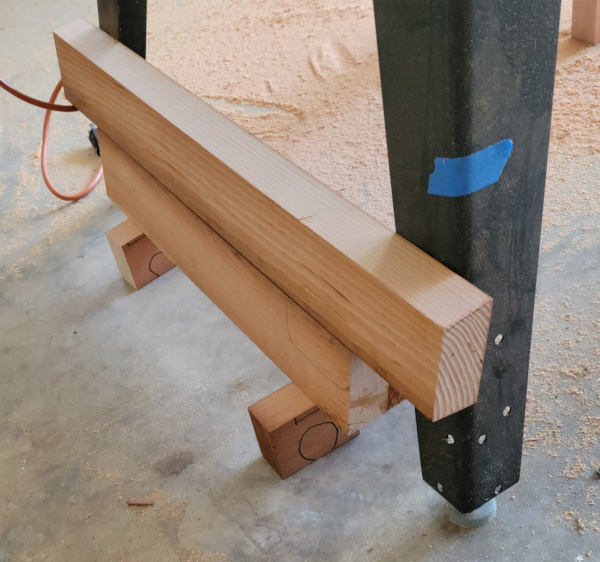
The blocks the gadget is sitting on are 1/4 inch shorter than the wheels, so when I add real wheels to the bottom, the feet should be 1/4 inch above the floor.
Here's the back view of the same thing:
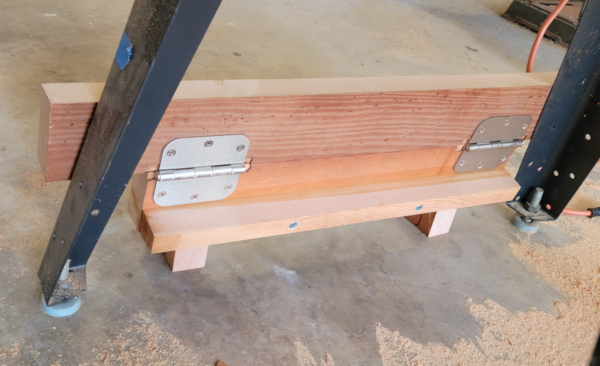
I've got the hinge attached with a shallow groove routed out on both boards under the hinge since the hinge itself isn't totally flat. I've also got an extension glued and screwed onto the bottom to provide enough width for the casters to be screwed in.
Turns out the top support is low enough so I can use one of the existing holes in the legs to mount it, hopefully one will be enough with it bolted down tight and some fender washers to distribute the load.
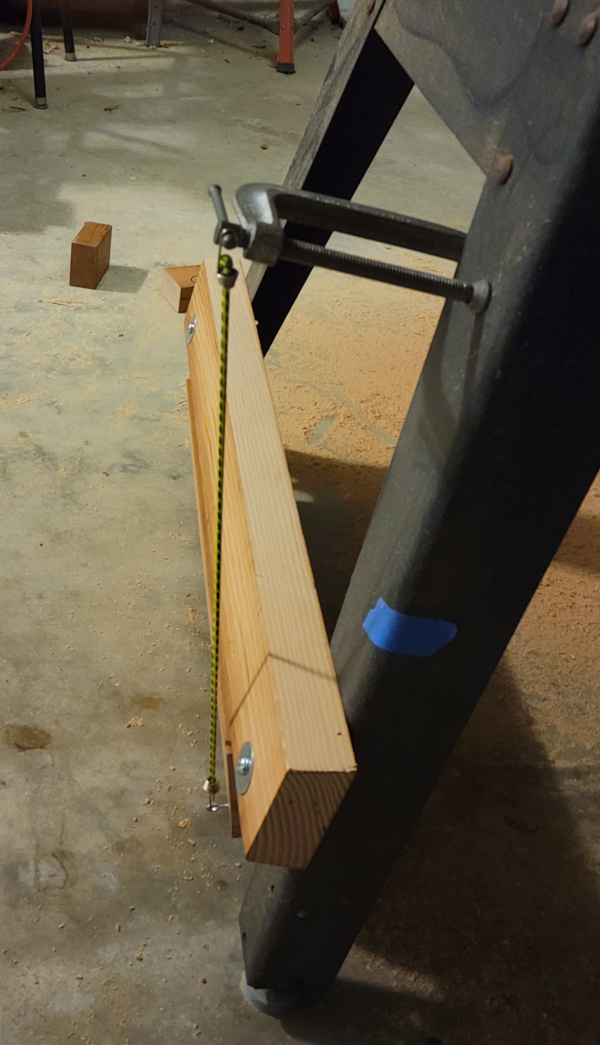
I did manage to get one side completed enough to test it. Here we have the front view with the legs folded under (and a handy C clamp as the temporary bungee anchor):
From the back, it is more obvious the casters are folded in:
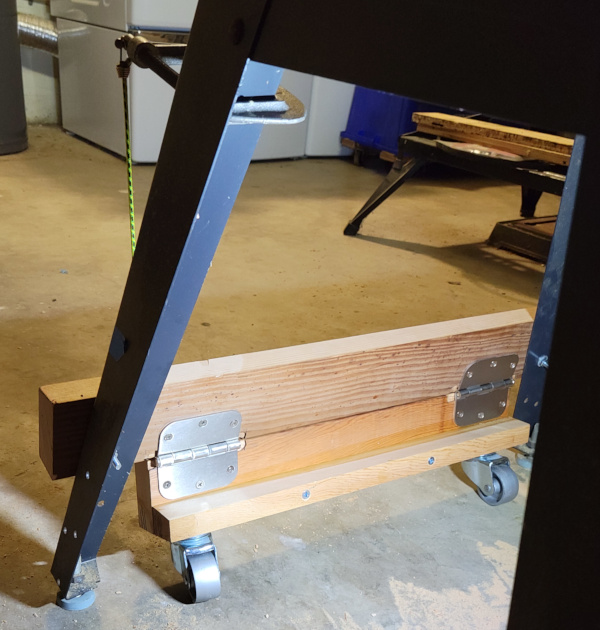
A couple of problems though. The bottom does indeed snap forward when I lift the side, so the bungee is working, but unless I rotate the casters around so they are as far forward as possible, the bottom folds back under when I set the saw down. This is fairly easy by just raising the bottom more and letting gravity rotate the casters.
A bigger problem is that the bottom also folds back under when I try to move the saw and the casters rotate around. I may need to invent a locking mechanism to hold the casters out after raising the saw. Here's an improvised lock with some clamps and a plywood scrap:
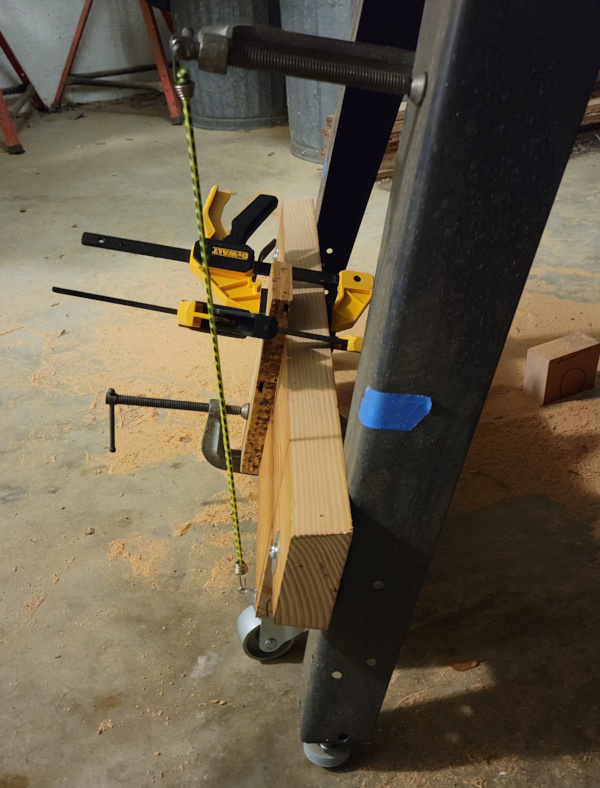
It is indeed much easier to move even with wheels on just one side. I should get the other side in place tomorrow and I'll see if the wheels stay deployed when I'm never tilting the saw up too much like a wheelbarrow or if I still need some kind of lock.
I guess this simplest possible mechanism is getting more compilcated :-).
Thinking about the lock (which I'll probably need), once I get the other side connected, then just a stick between both sides wedging them open would work fine as a lock.
Got the other side installed (easier since I just had to assemble the pieces I already cut). As expected, the wheels collapse if I try to roll it, so a scrap of plywood cut to just fit between the raised wheels serves as a lock. It seems to work well. Not as simple as I anticipated, but a heck of a lot simpler than dragging it around. Here you see it rolled back over to the side of my not remotely neat garage/workspace:
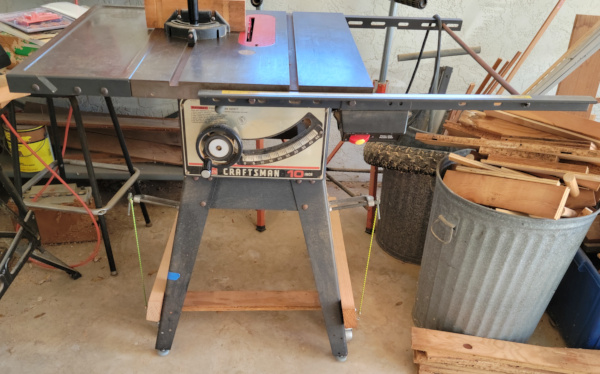
The bottom boards flex a bit when moving, but not enough to collapse. I suppose if I get carried away I could invent some sort of cam to really lock the board in tightly, but that's probably silly.
No doubt I'll want a better way to tension the bungees so I don't permanently tie up two clamps, but at least it is easy to lower the saw, since it pretty much tries to do that all by itself :-).
Someday I'll probably decide this is too much trouble and invent wheels 2.0, but until then, things are much easier than they were without the wheels.
If I do implement wheels 2.0, I'm tempted to use hydraulics to operate the wheels after watching this video :-).
See my other Craftsman 113 projects.