Enclosure
Most of the DIY enclosures I read about on the internet use IKEA LACK tables, which were cheap enough to seem like a good idea, so I got a couple of them:
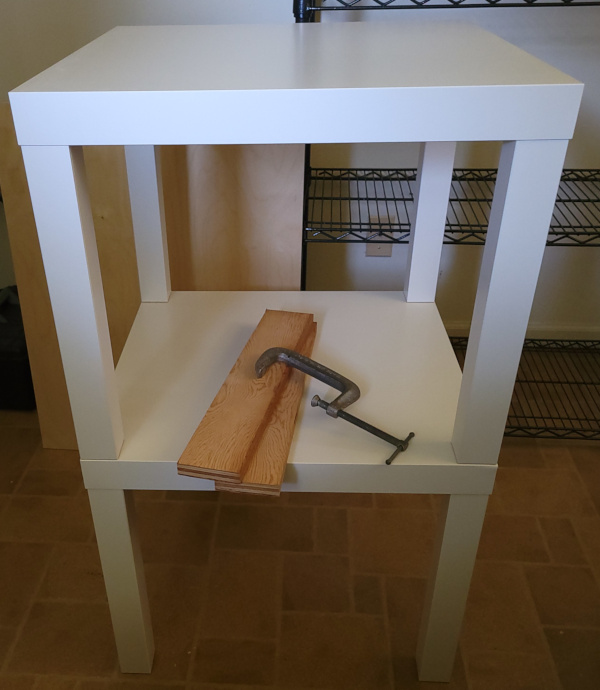
They were easy enough to assemble, just 4 double pointed screws that go into holes in the table top and legs which you then spend forever twisting around till you get solid contact. Only problem was developing a blister on my thumb :-(. I used the two pieces of plywood clamped to a leg to get enough leverage to make the final turn with an injured thumb :-). The moral of the story: Wear gloves next time I assemble one.
The plywood you can see in the back is destined to become a platform with casters the bottom table can sit on to make the printer (somewhat) mobile.
For the enclosure itself, foam core board like I used on the old solidoodle seems very appealing. Easy enough to make cuts and modify things if I need access for cables and such. Clear vinyl sheet for windows in the board should also work well. [Way more vinyl than I need, but who knows how many redesign iterations I might go through].
Probably even better than foamcore, I can 3D print right angle brackest to hold aluminum channel to make "doors" out of channel. Then strech vinyl out and use spray glue on the face of the aluminum and press it into the vinyl to make mostly clear but rigid frames.
For lighting, I have lots of 12V LED strip, but the power supply on the MK4 is 24V, so after comparing the price on 24V LED strips versus 24V to 12V buck converters, I ordered the buck converters.
I've cut the pieces for the platform:
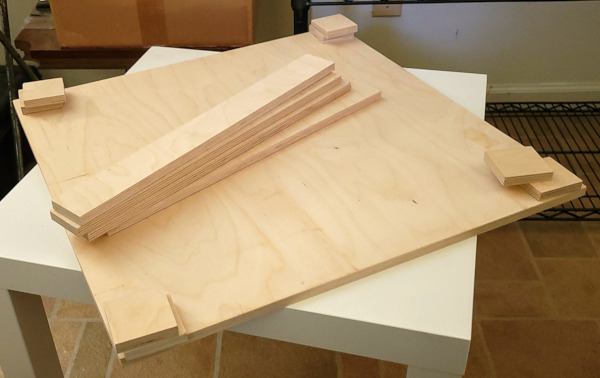
Used up almost all of a 2x4 foot sheet of 1/2 inch plywood to make these pieces.
There are 8 2¼ x 2¼ squares to be glued to the bottom to make pads thick enough for the casters to be screwed into.
There are 4 17½ by 2 strips that will form a lip on top of the platform, fitting between the legs.
The platform itself is 21⅝ x 21⅝.
All of the cut lines were simply inscribed on the plywood using the table itself as a guide. The height of the lip was detemined by how wide I could cut 4 strips out of the largest leftover piece after cutting the main platform. The size of the caster pads was determined by the width of the smaller leftover piece. All measurements were taken after the fact.
Now I need to print 4 of these custom brackets (about an hour each), one to go on the inside corner of each leg:

The model for this bracket is on printables.
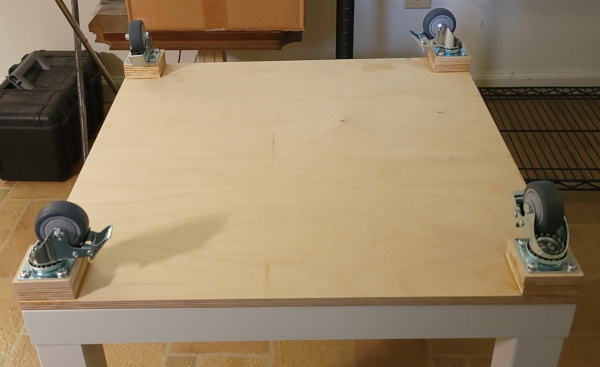
Bottom is now assembled after letting glue dry overnight. It rolls very nicely:
Here are the platform top pieces laid out. Just need to very carefully secure everything without any parts shifting on me :-).
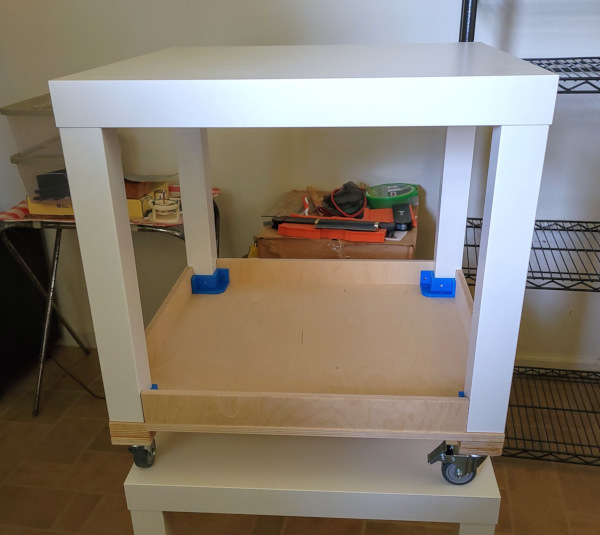
I managed to get it assembled with no major disasters, here's the finished product with the tables sitting on it:
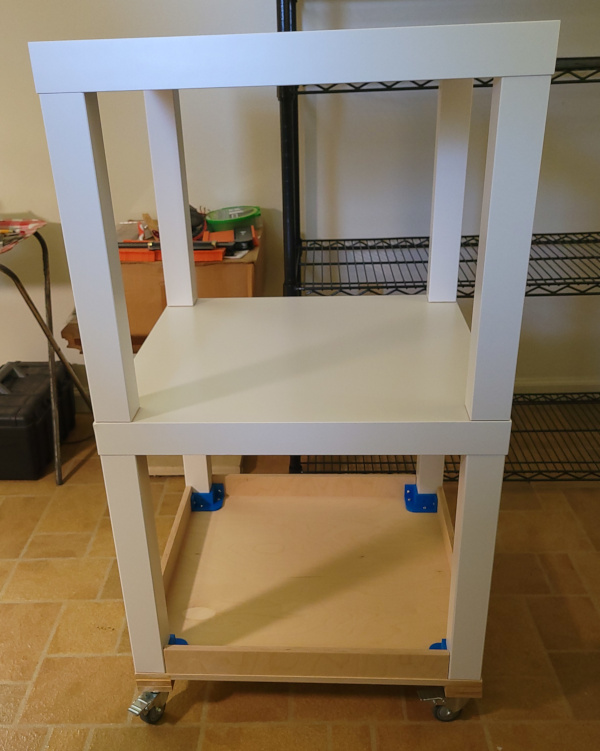
I've got screw holes in the brackets I can use to screw into the tables legs, but I haven't decided if I need to do that yet, so currently I can just lift the table off the platform.
I guess that's all I can do for now, exactly how I want to build the enclosure on top probably won't be clear till I finish building the printer and see how to access the control panel and power switch and get to the extruder for loading and unloading filament..