Prototype Fittings
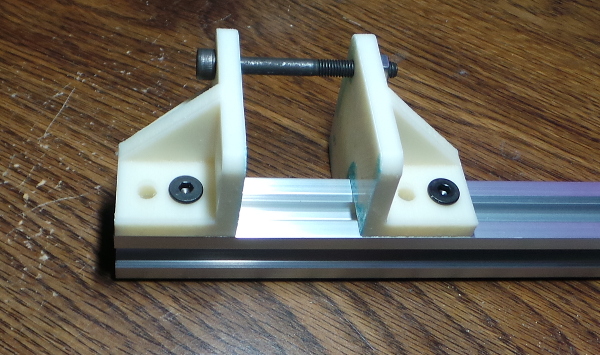
My stacked-idler-bracket part for holding an M5 bolt that will hold GT2 idler pulleys seems to work quite well with a test fit on the sample v-slot rail that arrived the the mail:
The nema17-bracket part needs more work. The recess where the M3 screw caps are supposed to fit isn't big enough, and there is more play in the t-nut mounting than I thought there would be, so I may want to add a 20mm wide channel to the back to fit over the v-slot:
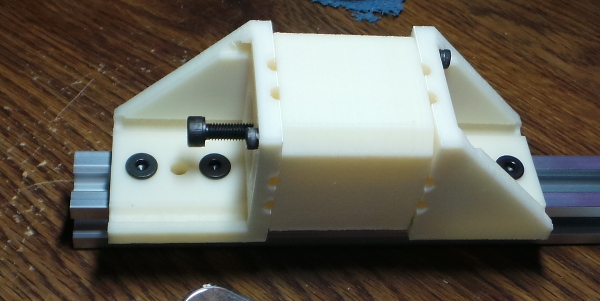
I've improved the nema17-bracket now, and also got my stepper motors in the mail. The stacked-idler-bracket above worked so well with wrapping the part around two sides of the rail that I decided to do the same for the nema17-bracket, and also fixed the hole sizes for the M3 screw caps:
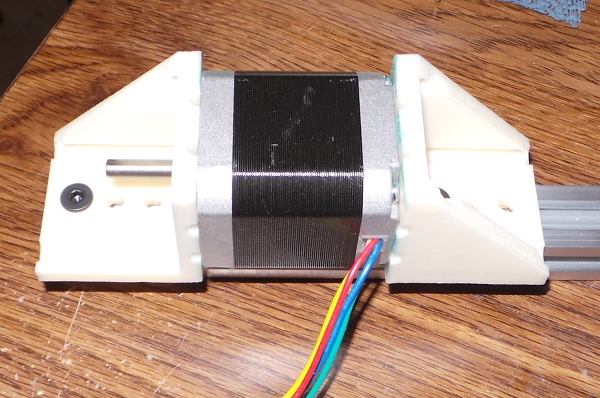
If I rotate it, you can see the part extension attached to the side of the rail:
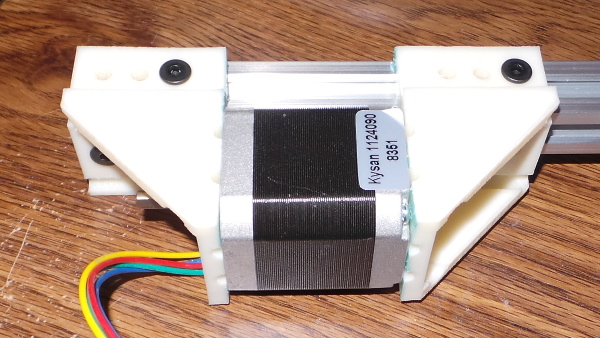
The bottom bracket is probably not necessary. There isn't any way to physically attach it, so all it is doing is taking a little weight off the top bracket by being shoved against the bottom.
And for fun, I used a whole collection of tools like libreoffice, and inkscape to generate the most important piece of all:
It prints in two pieces from the nameplate() and nameslide() modules in nameplate.scad file. That file also imports jiggit.scad and vslot20x20.scad (both generated by inkscape). A little glue to put the parts together, a little black spray paint, a little sanding of the face and metallic emerald paint on the letters, and I'm done :-).
A more useful item: The piece I'll print on the back of the X carriage to use for tensioning the belt. A slider the belt goes through runs in a form fitting slot so it can't twist. M3 screws can draw the slider tight, and a wedge clipped to the end of the belt keeps it from escaping back through the slot:
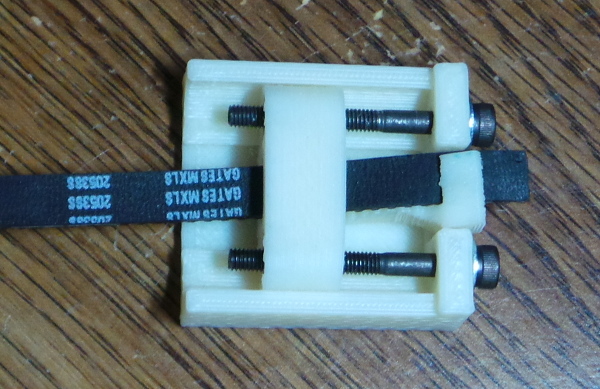
Some playing around will be necessary to make sure slot gets printed at the right height on the back of the carriage so it keeps the belt level as it wraps around the idler and into the carriage.
After doing some visualizations of the carriage, I decided a redesign was in order with smaller parts that could fit between the wheels:
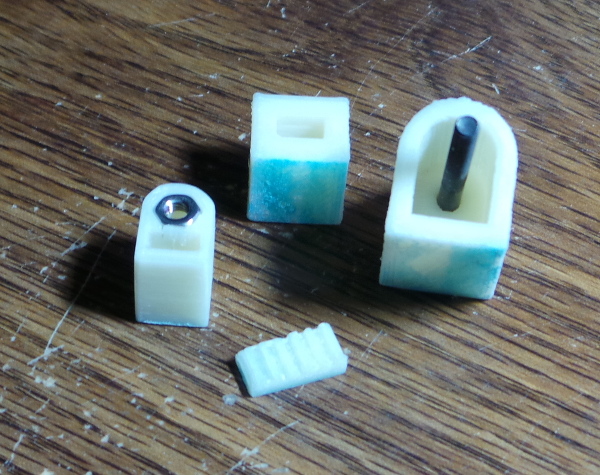
I've got blocks with wedges to hold the belt. One of the blocks is designed to print on the carriage as a fixed belt end, the other slides in a belt guide for adjusting tension.
Meanwhile, more detailed work on the carriages has led me to change the belt path to run just above the Y rail, so I'll need a new motor mount that centers the pully on the rail and holds the motor upside down so I can get the belt really close to the rail:
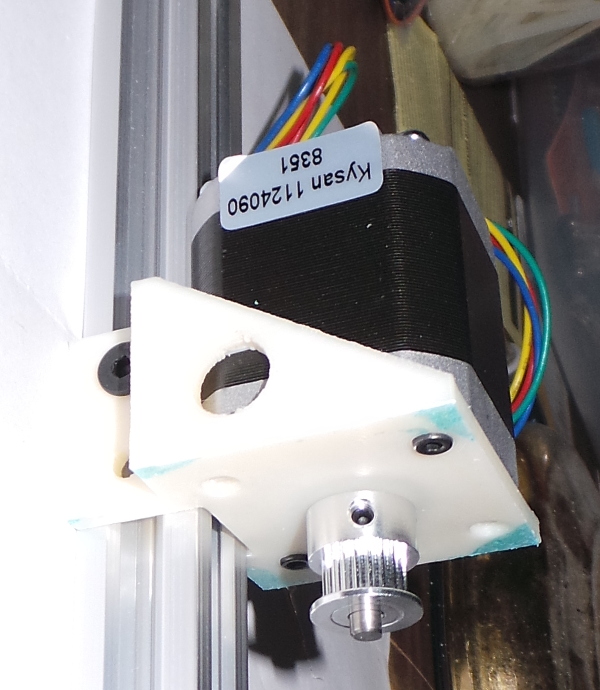
I can use this mount for both the X and Y motor, just placing them at a different height for the high and low belt.
For the other end of the printer, I need a way to stack two geared idler pulleys:
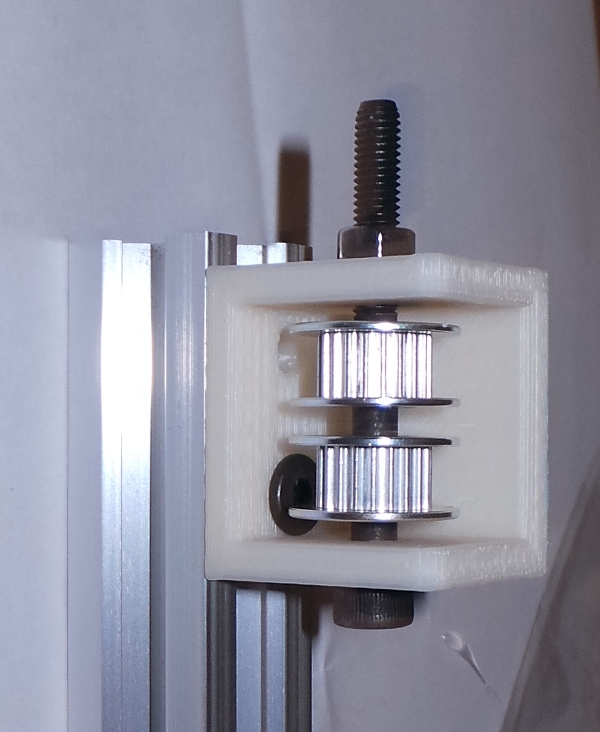
I managed to get 5mm holes drilled in some brass M3 washers, and they seems to work well as spacers for the stacked pulleys, so now that I know the actual dimensions of the belt layout, I've started printing the carriages. Up first the X carriage:
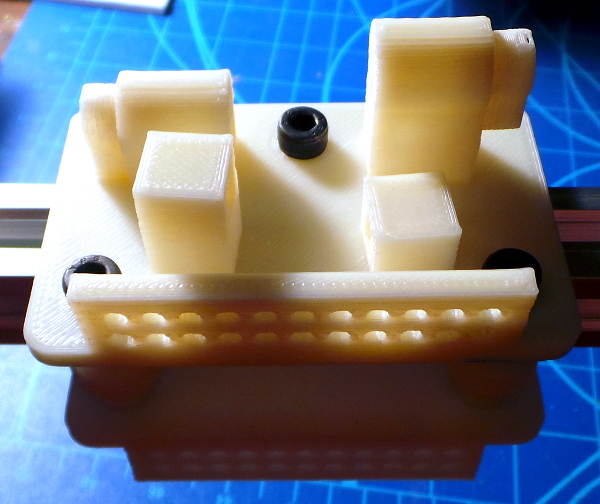
That shows the sliding blocks that will allow me to tighten the belts inserted in the carriage. It doesn't show the small wedges that will hold the belt in the slots (but I printed them as well). Here's a different angle showing how it fits on the V-slot (with dummy wheels and spacers and the wrong size bolts at the moment).
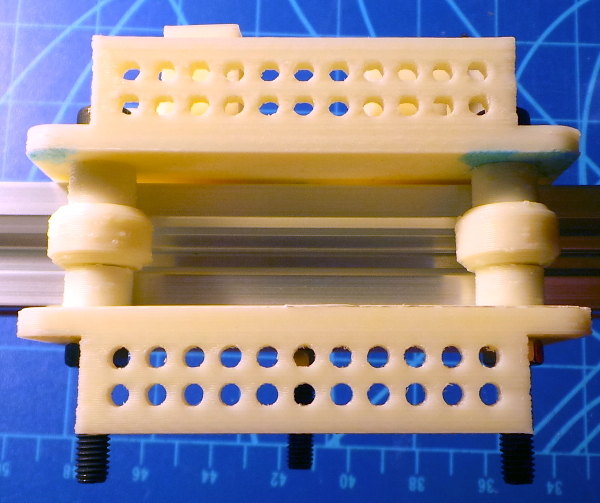
I've got an order for some real parts on the way, so soon I'll be able to make a proper test of how well it fits.
Meanwhile, I've printed all the right hand Y carriage parts:
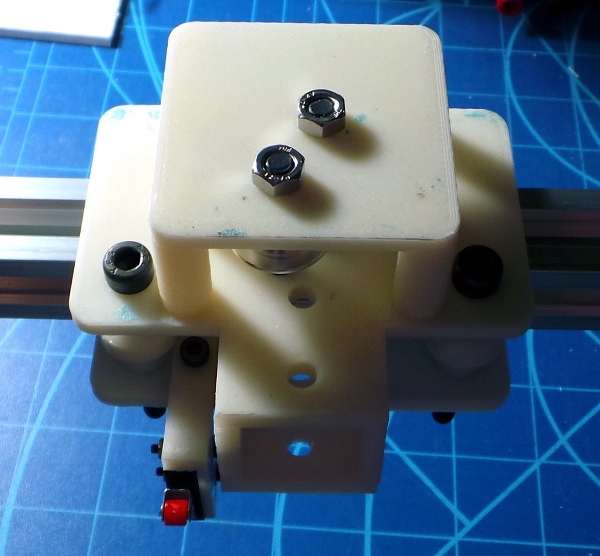
You can see how the top and bottom halves go together to form a 20mm square opening where the X rail will be mounted. And in this angle you can see the way the idler pulleys fit under the cap and above the carriage.
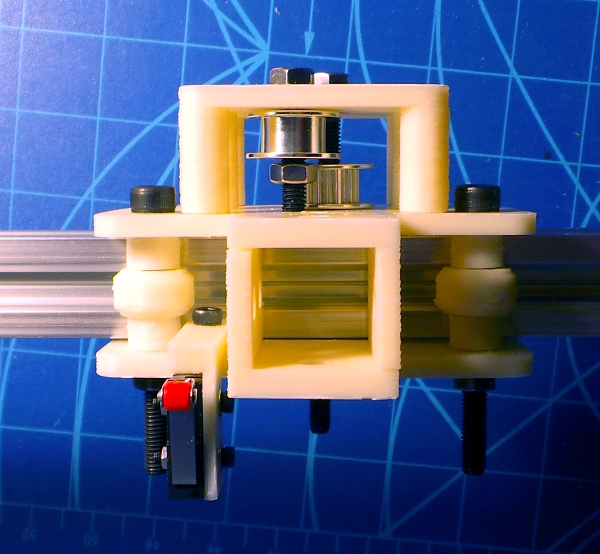
You can also see how the microswitch mounts to the carriage to detect when the X carriage reaches home.
I've added a mount for the E3D on the X carriage now, and printed a copy of the left X carriage (mostly a mirror of the right Y carriage). I took a family portrait this time:

I also included the extruder I made a while back in this picture.
Hot dog! My batch of openbuilds parts arrived, and I can put some real wheels on one of the carriages and see how sturdy it seems:
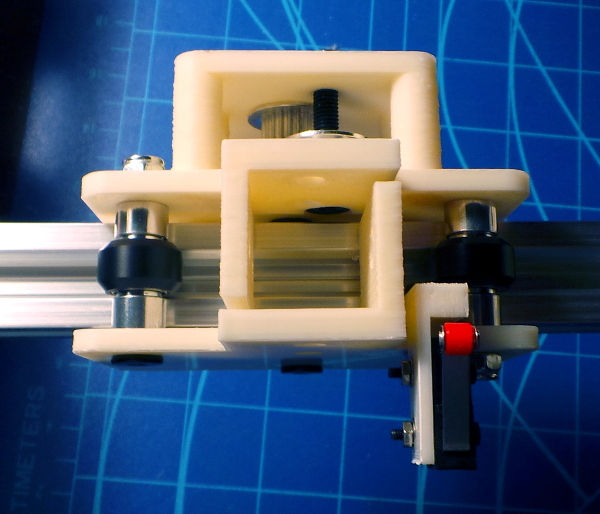
The wheels and v-slot work really well. I can try to twist the carriage in any direction and it is rock solid, no movement, but if I slide it along the rail it moves very smoothly with no resistance.
Unfortunately, my prototyping with dummy parts failed to take into account the extra space used by the "precision shims" you need to place on either side of the wheel, so all my dimensions for spacing between the top and bottom of the carriage is off (you can see gaps between the parts that are supposed to fit snug around the X rail in this picture). I'll need to adjust my openscad and reprint lots of stuff (oh well :-).
I've also discovered it would be convenient to punch some holes here and there to allow me to get a hex driver into the top of the bolts, so I may do a few design mods for that as well (on second thought, I just turned the bolts upside down so I didn't need the extra holes).
I've now reprinted the Y carriages and the hot end mount (which all depended on the separation of the plates). I've installed official wheels and spacers on everything and taken a new and improved family portrait:

While I was working on the E3D mount, I moved it out a bit to make room for the cooling fins and raised it up, so the hot end doesn't stick down so far, and the print bed doesn't have to be as low.
I need to finish my openscad layout of the entire printer to verify how I think things will fit together and how long I need to make all the rails before I cut any rails and start building, but most of the printed parts are finished now.