Work Table Light
The 3D printed parts for this are on printables at Parts for work table LocLine lighting.
Inspired by Adam Savage's workbench lamp I'm building a LocLine based lamp to go on my Folding Workbench.
First item is tackling the base to attach the LocLine, for my version, that's where 3D printing comes in. I extracted the 3/4 inch line element from this collection on thingiverse. Some test prints showed me I needed to scale to 99% to print an element I could push into the LocLine after a bit of sanding.
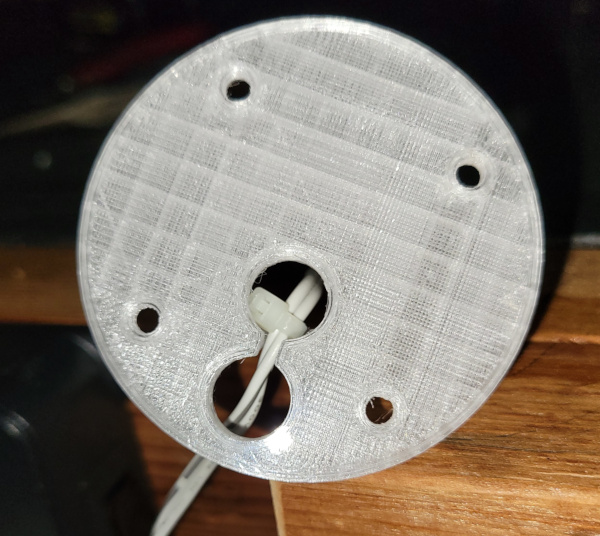
I imported the 3-4_Element.stl into OpenSCAD and added a larger flat cylinder around the base where I put screw holes and holes to run the power cable (I found a 12V 2A power brick in my giant collection of old wall warts with a nice long cable and it seems to work well, so I made the holes to feed the cable big enough for the 12V plug on the cable to fit through).
Here you see from the top how the plug threads through the printed base:
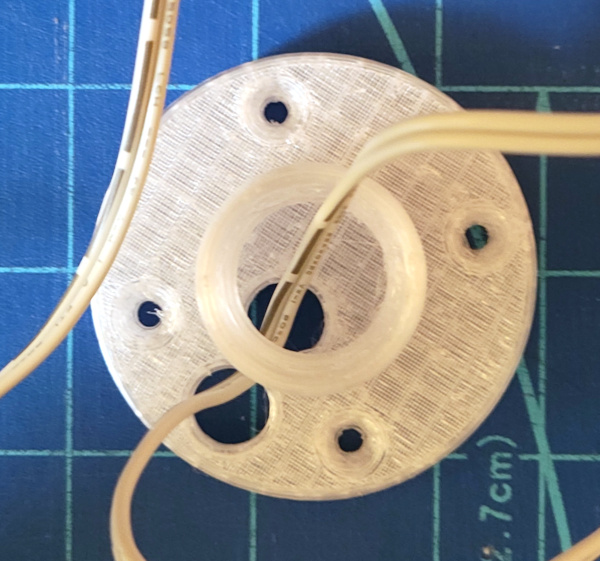
I happened to have some #6 wood screws, so the screw holes are shaped to fit them.
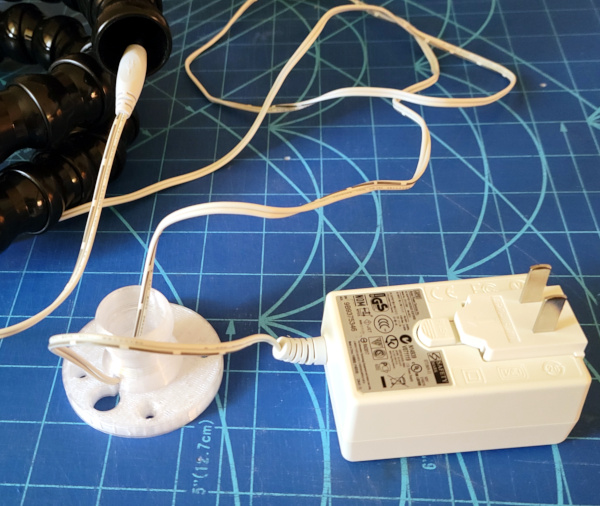
Here is the transformer, the base, and a peek at the LocLine:
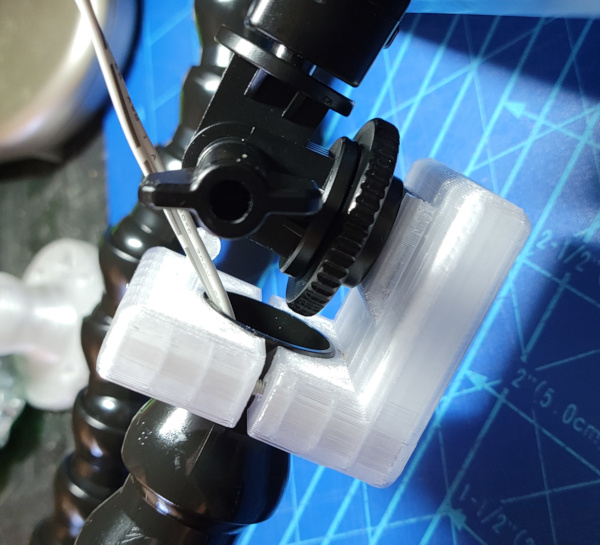
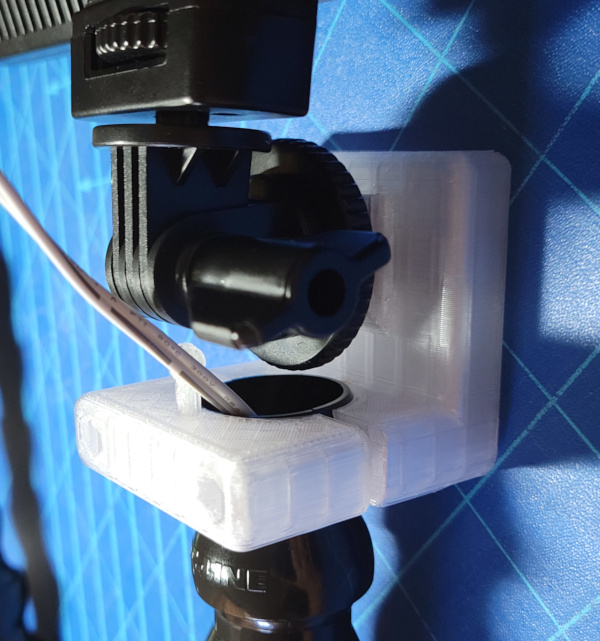
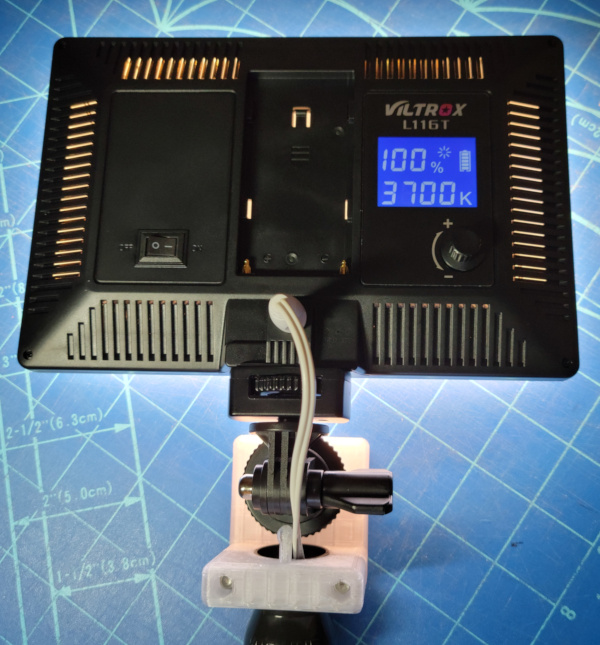
The top print at the other end of the LocLine is in two pieces and clamps around the LocLine with a couple of 30mm M3 bolts and some nylock nuts in a 3D printed nut trap. The lamp connector has a square on the end that slides into slots on the printed part (maybe that's called a shoe?), then a 3/4 inch 1/4-20 flat head bolt screws in from the front and the knob on the lamp screws down from the back. There is also a short post to be used for a wire tie for strain relief. Here are a few views of the assembled top:

Just to verify, it does work:
After figuring out I have a reasonable amount of space to run bolts through the holes on the short side of the table, I printed spacers to hold the bolts I'll use in the center of the existing holes in the workbench:
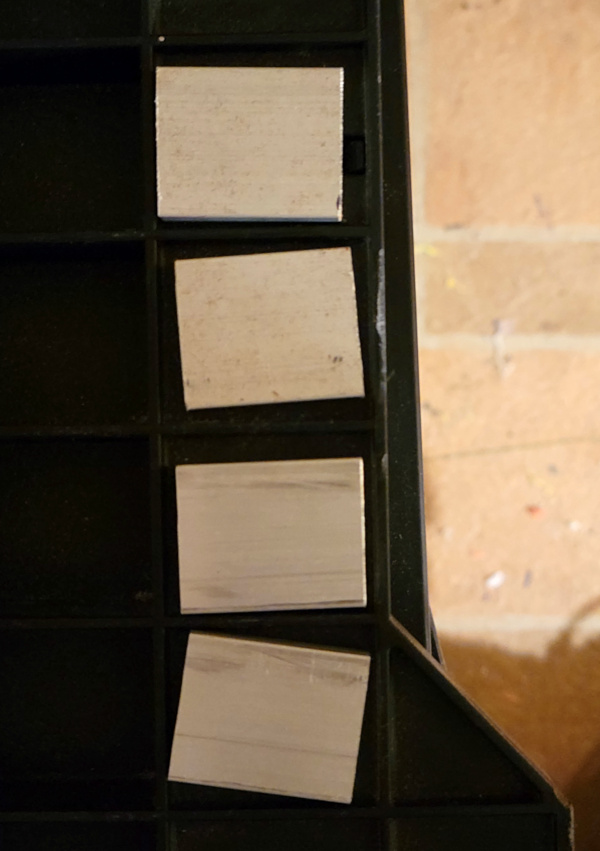
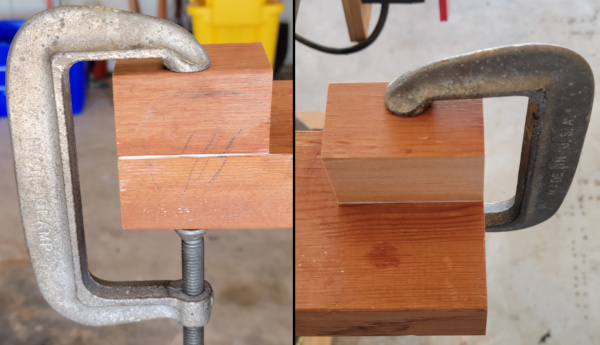
I'll need a "nut" on the end of the bolt large enough to span the hole, so I've cut 4 pieces of 1" by 1/4" aluminum bar stock 1 1/4" long. I plan to tap 1/4-20 threads in them, but only after I determine exactly where the holes should go. I plan to clamp a stick on the back of the bench I can run the aluminum along, then use a 1/4" drill bit in the spacer to scribe the correct line on the aluminum where the hole should go (must be offset from center to allow the aluminum to fit under the table top). Here are the aluminum pieces before drilling:
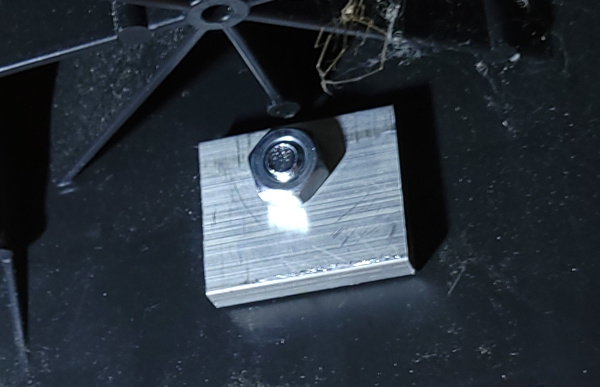
Got one piece scribed, looks like 8.7mm down from the top is the line I want to use to drill the hole. Need to layout all four and center punch the dril point, then drill 13/64" holes for tapping. Completed one piece to test everything before making the rest, seems to work fine:

Here's the "nut" on the inside of the work table.
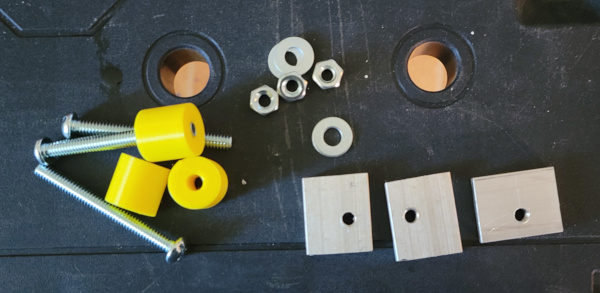
If I sink the screw heads into the 2x4 enough, I can leave enough thread sticking out of the aluminum to allow screwing down a normal nut to lock the bolt so it won't work loose. I'll be able to measure how deep using the bolts test fit to the side. Looks like the washers are sitting 26mm out from the edge of the table so I need to drill the holes 12mm deep with a 3/4" Forstner bit to make enough room for a washer. I measured the center to center distance between the holes as exactly 100mm, and the top of table to center of hole is 40.5mm, so that should allow me to layout the hole drilling positions. I'll probably make the bolt holes 5/16" to allow for slop in all these measurments (and the hole drilling :-).
I got the other three aluminum blocks drilled and threaded and all the parts ready to go:
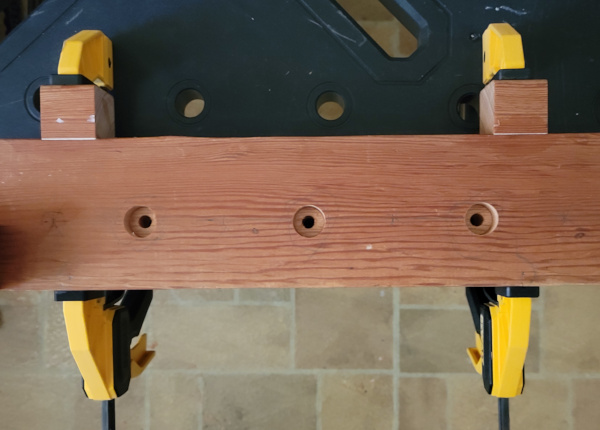
Seems to have worked. Measure lots and drill once was the way to do it. The board has been mounted successfully:

The table still folds up properly with nothing blocking any part of the mechanism. Once folded, it is easier to get light on the inside:

Banging on the LocLine as well as the armature wire with a rubber mallet got them both relatively straight. A 42" length of the LocLine seems to be sufficient to reach anywhere on the table, so I (with much difficulty) separated the extra LocLine. Both the armature wire and the cord have no problem being dropped through, so assembly should be easy. I have a lot of slack available in the cord, so there should be no problem positioning the power strip.
I'll want to smooth the rough ends of the armature wire so it won't stab the power cord.
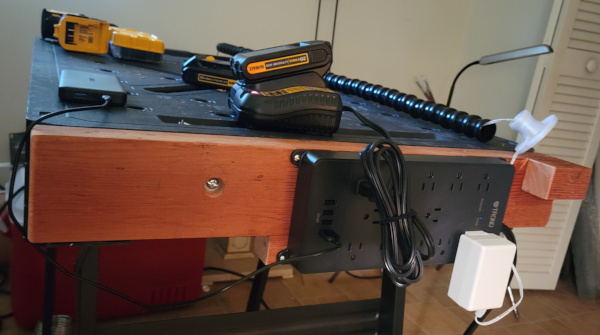
The power strip I (finally) found to attach to the workbench has all the attributes I've been searching for. Sockets oriented in different directions for wall warts of different orientations plus mounting tabs sticking out so you can solidily screw it down from the front. TROND 13-Outlet Power Strip. It is wider than a 2x4, so I may have to glue on some extensions to attach all 4 screws (it does come with small mounting screws).
I've started adding the extension bits to the board. First the piece I need to screw the lamp base down:
Once the glue dries, I can add a screw to make sure it stays there. Meanwhile, I can cut some bits of 2x2 to add on for attaching the power strip:
Glue dried, screws added, board mounted on table, power strip mounted on board, testing power strip by charging a few things (seems to work):
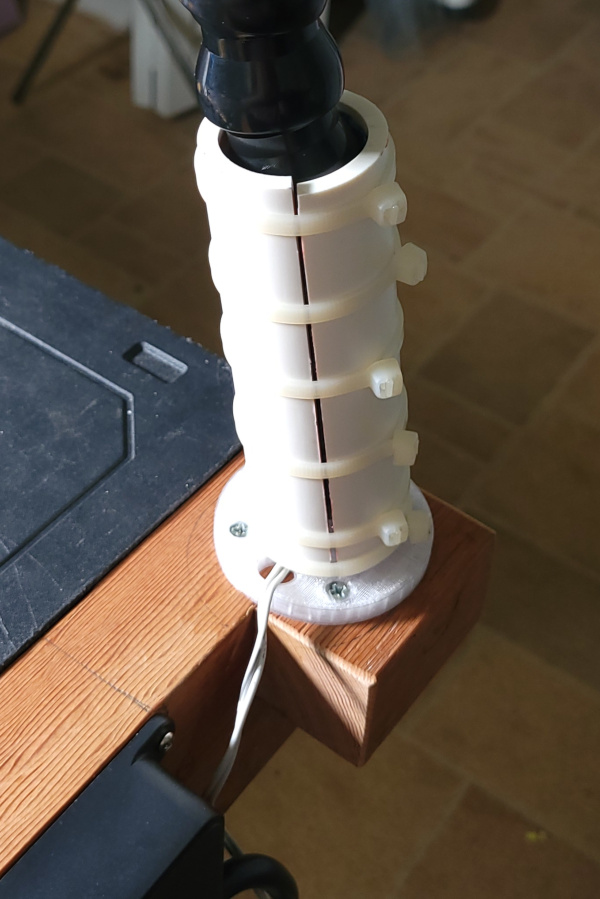
Before screwing down the base, add a zip tie for strain relief so dropping the transformer won't yank the cord out of the LocLine:
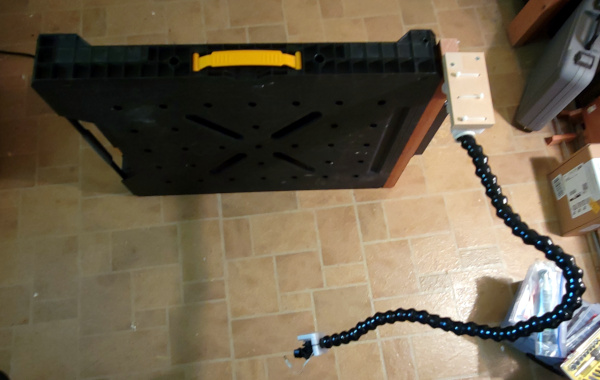
Here is the base screwed down and the armature wire and rod ready to be assembled:

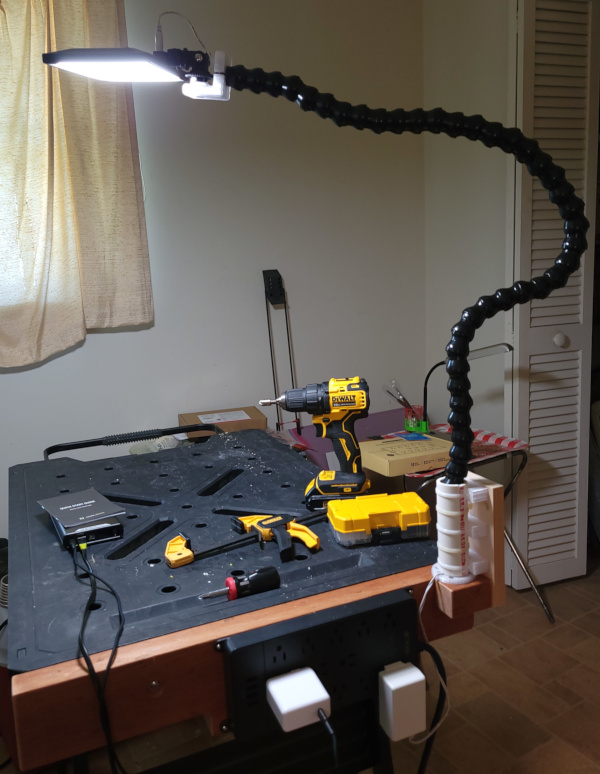
It is all together and working now (the only thing in the room that is neat at the moment is the table):

I pushed excess wire down into the top of the LocLine and used the post and a zip tie at the top for strain relief. Just enough wire is left out to easily plug the connector into the lamp:

One problem though: The base isn't as tight as I'd hoped it would be:

This thing needs a "splint" to hold the first few inches straight. Turns out 1 1/4" PVC pipe is only a tad bigger on the inside than the LocLine, so the simplest splint is probably made from PVC. Found a hint on the internet about cutting PVC lengthwise using hot glue to secure the pipe against a 2x4:

By golly, it worked! Two nice pieces of PVC split lengthwise:
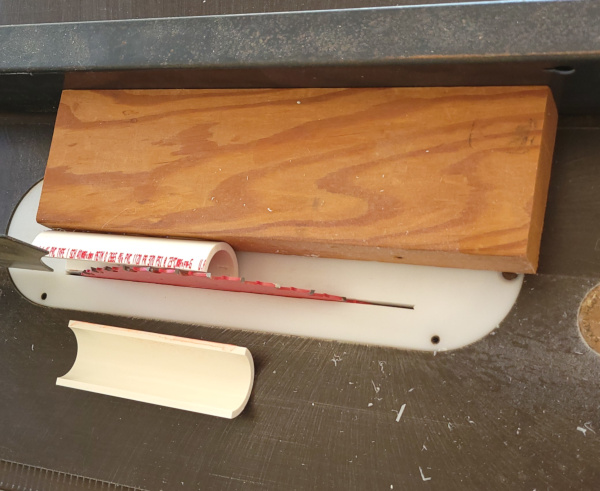
The same internet hint said that cheap hair spray would help make it easier to pry the hot glue off, and that worked as well (fortunately had some from use on a 3D printer build plate), so now I have the splint attached:
It is better, but still a bit wobbly, maybe if I add some vertical pieces of wood, and tie the splint to them? I'll think for a bit...
Experimenting with a clamp and some wood scraps, the key seems to be to keep the splint from being able to rotate. If I drill some holes in the splint and 3D print some blocks to go between the splint and the board I add, I can put posts on the 3D printed parts to go in the holes and prevent rotation once everything is tied together.
Designed the parts to support the splint against yet another board:
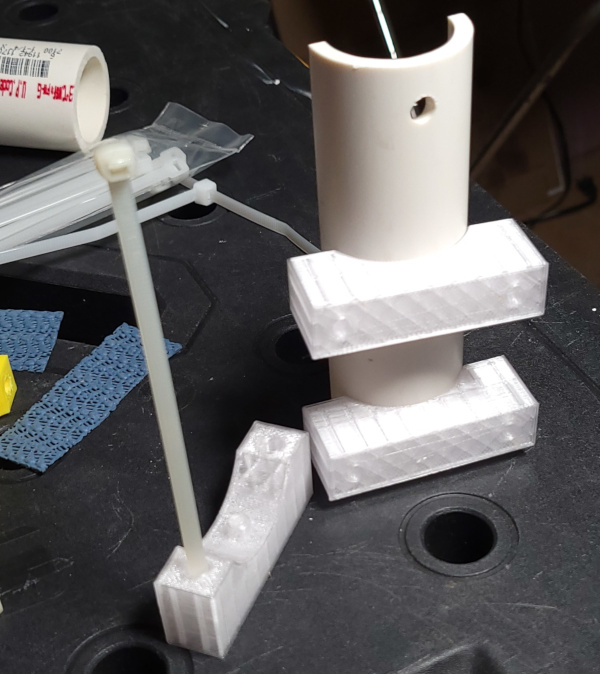
The rounded cut out matches the outer diameter of the PVC pipe, and a post is printed in the middle of it to fit in the holes I drilled in the PVC. Also has holes for wrapping a wire tie around the splint and through the board (which will get matching holes drilled). Here's the way it fits:
I'm also adding pieces of the non-slip rubber-like fabric inside the splint to encourage the LocLine not to rotate.
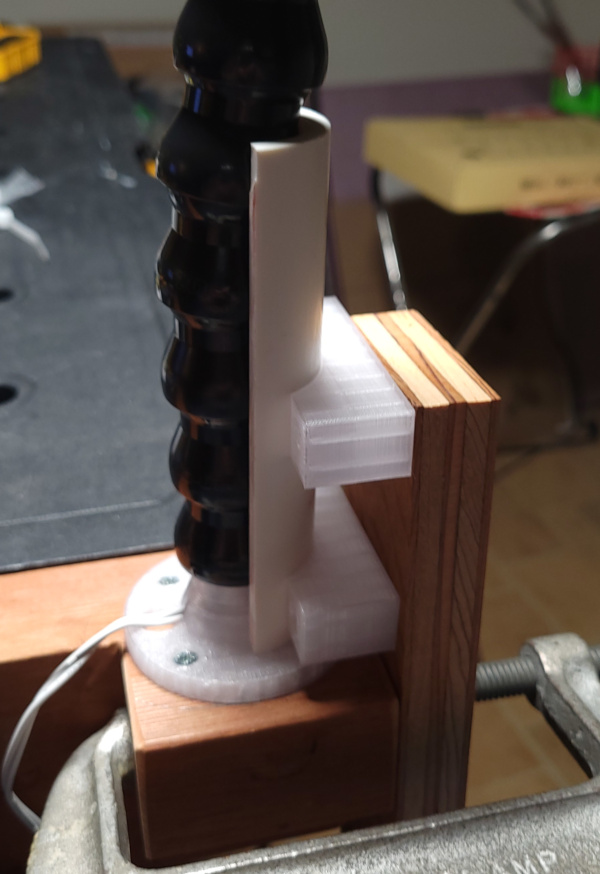
I've now got a nice piece of plywood with holes for the wire ties screwed and glued to the end to support the splint:

On the other side you can see wire ties around the splint halves as well as the longer wire ties securing the splint against the plywood:

It works much better now, with far less trouble positioning the light where I want it:
I think I can finally call this done.
P.S. It still folds, but isn't quite balanced the same way as before :-). I took the lamp off just in case something drastic happened (but nothing did, it would probably be OK to leave it while folding it up):
| Parts used in project |
|---|
| DeWalt Express Folding Workbench |
| VILTROX LED Light Panel |
| 5 foot 3/4" LocLine |
| TROND 13-Outlet Power Strip |
| 1/4" aluminum armature wire |
| One 12V 2A spare wall wart |
| Two 30mm M3 socket head bolts |
| Two M3 nylock nuts |
| One 3/4" 1/4-20 flat head machine screw |
| 4 round head 2 1/2" long 1/4-20 machine screws |
| 4 1/4-20 washers |
| 4 1/4-20 nuts |
| 4 1 1/4" long pieces of 1" by 1/4" aluminum bar stock |
| 1 23 1/2" length of 2x4 |
| 4 1" #6 flat head wood screws |
| 2 small zip ties for strain relief |
| Three extra bits of wood and wood screws |
| Short piece of aluminum rod for stiffness |
| Grip Liner non-slip material |
| 1 1/4" PVC pipe |
| Lots of long wire ties |
| Plywood piece for splint support |
| A couple of short wood screws to secure the plywood |