Ridgid Vac Handle
I've uploaded all the 3D printed parts to thingiverse at Ridgid Vac Handle.
Now the saga of the vac improvements:
Moving my Ridgid Wet/Dry vac (model WD12701) from point A to point B is a large pain in the patoot. If I try to shove it with my foot, it darts off in some random direction running into whatever it thinks would be most inconvenient. But to actually guide it I have to walk hunched over like Charles Laughton :-).
I figured I ought to be able to fix this annoyance with my 3D printer, and thus was born my vac handle. The vac has 4 holders for accessories on each of the 4 casters, so my idea is to print pieces that look like accessories on the bottom and holders on the top so I can pop them in place of the accessories and just move the accessories up a few inches. Meanwhile I'll also print a holder for a piece of 3/4" PVC pipe sticking out the side, and if I print two of them, I'll be able to add a handle across two of the casters and make the dadgum thing steerable without hunching over.
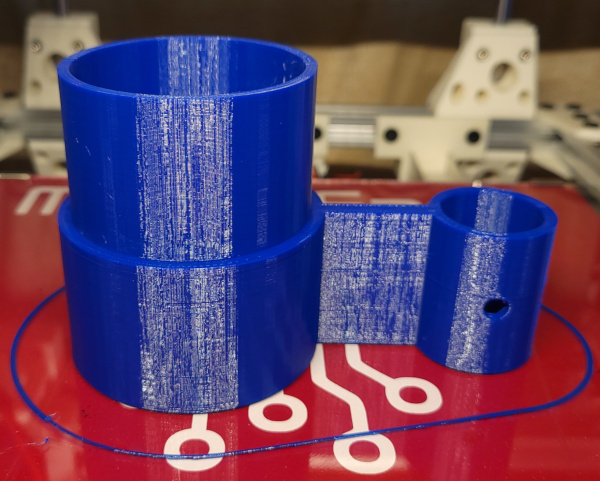
Here's the first piece successfully printed (only took about 5 hours):
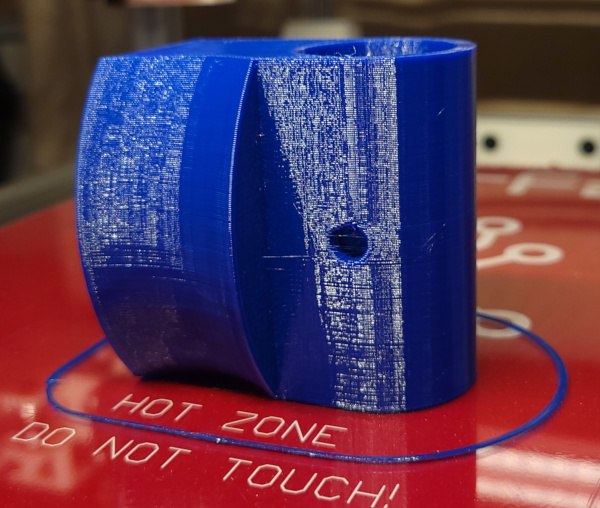
Here's the view of the bottom of the print:

And here's how it goes on the vacuum and holds the original accessory it replaces:

As long as I'm making it easier to move, I might as well fix the annoyance of needing to painfully wrap the cord around the top then unwrap it later. I'll put a crossbar up the handle, and add a hook on it so I can just loop the cord up and hang it from the hook.
I'll put the handle together with PVC pipe fittings and glue, and bolt it to the printed pieces on the vacuum. I'll make it the right height for me so I'll finally be able to push the vacuum around while walking erect.
Sigh. My new printer, Jiggit, decided to flake out (I have a part on order), so I printed the 2nd accessory adapter on my old solidoodle. It has a few layer separation issues, but hopefully will last long enough for me to get the handle built and fitted, then I can print a new piece in PETG when I get Jiggit fixed (maybe hold off gluing anything till then).
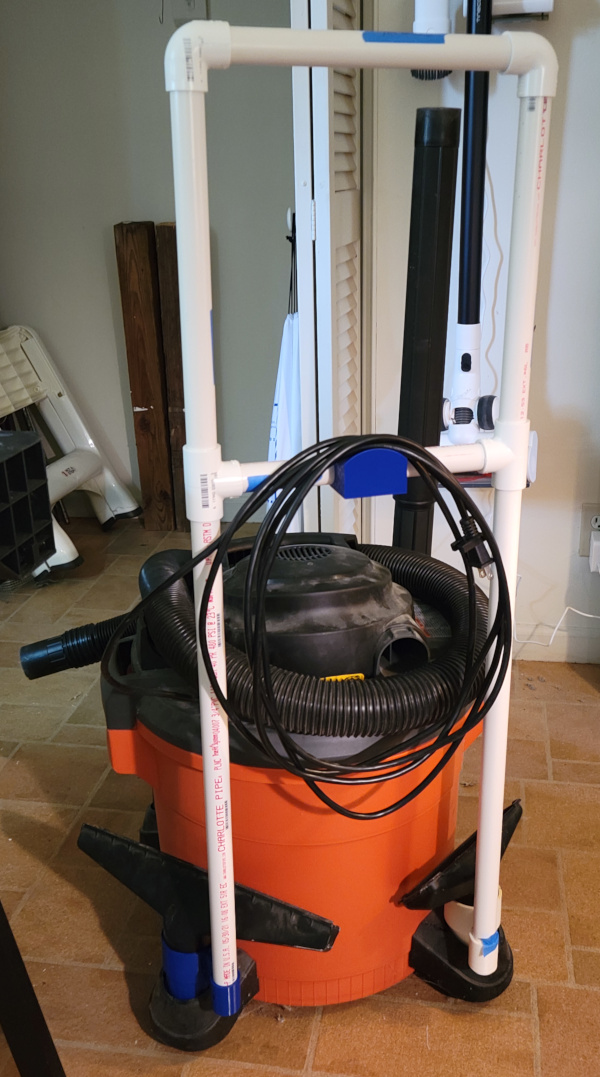
Here's a full scale test fit with all the PVC pipes cut (but nothing glued or bolted yet):
Here's the hook I printed (just before printer died) for holding the cord:
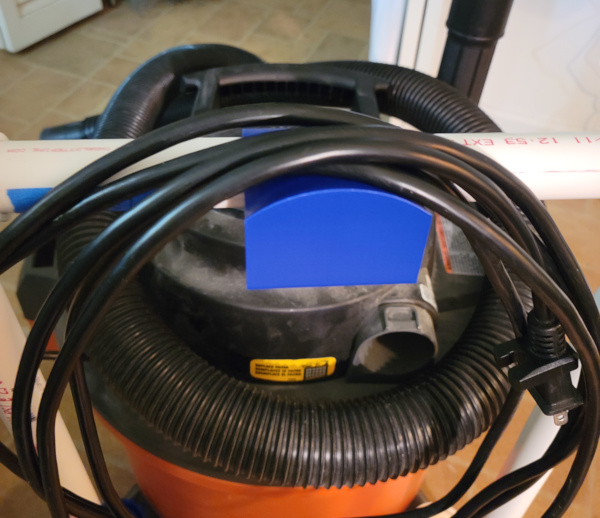
And here's the cord hung on the hook mounted on the crossbar.
It works as it is, but it would be a lot more solid if I made some additional pieces to slide up over the bottom vertical pipes to hook under the lip of the canister and hold the handle much more solidly so I can push it around without any flexing. I'll work on those when I get the printer working again (and I also need to replace the fragile ABS adapter I printed on the solidoodle with a superior PETG one.)
I should also think about some hooks for draping the hose on the handle. That might be yet another way to reduce annoyance.
For anyone interested in the precise dimensions of the pipes I cut, here's a table:
| 3/4 inch PVC | |
|---|---|
| 2 Cross bars | 10 9/16 inches |
| 2 Bottom Verticals | 24 1/16 inches |
| 2 Top Verticals | 12 3/8 inches |
Got new heater cartridge installed in Jiggit's E3D and it seems to be successfully printing a new adapter, so I'm on the road to finally getting all the parts printed.
While printing new parts, I should also redesign the cord hook. If my goal is to make the vac less irritating, I don't want a hook where the cord falls off easily. An extra extension on the outside of the hook should be good.
I have designed, but not printed, the support to go under the lip of the canister and out to the handle, so I guess printing one of those should happen soon as well.
I've now printed the support (twice, the second time with the right dimensions :-). Here's what the correct version looks like:

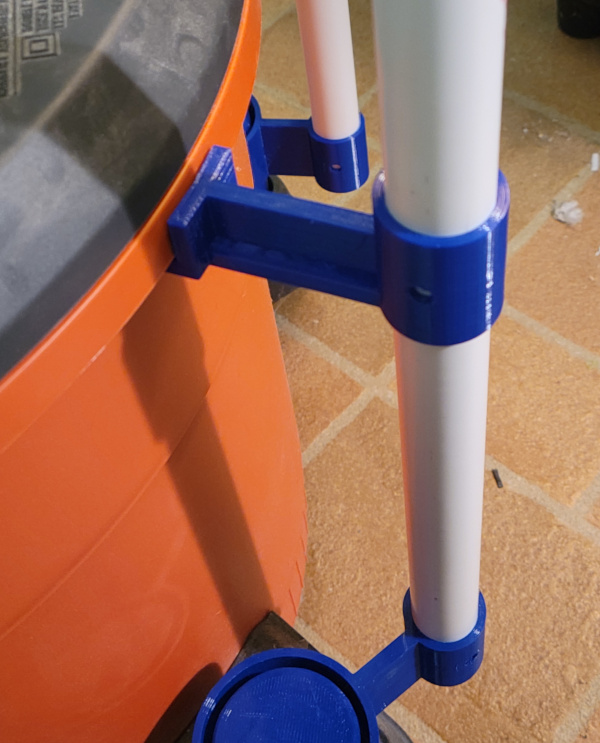
And here it is on the vac - much stiffer handle with better control now:
Next, I printed the redesigned cord hook with an extra lip so the cord won't fall off so easily:

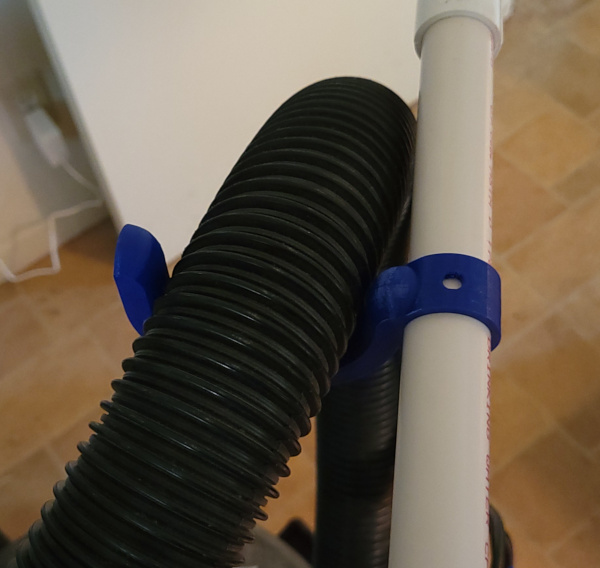
I've now printed a hook where I can hang the vacuum hose:

Here it is mounted on the top of the handle:
(Odds are good that another hose hook would work fine for the power cord, but I designed the power cord hook first so I didn't think about it soon enough.)
Here's the nearly finished complete assembly:

I want to add another hose hook on the side to make sure the hose end doesn't flop around, and then it will be ready for glue and bolts.
After that? Perhaps the Olympic Wet/Dry vac slalom :-).
Side hook for hose, glue and bolts have been added. This project is complete:

The bolts I used were 1/4-20 1 1/2" long, which stick out the other side of the printed piece just enough to hold a nut.
The only thing I can imagine to add might be a big UPS to turn it into a battery powered vac, but that doesn't seem very feasible :-).
First thing I vacuumed up was all the PVC pipe swarf from drilling the bolt holes. It really was lots easier to fool with the hose and the cord in the new arrangement, not to mention being able to move it where I want it to go instead of where it decides to go.
Amazingly, no modifications to the vacuum itself were required for any of this. All the parts fit on existing structures on the vacuum, no holes drilled or glue applied anywhere.
...but months later, that may change. I broke the pieces that hook under the lip on the top because as the vacuum filled up and got heavier, it put too much strain on those parts when I tried to tip the vacuum to go up or down a step. Have to think about an improvement there (and empty the bag).
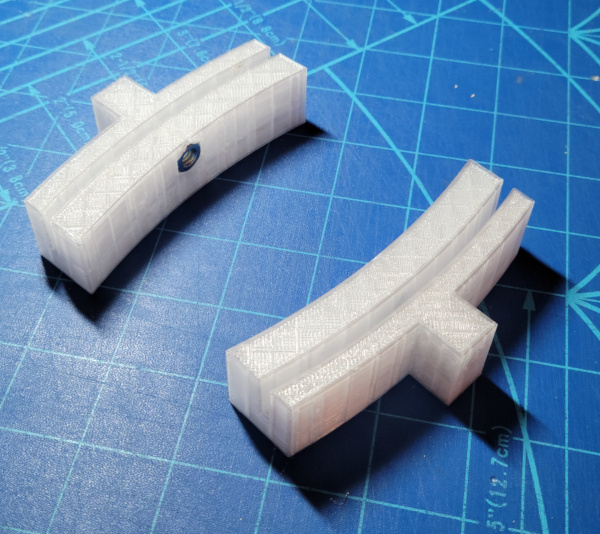
My new support does require a modification to the vacuum involving drilling holes (or cutting notches) in the outer canister lip so long 1/4-20 bolts can be used (much stronger than plastic prints). Here are the new support pieces printed:
This is what they look like installed with new holes for the long bolts drilled in the PVC pipe:
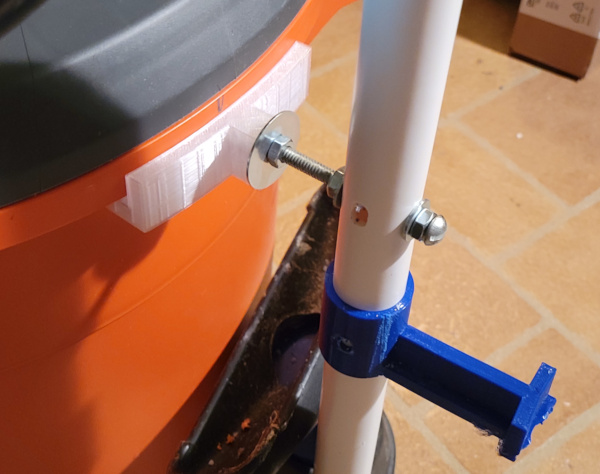
Time will tell if these are more robust (but since I emptied the bag, the new bag will take a while to get heavy again). It definitely seems more solid now with the slight wiggle in the handle gone.
Maybe I'll cut off the old supports someday (or use them to hang something). For now they don't hurt anything.