Z-Stop with Nut Trap
This is on thingiverse as thing 506638 (Solidoodle Z-Stop with Nut Trap).
NOTE: I updated the thingiverse files with a v2 version that provides thicker walls and more support because the old one could twist a little when trying to move the screw after the locktite set. As a result the nut popped out on my original. I also switched to locktite gel superglue to hold the nut in place and did a little sanding on the nut and the nuttrap to rough up the surfaces for a better grip. Hopefully v2 will work better.
I did have to sand down the side of the bar holding the nut a little because the thicker wall scraped the print carriage a bit.
The plastic threads in the Solidoodle Ext. Z-Stop Screw I used for a long time didn't want to hold the Z stop screw very tightly. Some Locktite Blue was called for, but the instructions on it say to avoid using it with plastic, so I built a new version of the Z-Stop using openscad and added an M3 nut trap for the screw to use.
The variables at the top of the openscad source allow you adjust the height for thinner or thicker glass (or tile, or whatever). The values currently built in make the dimensions identical to the part I copied.
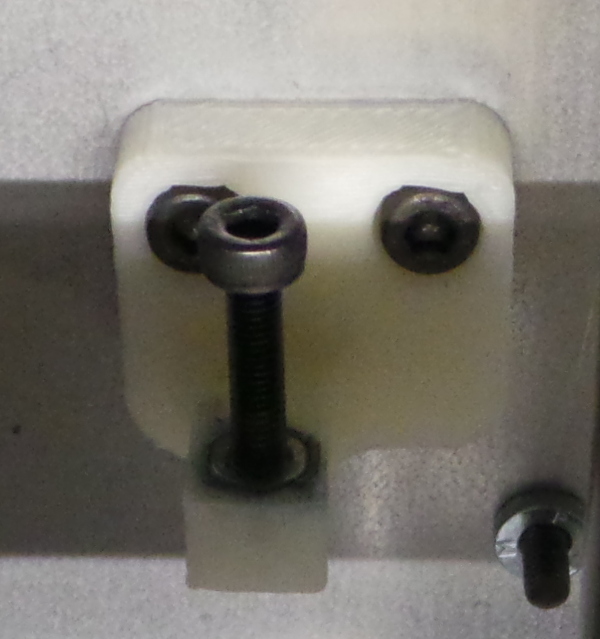
After printing, run a 1/8 inch (or 3mm if you have one) drill through all the holes so the bolts will fit without binding, then epoxy the M3 nut into the nut trap (being careful not to clog up the threads). After the epoxy sets, use the Locktite Blue according to the instructions on the package and mount the new Z-Stop in place of the old one on the Solidoodle.
Once you calibrate the Z-Stop setting, it should now stay calibrated without the screw vibrating loose any longer.
Go back to my main Solidoodle page.