TARDIS Problems
I've been running into some interesting problems trying to print the TARDIS Deluxe Kit.
Back of print screwed up
The weirdest one so far is from my print of the TARDIS_top_02.stl piece, where the side that was at the back of the solidoodle has a lot of irregular glitches, but the other three sides are quite nice. Also the back wall doesn't seem to go up entirely vertically, where the other three walls seem pretty flat and straight (though it is hard to see in the photos below):
Back (click image for high
res)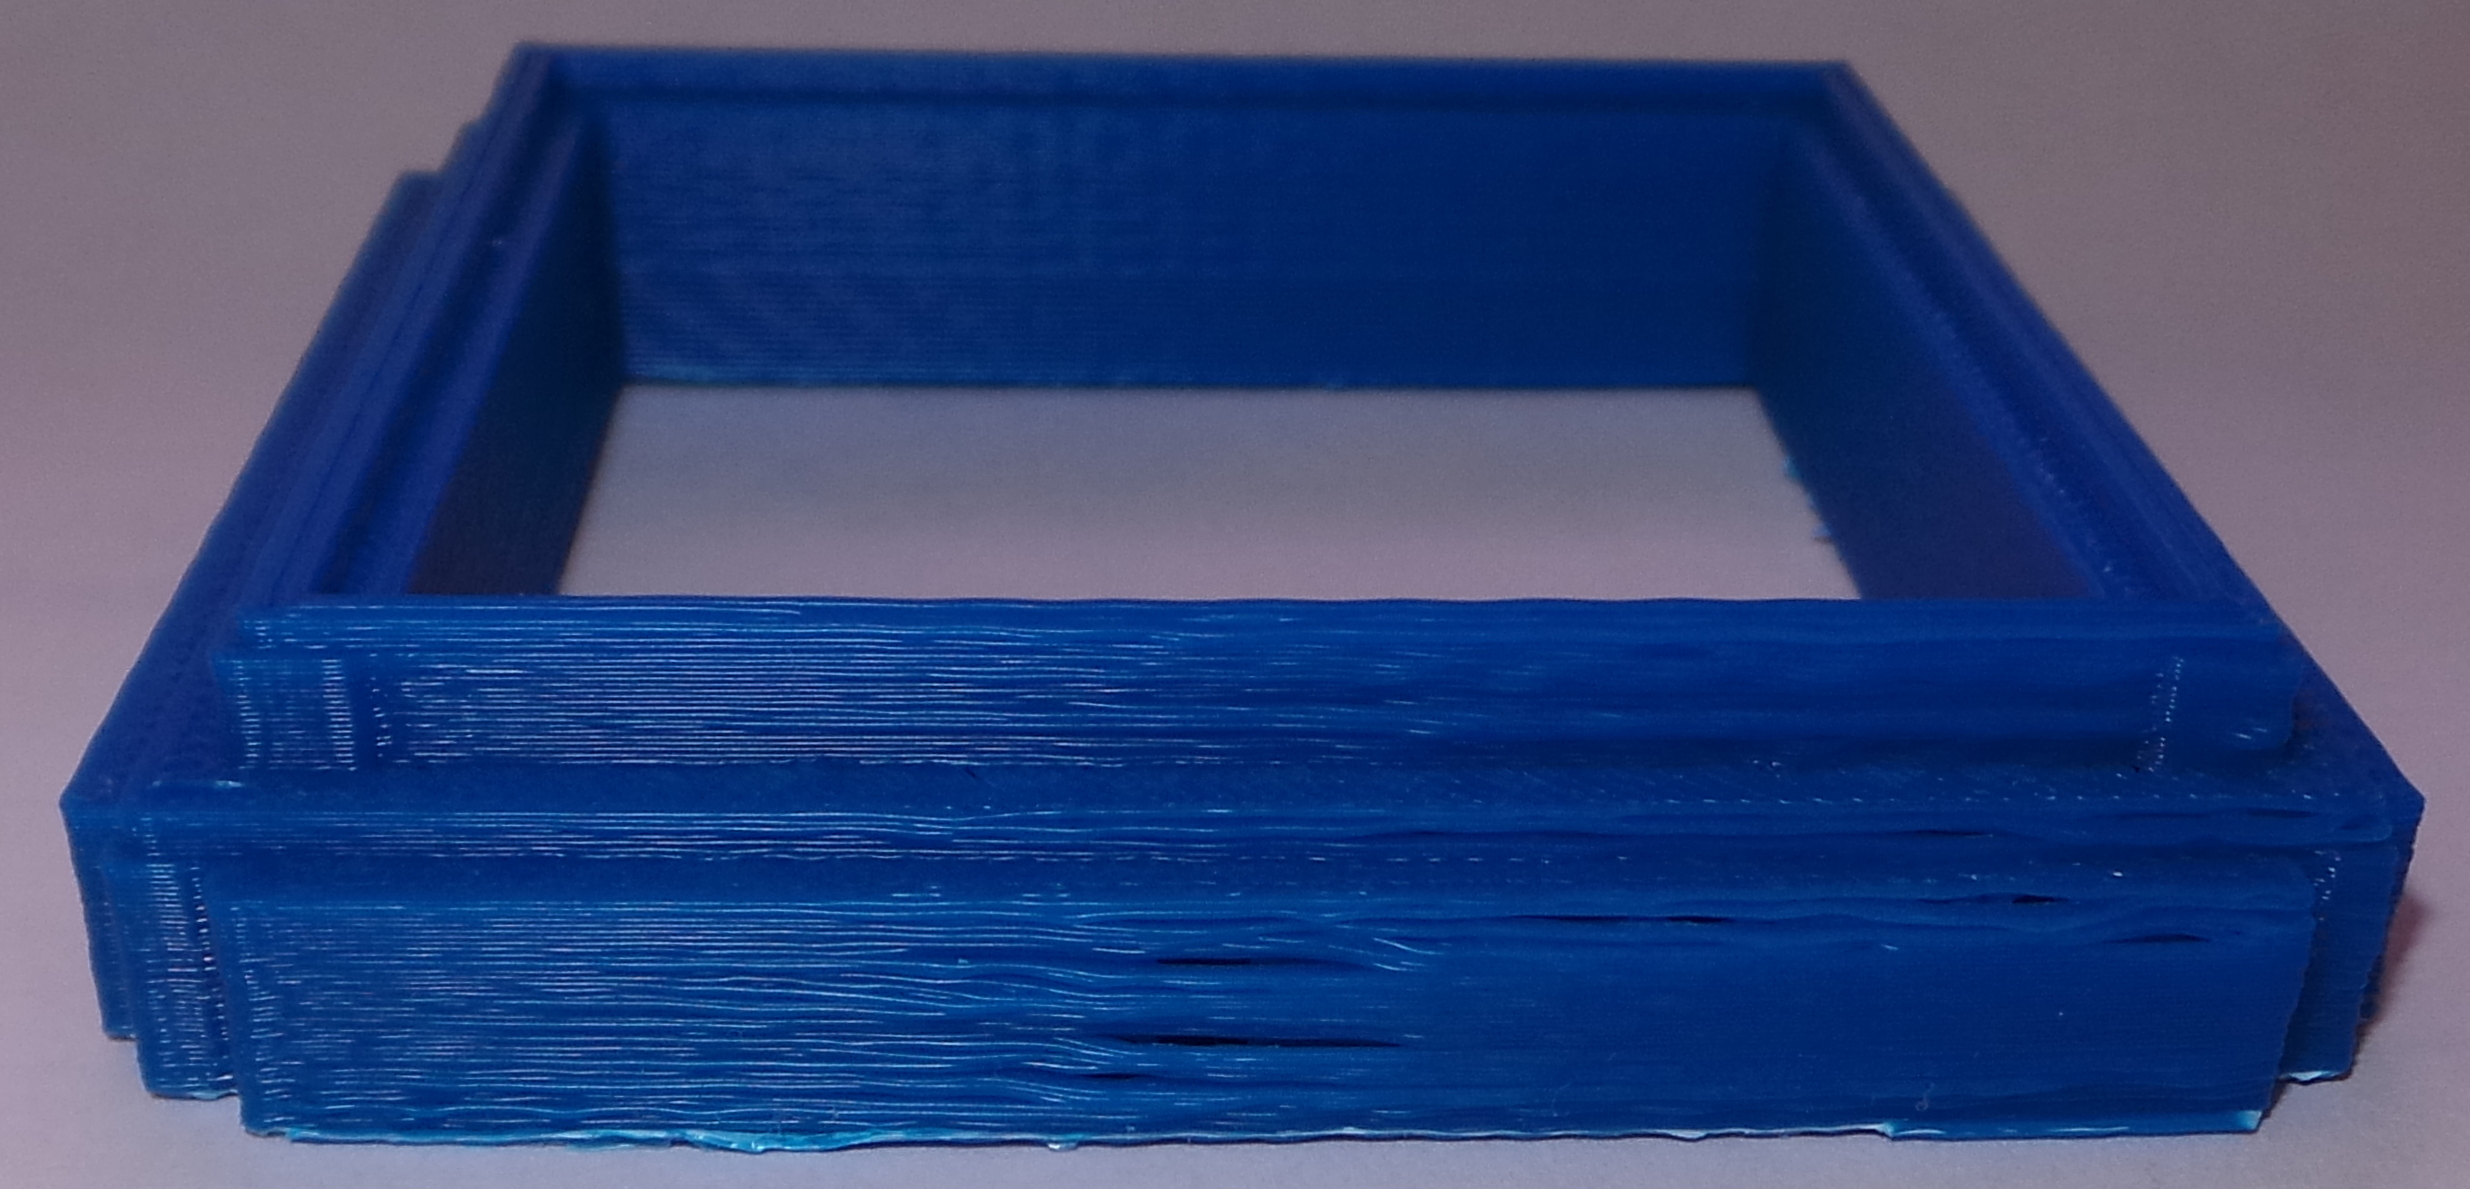 |
Front (click image for high
res)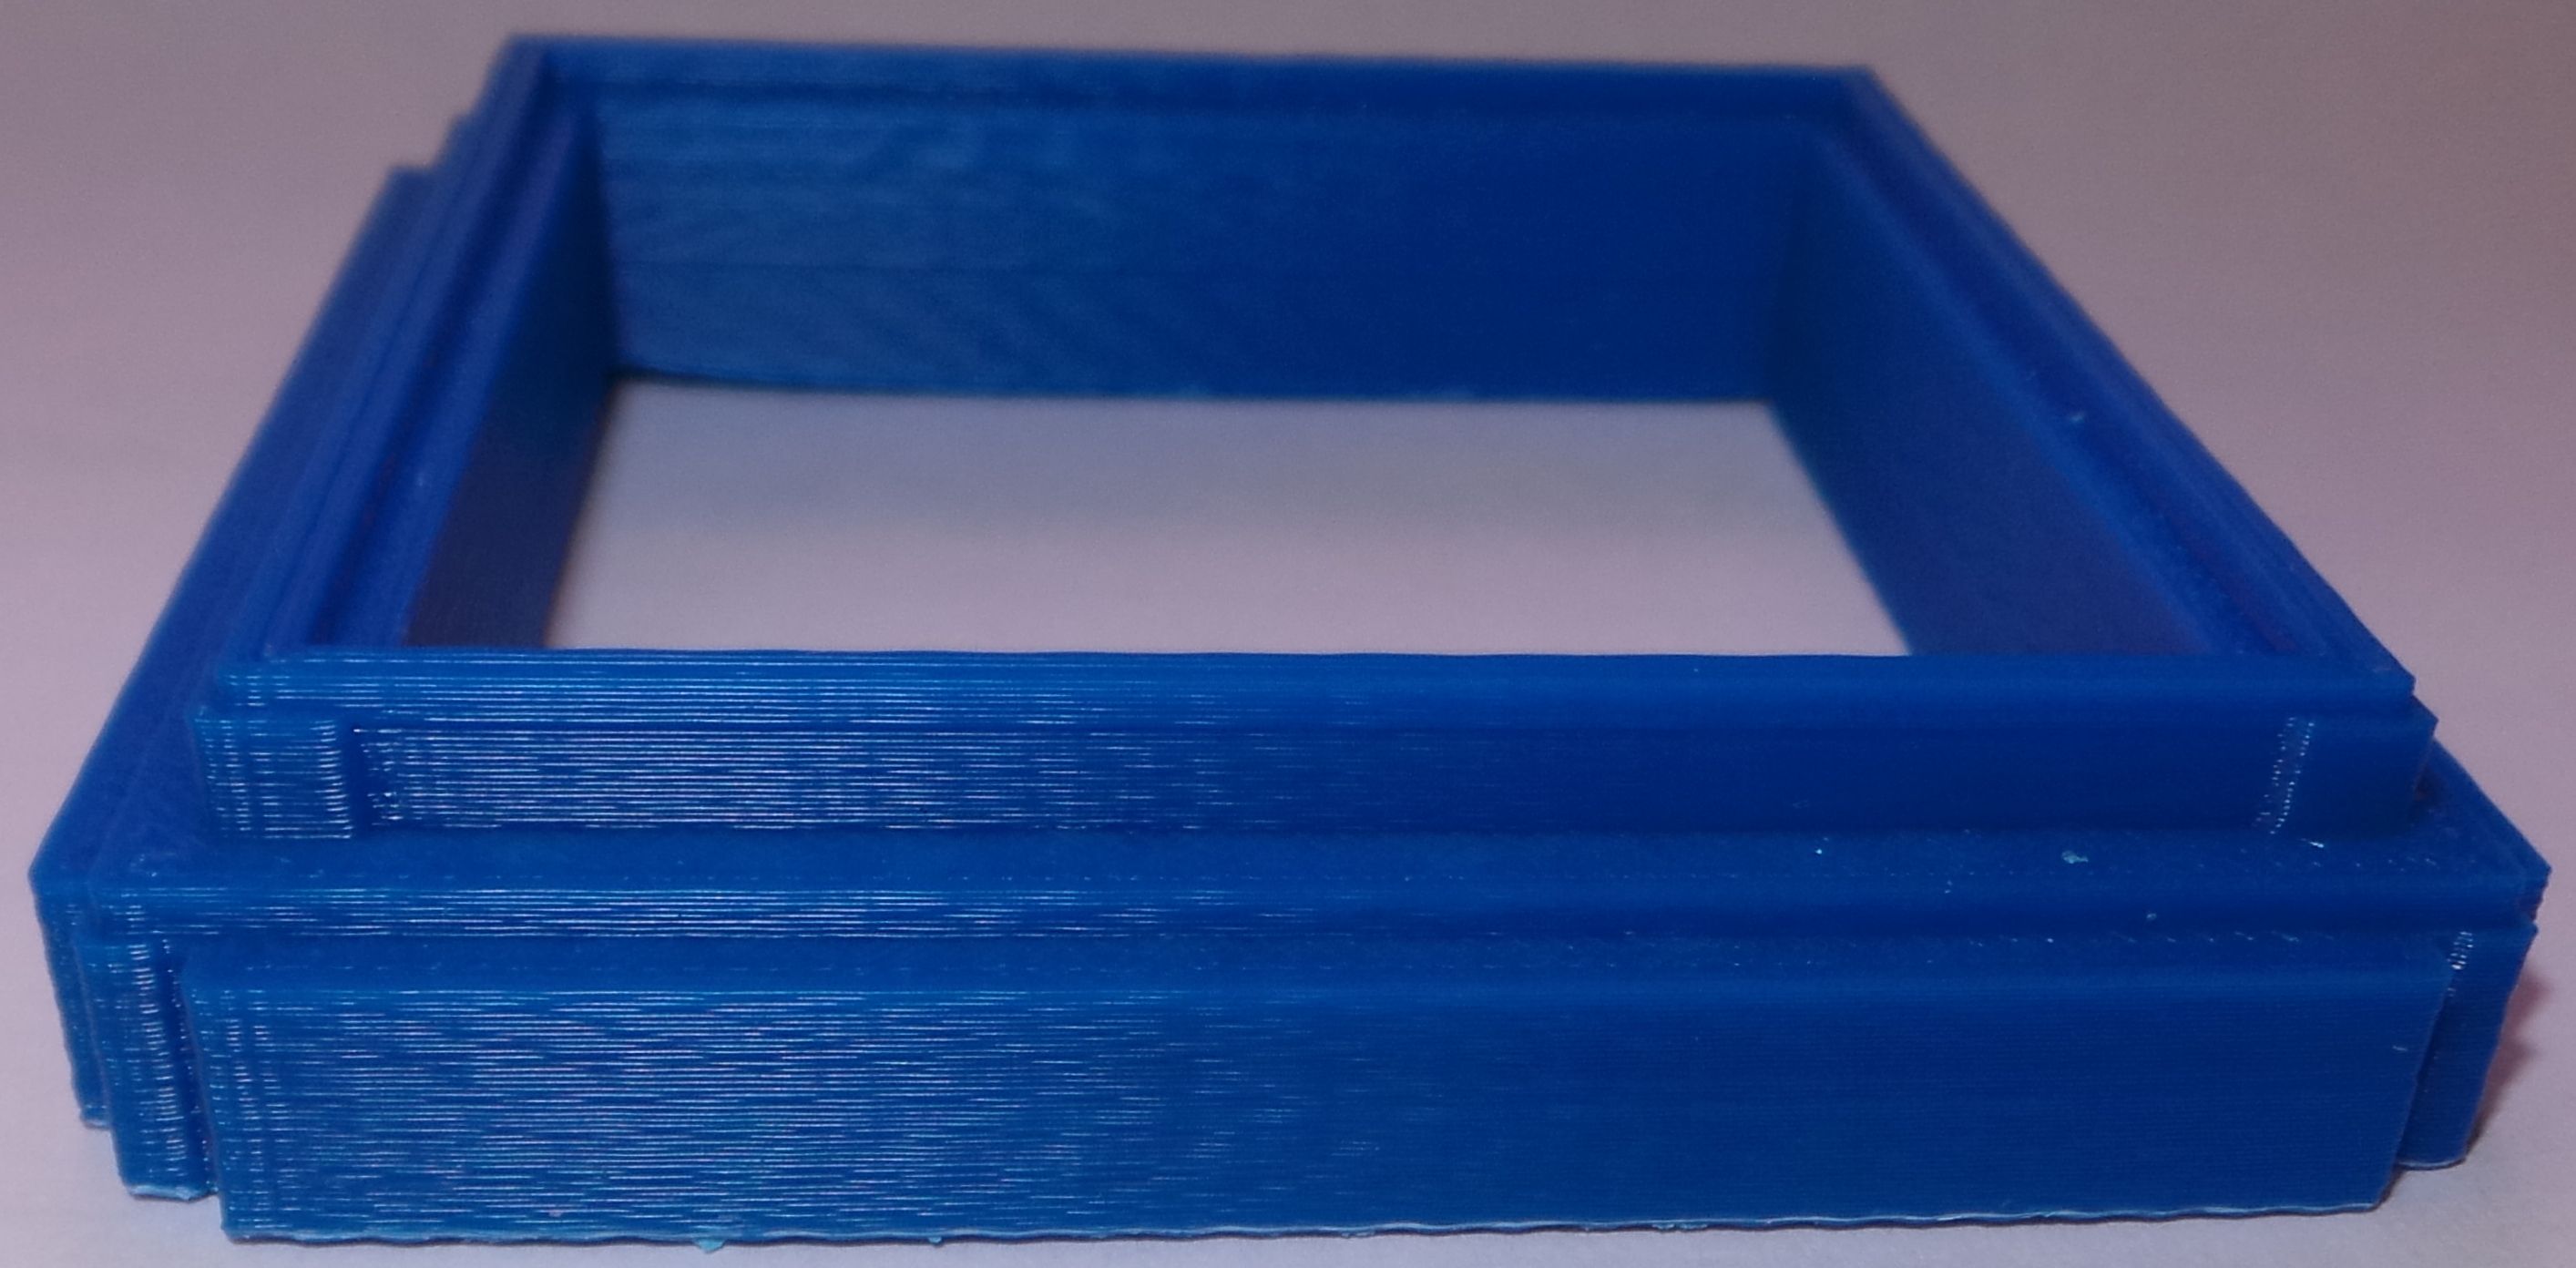 |
Left (click image for high
res)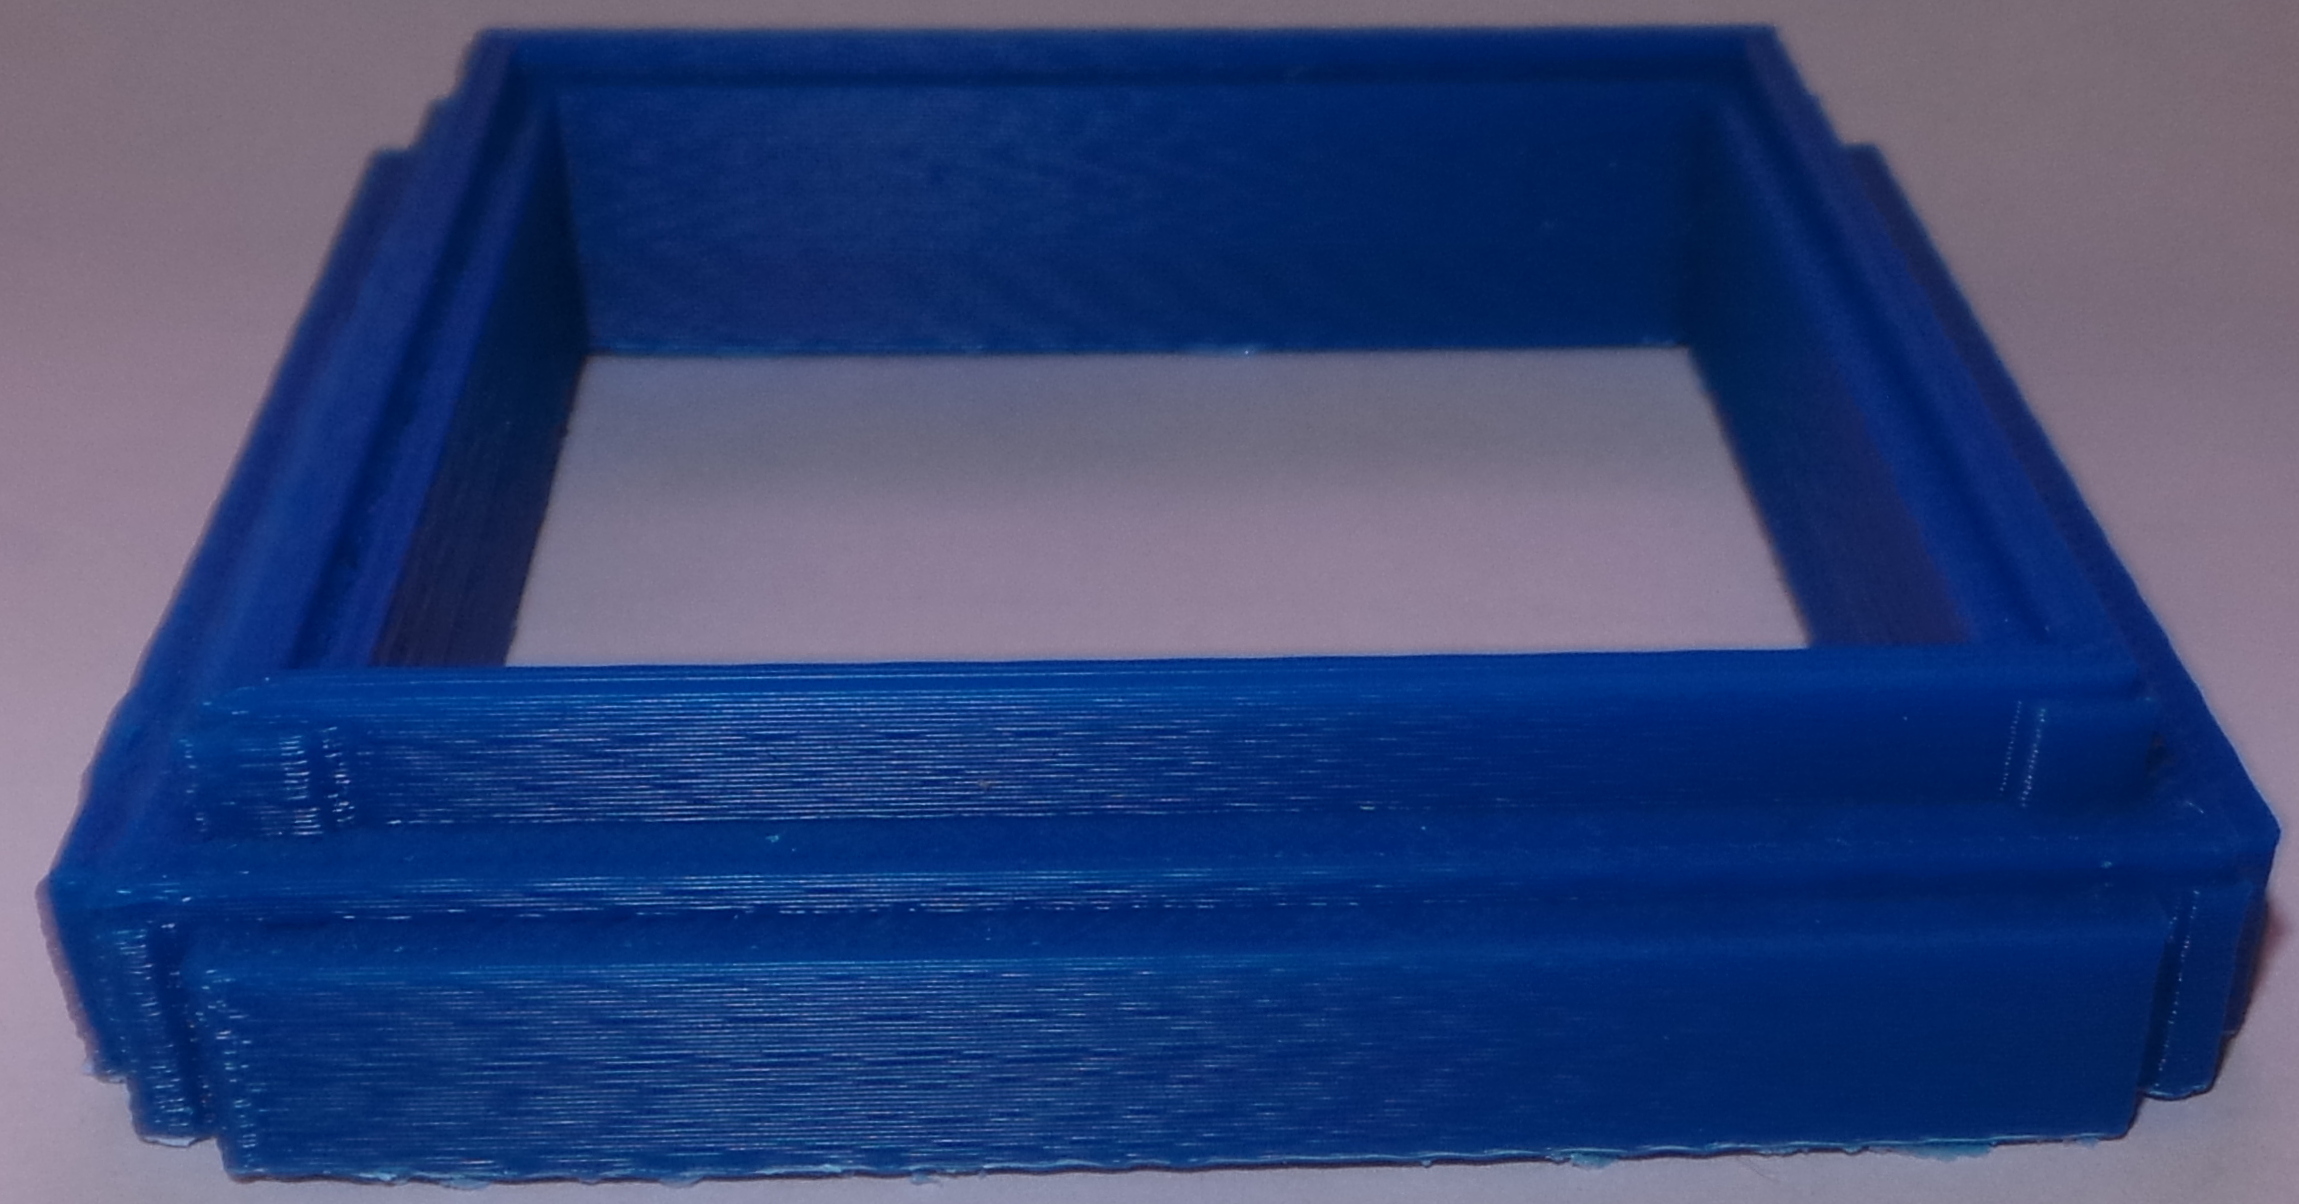 |
Right (click image for high
res)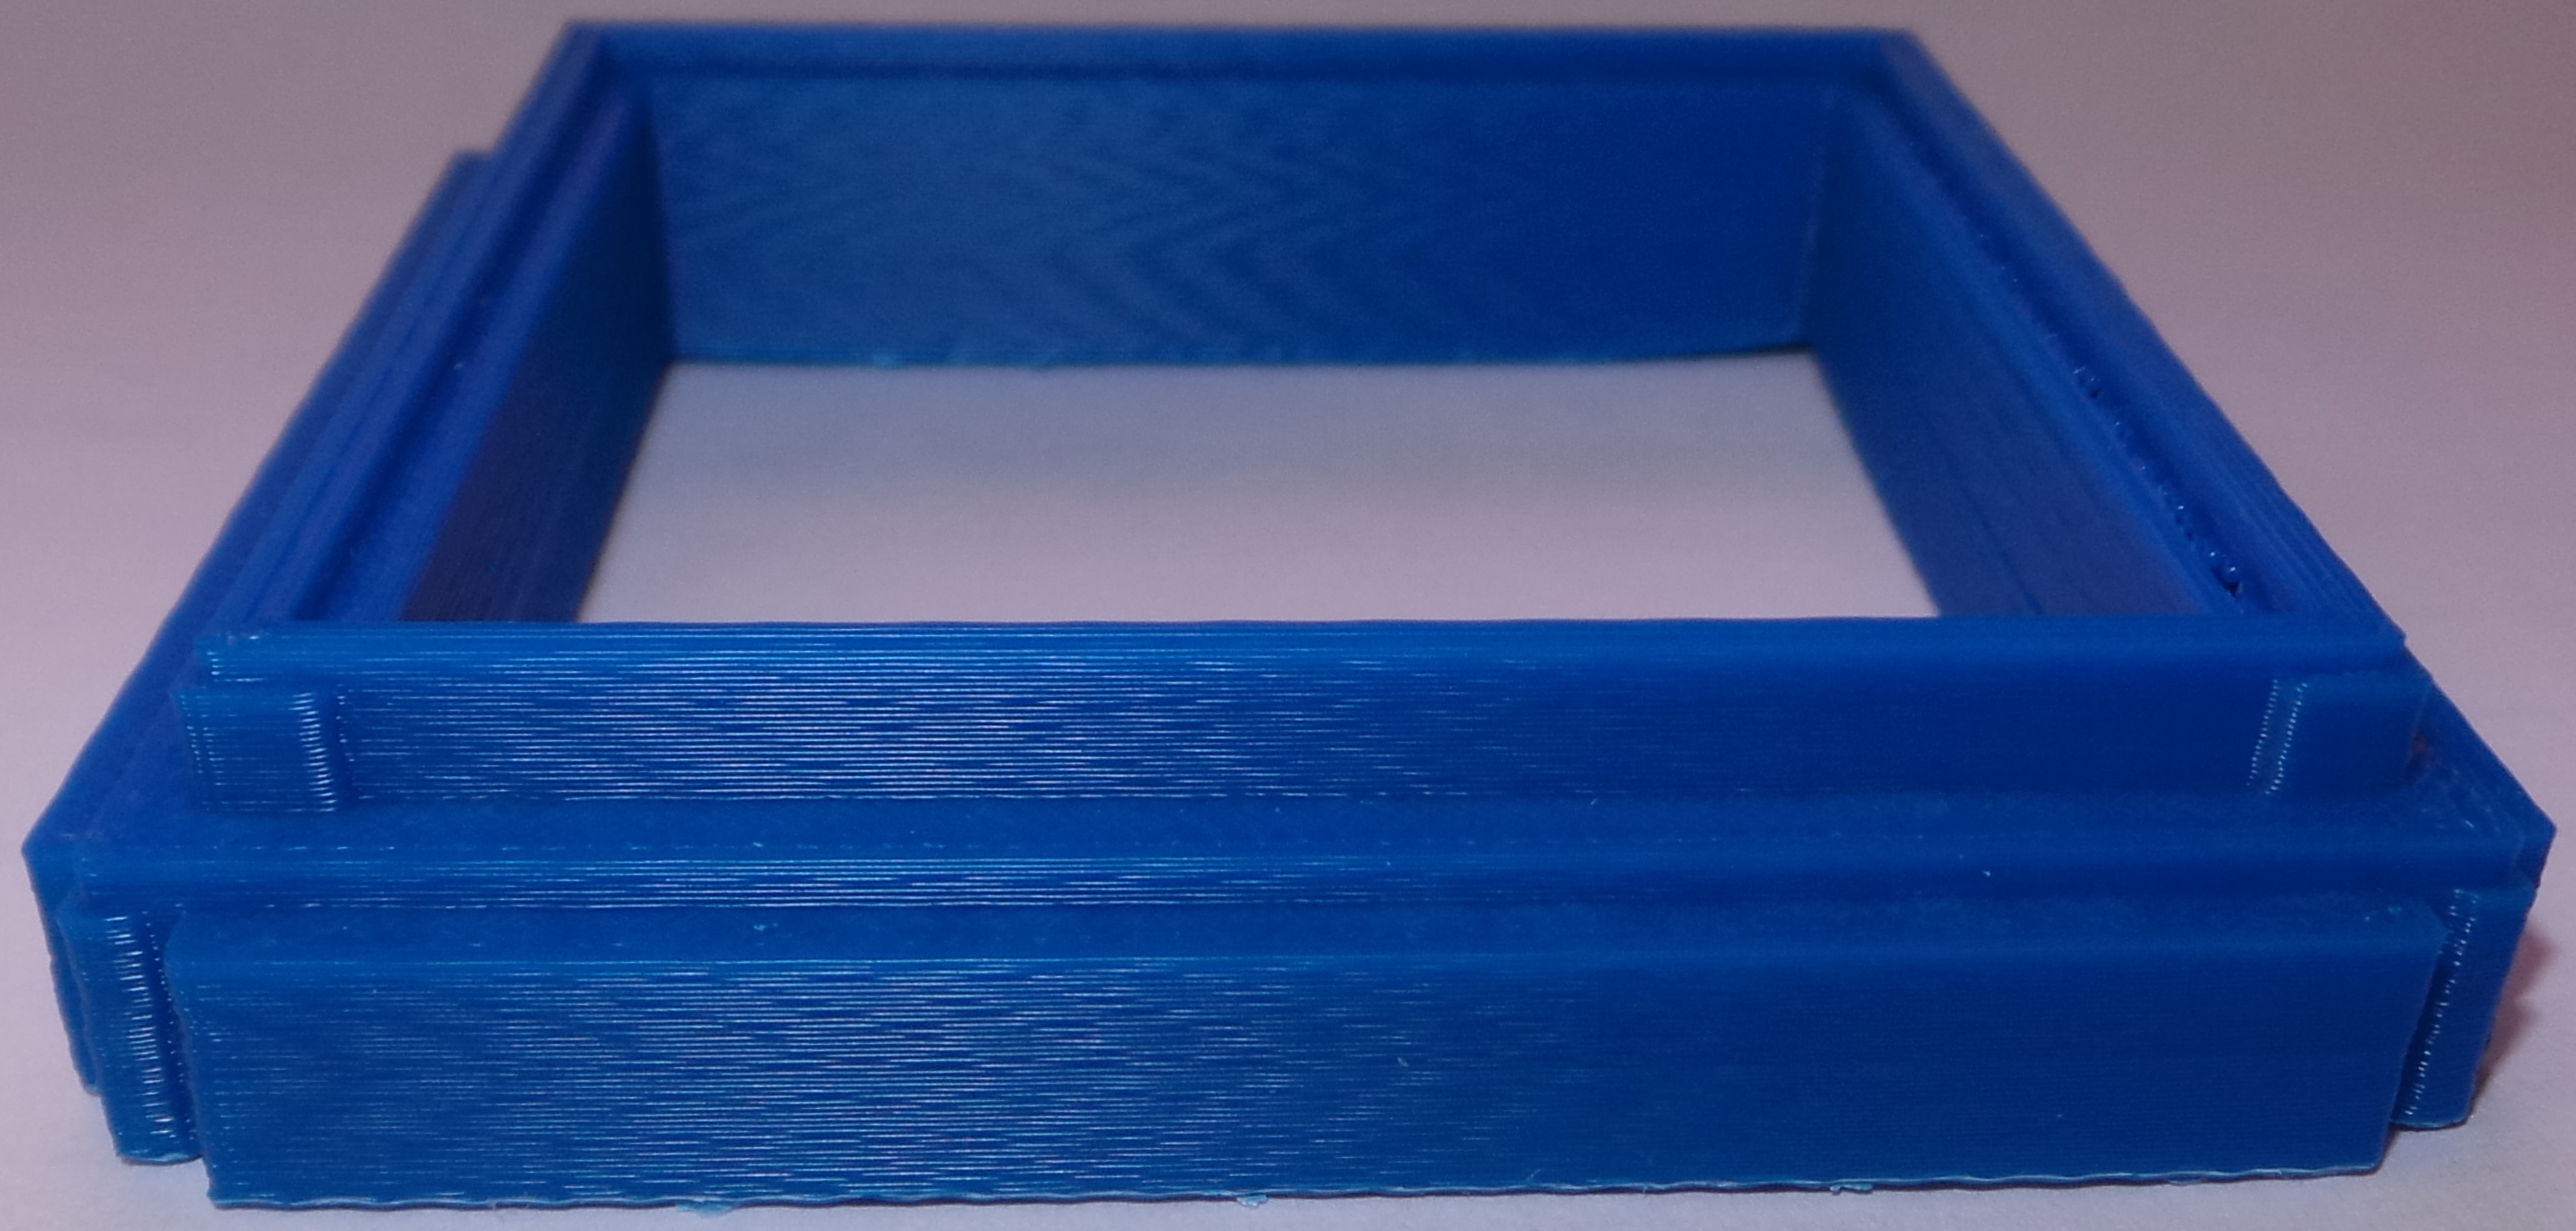 |
Front Profile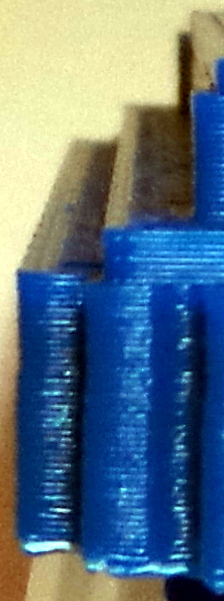 |
Back Profile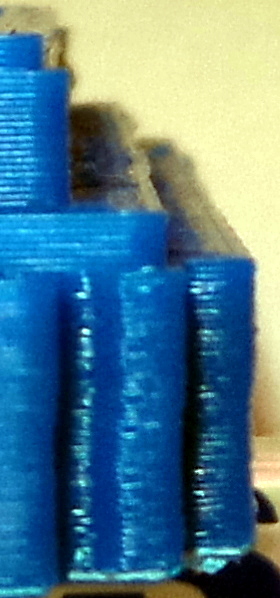 |
I have no idea what might be causing this. My best guess is that maybe when the print head moves back that far, the wiring harness is getting compressed and rocking the head (but I can't prove it).
This is my first attempt at printing anything at .2mm layer height, but I don't know if that has anything to do with it.
I was printing some other parts that had the same problem, so I moved the model as far forward on the print bed as I could without hitting the binder clip holding down the glass, and the back of the part now prints fine. It is definitely something about the position on the printbed that causes the problems, and rocking of the print head still seems most likely. I experimented with the Solidoodle extruder head wobble preventer a while back when experimenting with a Bed Level Sensor idea. That didn't work, but perhaps I should install the gadget anyway just for the spring to hold the head in place with more than just gravity.
I discovered this really was the carriage rocking, and adding the Solidoodle Springloader seems to have completely fixed the problem.
Openscad barfs
This project is discovering lots of new errors. The next thing I ran into was openscad barfing when I tried to import the front panel part and add a couple of small "dam"s across the slot in the back to prevent the brim from filling it up. I had no problem with the side panel doing the same thing, but the front panel apparently makes openscad die with an exception thrown from CGAL:
 sorry, this triangulation does not deal with
 intersecting constraints
terminate called after throwing an instance of 'CGAL::Assertion_exception'
  what():  CGAL ERROR: assertion violation!
Expr: check_protocoll == 0
File: /usr/include/CGAL/Polyhedron_incremental_builder_3.h
Line: 199
Aborted
I ran the part through netfabb cloud to make sure there was nothing wrong with the model and repositioned it to (0,0) coordinates so it wouldn't be off screen in openscad, but even with an model fixed up as well as I could, the CGAL error still happened. I just wound up printing it with the slot getting filled with brim, and I'll see if I can peel it off after printing.
For reference here is the TARDISfrontpanel_fixed.stl file and here is the brimmable-front-panel.scad. All is well till I try to export as STL, then the exception is thrown.
I reported this as issue 578 on the openscad github, so we'll see what they think.
For good measure, RepetierHost crashed for no apparent reason the first time I tried to print this. Restarting everything seemed to allow it to print OK (no idea what happened the first time).
Print Settings
Aside from actual problems, I've been experimenting with settings in slic3r. I found that 1 layer doesn't really cover very well. It leaves small holes where the filament probably catches on the edge of an infill cell that may have curled up a bit. I finally settled on 3 top layers as a setting that does seem to provide a solid looking surface.
Another trick is to set bottom layers to zero on parts where the bottom won't show. That gives me just the hex infill pattern on the bottom which is easier to peel off the print bed.
I seem to get better prints if I go really slow. I changed all the settings to half the default speed except for bridges and overhangs which still need to print fast to avoid sagging. I also left the speed for motion without print alone.
Finally, large parts like the side panel always seem to peel up at the corners. I suspect that is maily due to the small sized bed heater (I'm working on a bed heater upgrade, but am not quite ready to finish it). My best solution so far is one of the techniques I found in the forums: I slow down the first layer quite a lot and as the brim is mostly printed, I run around the corners with a dauber filled with the MEK+Acetone+ABS "secret sauce". That is a pain in the patoot, makes it hard to get off the bed, but really does seem to hold the prints down solidly.
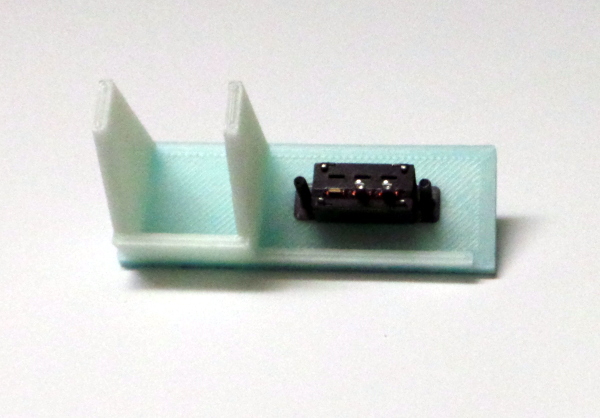
Switch
My local Radio Shack didn't have a 275-0409 switch, but they did have 275-0032 which requires a different set of holes to mount, so I whipped out the newbat.scad script to generate tardis/newbat.stl. A little filing, a little drilling to enlarge the holes with a 5/64th drill, and the bigger switch is mounted:
Circuit
There aren't any instructions for the LED circuit, but I should be able to figure out how to run 5 LEDs that want around 3.3 volts each on a 9 volt battery. I can breadboard something to make sure it works then get everything wired up.
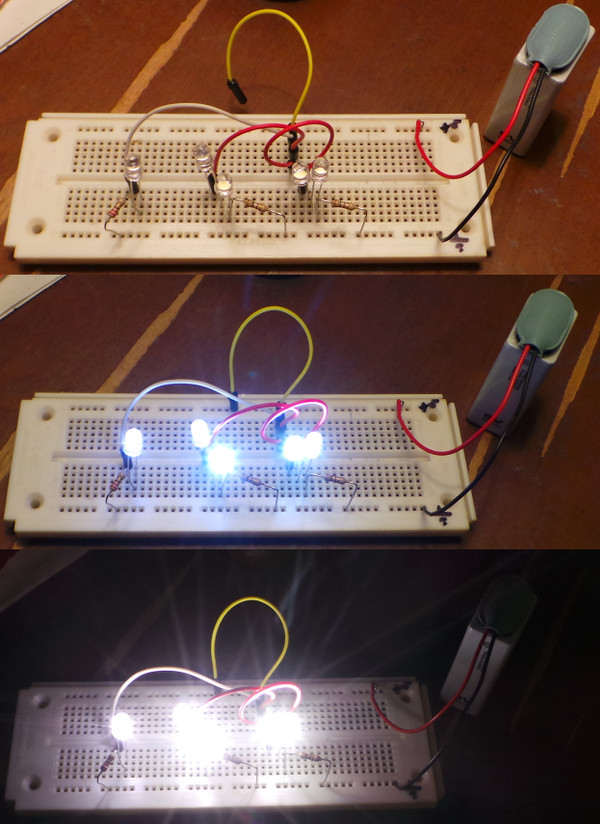
While I was buying the switch, I also got some 276-0017 white LEDs at Radio Shack. They don't come with much info, but it does say the max current is 25mA, so I whipped out a circuit with a 9V battery and a potentiometer and cranked the resistance down till I got real close to 25mA current flowing through 1 LED. I then measured the voltage across the LED leads, and got 3.35V for forward voltage drop (which seems to be pretty consistent with typical white LEDs). That should be enough data to come up with a circuit to drive all of them. I don't think it needs to be very efficient, the lights won't be on most of the time, just when I'm showing off the TARDIS :-).
A little arithmetic and I come up with 92 ohms in series with 2 LEDs being just about right for a 9 volt source, so I can do a couple of those in parallel and then go for 184 ohms in series with just 1 LED for the final parallel circuit.
The parts I had were 100 ohm and 220 ohm resistors, so I used them, and it seems to work OK. Nothing is getting hot when I leave it on for a while, but the LEDs are plenty brigh enough:
And here's the circuit diagram:
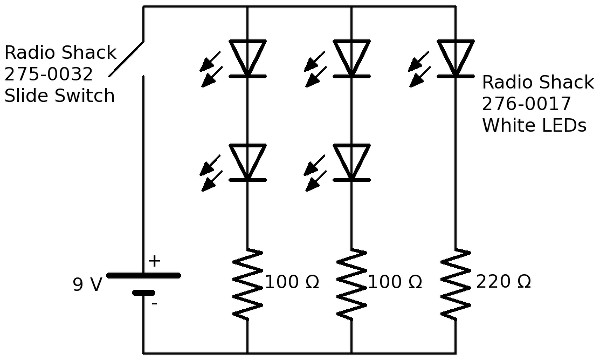
The resistor values were chosen because they were near (but bigger than) the desired values, and I had them in my parts bin. The values aren't really critical (other than making sure they aren't so small they'll let the LED get fried).
(I have an arduino board laying around, and am tempted to wire it up to give me USB control over all the LEDs and perhaps a speaker to generate TARDIS noises, but I'm restraining myself for now :-).
Shields
The panels are pretty transparent, especially the way I printed them with no bottom layer. I wanted to come up with a way to block the lights from shining through the TARDIS and just light up the windows. I found some Aluminum Foil Tape at Home Depot, and it seems to be exactly what I need to line the inside of the TARDIS. I can put it on the whole panel, then cut away the bits I don't want taped. It seems plenty sticky enough to hold, and it completely blocks the lights.
Just to be on the safe side and make sure none of the wires short out against the aluminum foil, I can also add some plastic tape where that might happen.
Results
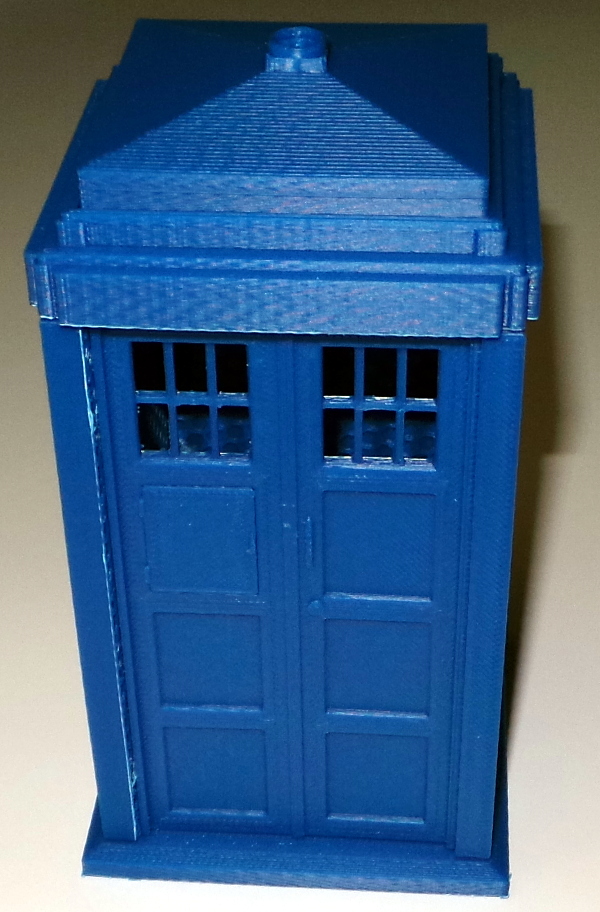
Despite all the problems, I'm getting there. Here is a test fitting of the major parts:
And here are the lamp and windows added (still haven't figured out the best way to get labels attached):

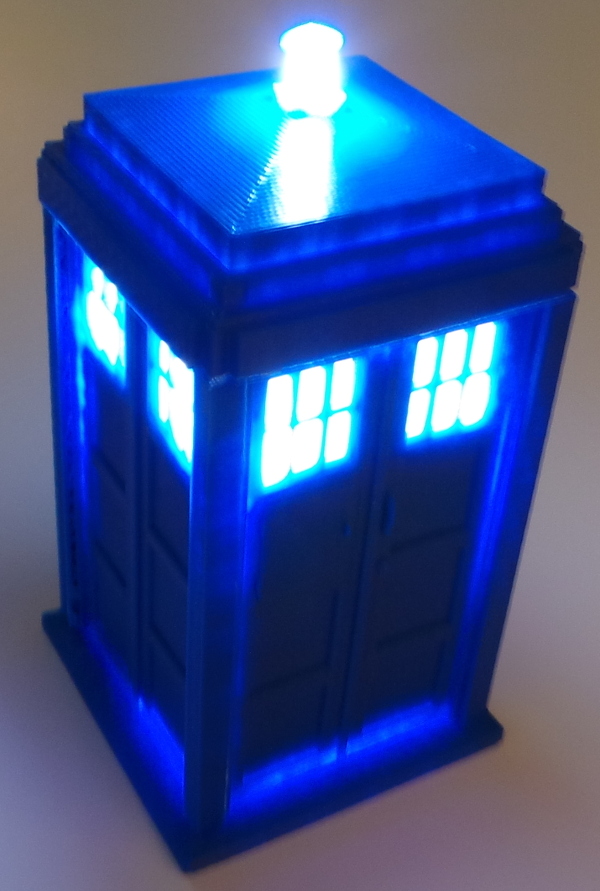
After much soldering and finicky assembly, I now have the whole thing put together and the lights wired up:
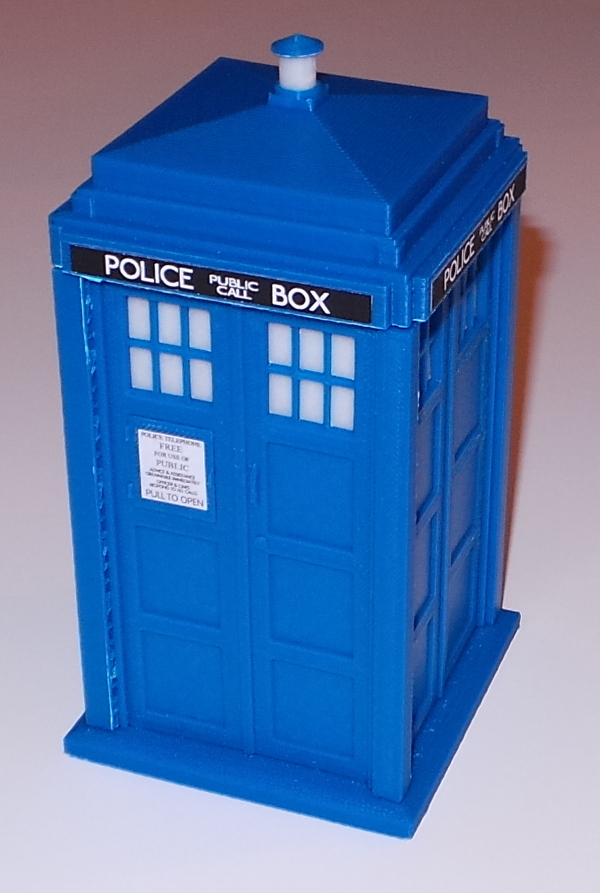
And finally I used a glue stick to paste the labels to the TARDIS and I'm done:
With lights on:
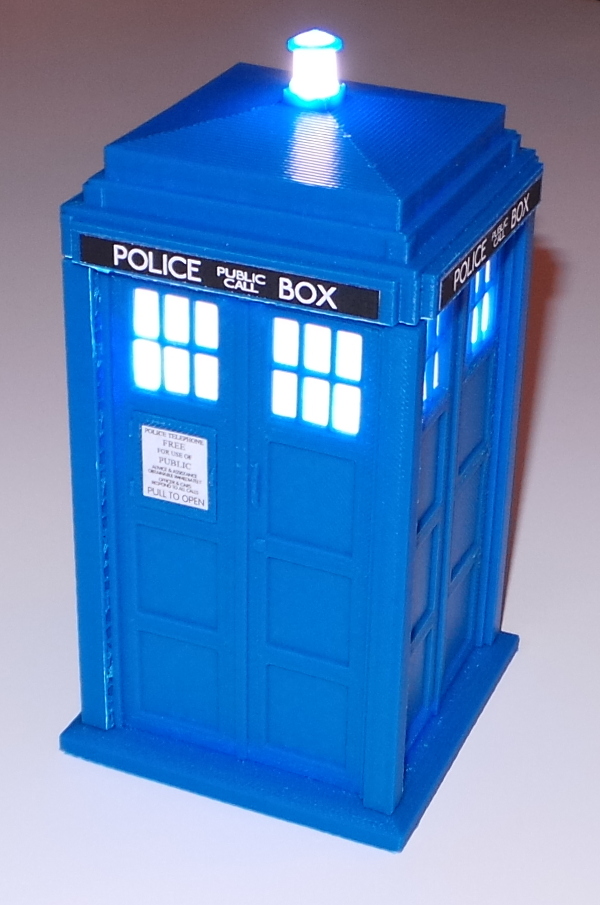
Time will tell how well the Elmer's Extra Strength glue stick holds the paper labels to the ABS. I did sand the plastic a bit and used the glue stick on both surfaces. It certainly appears to be sticking quite well for now. [Update: A few months down the road, and there is still no sign of the labels peeling off, so I guess the glue stick was the way to go.]
Go back to my main Solidoodle page.