Dial Indicator Rail Mount
This is on thingiverse as Solidoodle Dial Indicator Rail Mount.
Replicator Bed Level Jig is a dial indicator mount designed for a Replicator that mounts across the two X axis rails. This is a version designed from scratch along the same principles that fits on my Solidoodle 2 X axis rails. Because the belt runs between the rails, I figured I should stick the dial out in front:
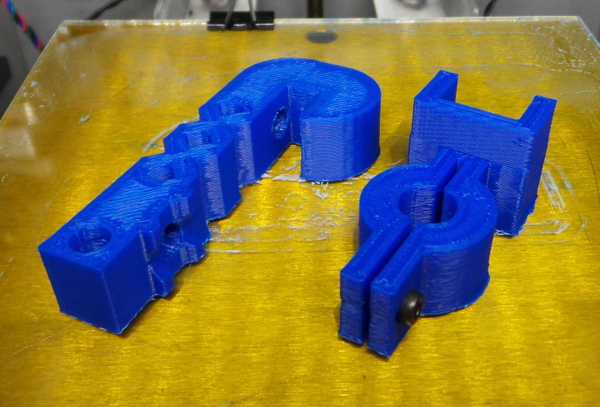
The prototype in the image above wasn't really perfect. I had no end of trouble trying to get the long piece to print without curling up, and the holder for the dial indicator allows the indicator to shift a little no matter how tight it seems.
So, a new design cut some holes out of the long piece to relieve stress, and a new dial mount added a clamp feature with one of the M3 bolts that I no longer need to hold the stock spoolmount (since I made a new spoolmount).
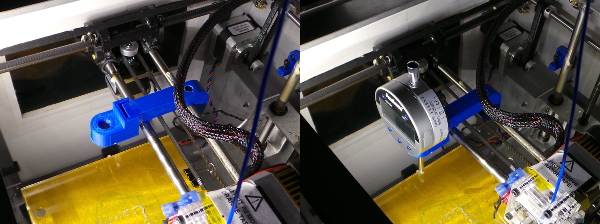
This design wraps around the back rail with a magnet in the bottom to hold the part against the rail, and it has a cradle on the front with a magnet to hold it down to the top of the front rail. The dial holder has a cutout that can be glued to the end of the rail cross piece to hold the dial indicator out in front of the rails (in much the same position as the nozzle of the extruder).
The back magnet hole goes all the way up through the top so a drill can go all the way down to the magnet hole to drill it out for tweaking the hole so the magnet fits.
The new piece printed without curling (finally), but I did another stoopid thing: While working on drilling out the holes for the magnets, I managed to shove one of the magnets into the hard to reach hole in the back so that it won't come out (sigh). My plan is to use my drillpress to drill a 1/4 inch hold in a board, drop a short piece of dowel on the board, fit the hole in the part over the dowel so I know I've got the drill lined up directly above the magnet, then (very carefully) drill the smallest possible hole down to the back of the magnet so I can use a piece of wire (or maybe the drill bit) to push the magnet out of the hole. [The hole drilling trick did indeed work.]
Perhaps I should just incorporate such a small hole in the design since it is hard to check if the magnet is flush without actually shoving it in the hole, then you need some way to get it out. [Since drilling the hole worked, I went ahead and added holes to the model under each magnet.]
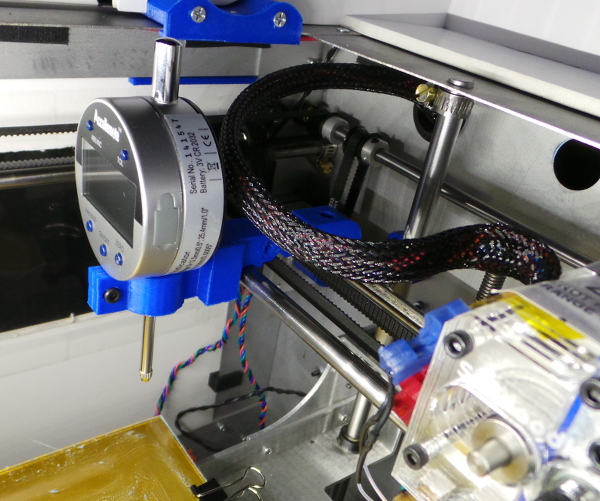
The epoxy has cured overnight, I've glued the parts together with a little acetone and ABS and it fits on the rails nicely:
I've been playing with this a little, and I think any remaining issues are with the dial indicator itself. It appears to have a little internal friction. If I move the bed up too far and come back down I get a different reading than I did just on the way up, but those readings are at least consistent in both directions, so the clamp does seem to be keeping the indicator from shifting, and the magnets seem to be holding things consistently on the rails.
Another experiment I tried was removing the whole thing from the rails then putting it back. After that I went from getting a 0.02mm reading to a 0.05mm reading in as near the same spot as I could manage, so things aren't totally reproducable down in the 1/100th millimeter region when you shift the indicator to a different spot on the rails.
However, I think it is about the best I can do, and it seems far more accurate and reproducable than any readings I got from previous dial mount attempts, so I guess I'll stick with this version.
The best technique does seem to be to move the bed up too far, then back down before taking the reading. And when shifting to another spot on the bed, move it down away from the indicator so the indicator doesn't drag on the bed.
When I'm putting it on the rail, I put a thumb on each side of the back rail, then push the back part of the piece onto the rail, then rotate it down to grab the front rail with the front magnet. Don't want to squeeze the two rails together or anything like that.
I have actually leveled my bed with this now, and worked out some additional techniques for reliable use: I put the indicator on the rails, then home the Z axis. That is way too high, so I then lower the bed till I read a small fraction of a millimeter. I make a note of the Z height shown in Repetier Host, and I lower the bed clear of the indicator and move it to a new position. I then home the Z axis again, and lower the bed till Repetier Host shows the same Z height. I can now read the indicator and compare it to the previous point.
In my experiments doing this with 3 points near the 3 leveling screws I was consistently getting readings within 0.02 millimeter at the same spot, even after taking the mount off and putting it back on the rails.
After I was satisfied I was getting consistent readings, I started adjusting the thumbscrews till all 3 readings were real close to the same.
I still have trouble adjusting the Z-stop though, even after I get the bed level. My best technique so far seems to be to just try and print something with a brim and watch the brim go down. If it won't stick very well, the nozzle is too high. If it sticks really well at first, but as the nozzle comes back around to a corner in the brim, it ploughs into the previous brim and shoves it off the bed, then I have the nozzle too low. (Unfortunately, those look about the same from a distance, so you need to pay close attention).
If the brim is screwed up, I can hit the Kill Job button, adjust the Z-stop (thinking about it twice to make sure I'm turning it in the correct direction) and then try the print again after removing the remains of the first print attempt.
If nothing I do makes the brim go down smoothly, then it is time to level the bed again.
Go back to my main Solidoodle page.