Foamboard Case MK2
This is on thingiverse as Foamboard Case Parts for Solidoodle.
My original Foamboard Case worked well enough, but it was too irritating to slide the front cover in and out all the time since I constantly need access to the inside of the printer. I have now revised things again, changing the way the handle works.
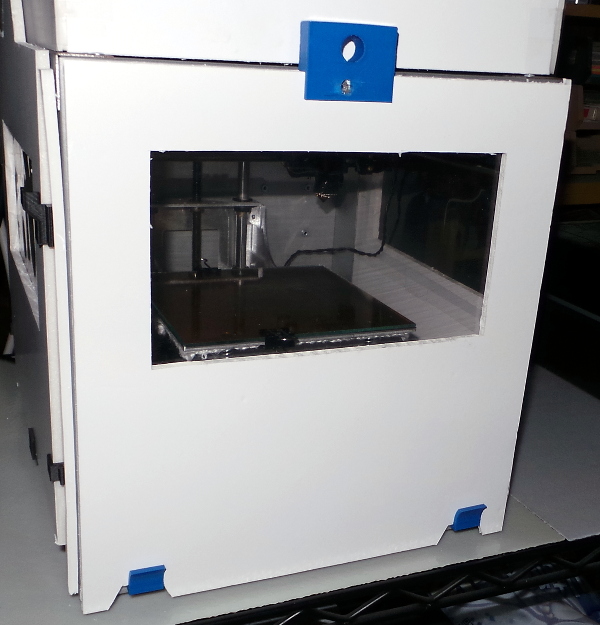
This is the 2nd new version of foamboard case concept with only two clips at the bottom to hold the bottom edge in place. They have flared openings so it is easy to get the cover in the clips. As part of the 2nd revision, the footplate parts were added as an alternative to cutting notches in the foamboard. The original handle is now obsolete because it was too hard to print. Instead I now have the frontplate and backplate parts to sandwich the foamboard and hold the magnet that sticks the foamboard to the top of the case. The actual handle is just a tab cut out of the foamboard. Weatherstrip on the edges of the foamboard complete the construction.
Here's one side using the new parts:
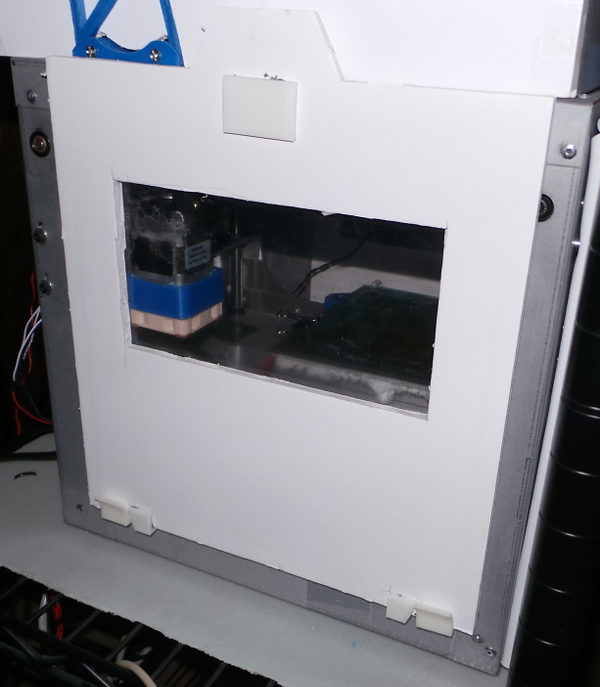
And here is the older design:

I found the D profile weatherstripping I used on the back of the board at Home Depot. It is MD Building Products 5/16 in. x 17 ft. All-Climate Weather Stripping Tape for Extra Large Gaps Model # 63628
The window is just a piece of clear vinyl cut from one of those 3 ring binder page protectors I had laying around and taped onto the inside of the board.
I had no problem printing the clip parts for the bottom of the door, but when printing the handle part, I kept having the printer knock it out of position when I tried to print a hole for the magnet near the top of the print (where the nozzle has more leverage :-).
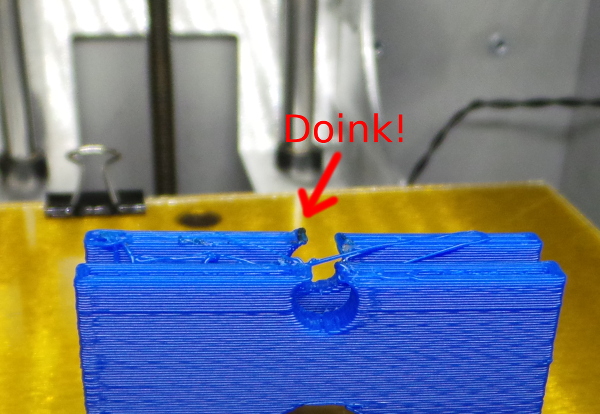
I eventually removed the hole from the model, printed it solid, and used a drillpress to drill the 1/4 inch hole to mount the magnet. I used the drill again after positioning the handle on the foamboard to drill through the foamboard so the magnet would fit. I used some epoxy on the inside of the slot that goes over the foamboard and in the hole for the magnet, put the handle on the board and the magnet in the hole and let it cure. [Now, I've gotten rid of the handle part and switched to the frontplate and backplate combination].
Stick one clip each on the bottom left and right of the Solidoodle front opening, cut some handy slots in the bottom of the foamboard to guide it over the clips, and you're done. [Or you can cut the bottom flat, and use the footplate parts to guide the foamboard between the clips].
The neodymium magnet makes a very satisfying click when closing the door and is strong enough to squeeze the weatherstripping to the front of the printer, but it isn't too hard to open.
I tried a strip of stick-on magnetic tape at first, but the stickum on the tape wouldn't stay stuck to the plastic handle, and the magnet wasn't really powerful enough to keep the door closed.
Go back to my main Solidoodle page.