Subtitle: Things I don't do enough to remember exactly how they work... (inspired by the original instructions I followed with great difficulty and much googling for missing info in this xda thread).
SDK
You can download the SDK (Software Development Kit) tools you will need from the google Android SDK web site and then read about Installing the SDK.
If you just want to do the sort of hacking described in here, you definitely do not need to install eclipse. You also don't need any of the different android version APIs or sample programs, etc. What you do need is the platform-tools package in addition to the basic SDK.
The Using Hardware Devices page describes some things you might need to do with udev rules on a linux system to get adb to talk to your Nexus 7 over USB when you don't want to run adb as root (which is probably the safest way to go :-). On my Fedora 17 system, it turned out I didn't need to do this (perhaps Google already has the right permissions built into the installed udev), but if I had needed to fix the permissions, I think this is the /etc/udev/rules.d/51-android.rules file I'd need:
SUBSYSTEM=="usb", ATTR{idVendor}=="18d1", MODE="0666", GROUP="plugdev"
Aside from possible udev rules, you also need to enable USB debugging:
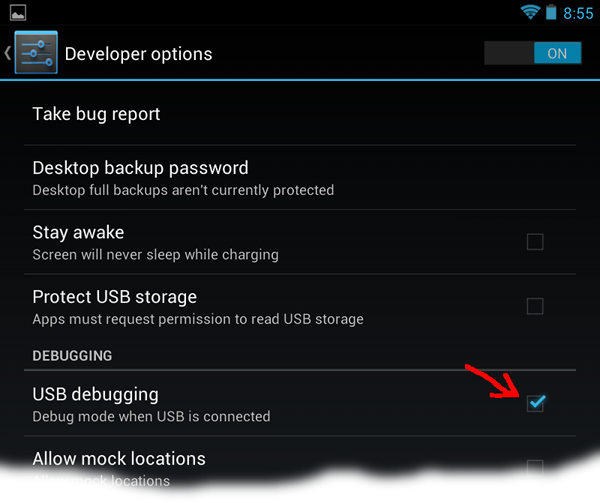
USB Debugging
Pretty much nothing will work when it comes to android hacking unless you first enable USB debugging. Do that from the Settings screen:
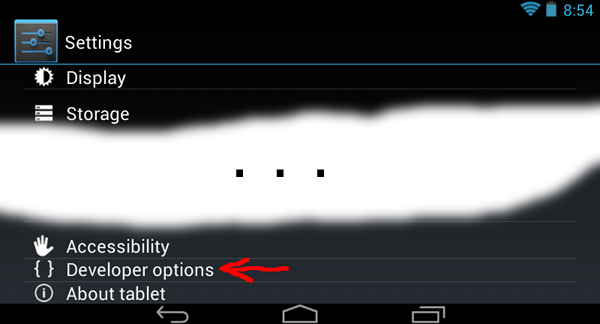
Dive into the Developer options and enable USB Debugging:
ABSURD NOTE: If you have gotten the android 4.2 update, you won't see the developer options choice in the settings screen until you first go to the About Tablet item and tap on the build number item seven times in a row. (This is not a rumor copied from The Onion, it is really true.)
What is USB debugging?
Basically, this enables a special service on the Nexus 7 which can communicate with the adb tool from the SDK to do debugging operations. Most of the hacking you'll do involves things classified as debugging operations, so you gotta have this turned on.
adb
Adb is the Android Debug Bridge and is handy for many things, but for the purposes of this web page, it is mainly useful to simply verify that the USB connection is working. If you plug in the Nexus 7 and type adb devices you should see it spit out a line with the serial number of your Nexus 7. If that works, it means you have all the nonsense above setup and installed correctly.
Don't forget that you need the SDK tools and platform-tools both in your PATH. For instance, I have the SDK installed on my Fedora 17 system in /zooty/andy/android-sdk-linux/, and I have /zooty/andy/android-sdk-linux/tools:/zooty/andy/android-sdk-linux/platform-tools: in my PATH environment to get access to all the tools.
One of the more obscure adb commands you might want to use is:
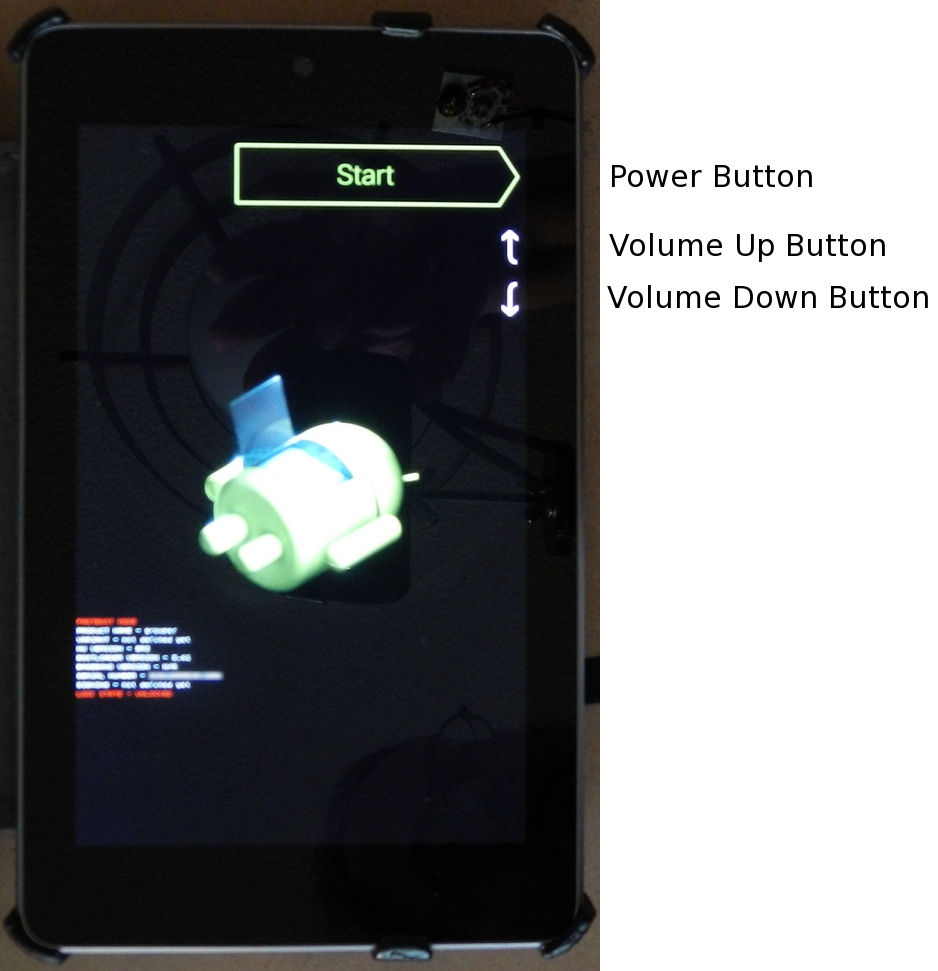
adb reboot bootloader
That will get you out of the android system on the Nexus 7 and into the Nexus 7 bootloader which you can talk to with the fastboot command:
fastboot
The fastboot command is similar to adb, but it talks to the bootloader, and it is the tool you need use for hacky stuff like installing a different recovery.
Warning: I have to run this command as root. All I get is a waiting for device message if I run it as an ordinary user (though perhaps those udev rules I didn't think I needed could help?).
Once, and only once (unless you reverse the process), you'll need to do this:
fastboot oem unlock
That unlocks the Nexus 7. I have no idea what locking actually is as far as the innards of the Nexus 7 goes, but you can only do most of this hacking if you are unlocked, so you really need to unlock it.
The side effects of unlocking are kind of drastic: Anything you added to the sdcard will disappear. Any apps you installed will be gone. Any settings you configured will revert to default. You will have to run setup again and tell it who you are. Basically it will be reset to the state it came out of the factory. The sooner you unlock it, the less work you lose. (Of course, anything stored in the cloud like the free Transformers movie reappears once you setup the device and identify yourself once more).
Fortunately, once unlocked, you stay unlocked. No updates or anything will lock it again.
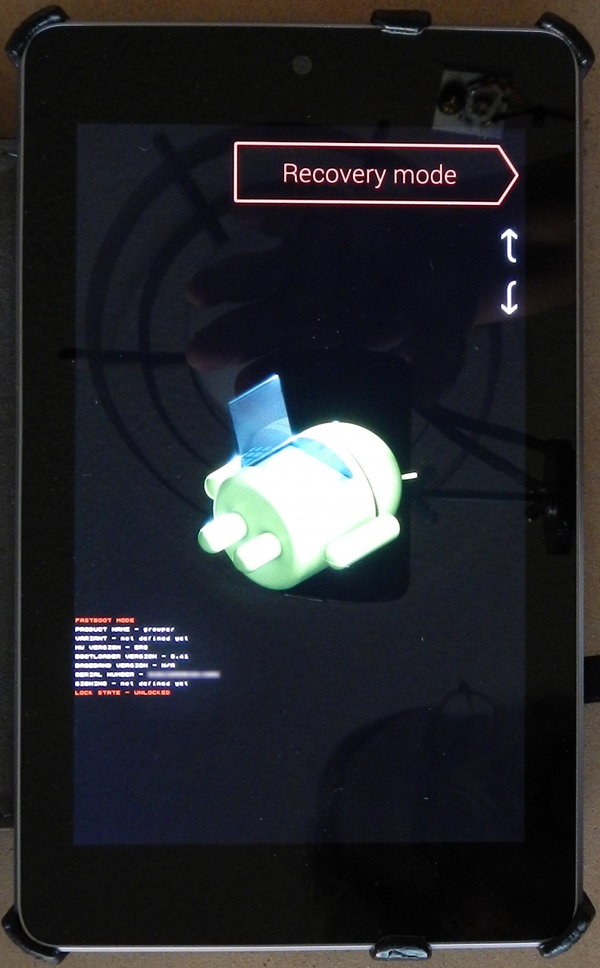
The other major use for the fastboot command is installing a recovery image. These come as files typically named with a .img suffix. You'll want to download the .img file for the recovery system you want to use (and for gosh sakes make sure you get a recovery built specifically for the Nexus 7 — the recovery images are highly device specific). Then you type:
fastboot flash recovery path-to-recovery.img
For the TWRP recovery I installed, I clicked on the Get TWRP for your device button on the TWRP home page and typed in Nexus 7 in the search dialog, which led to the download of the file openrecovery-twrp-2.3.1.0-grouper.img
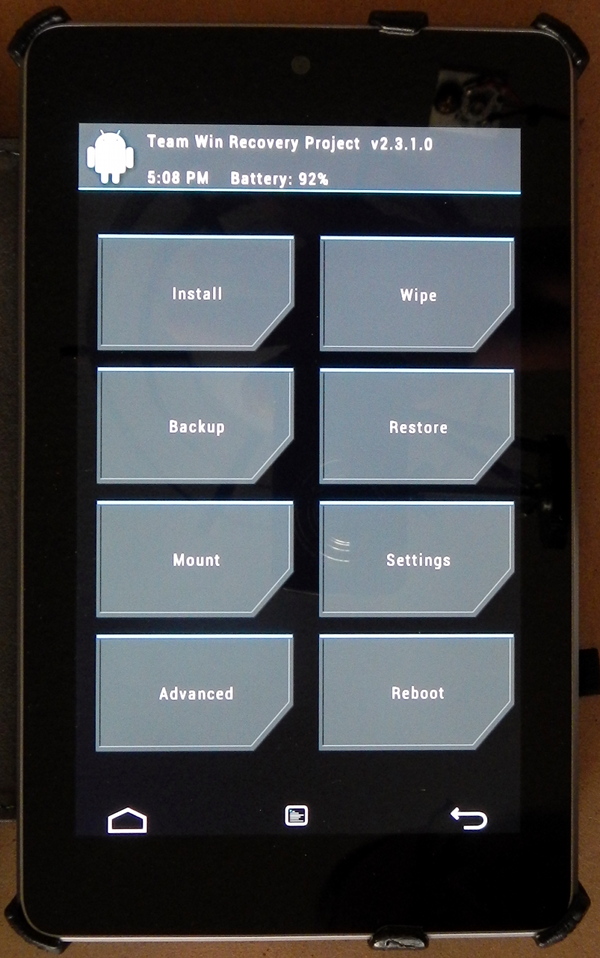
Having loaded the recovery image, you can now use the bootloader you are sitting in to boot it: