Carriages
I'm starting to look at the design for the carriages by hacking up some openscad visualizations of the assemblies.
Here's my first X carriage attempt:
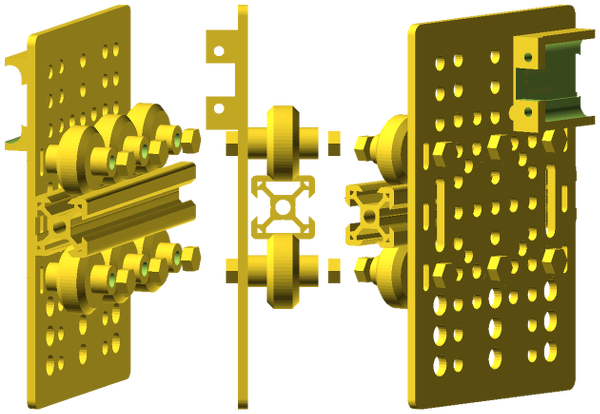
Picking off the center of the belt slot from the edge view, it seems to be 30.6mm above the top of the v-slot rail, and I can't really get it any lower because it would collide with the nuts used to mount the wheels.
I begin to see the attraction of running the belts inside the frame at the same level as the v-slot rails. I'd have to design Y carriages that held the X rail away from the Y rail to leave room for the belts to pass between them, but I'd be able to clamp the ends of the belts between the wheels both vertically and horizontally, which would be much better torque-wise.
I'd probably also need to work on the belt clamp to make it fit in a smaller space so it could go between the wheels at the two different levels needed for the different belts.
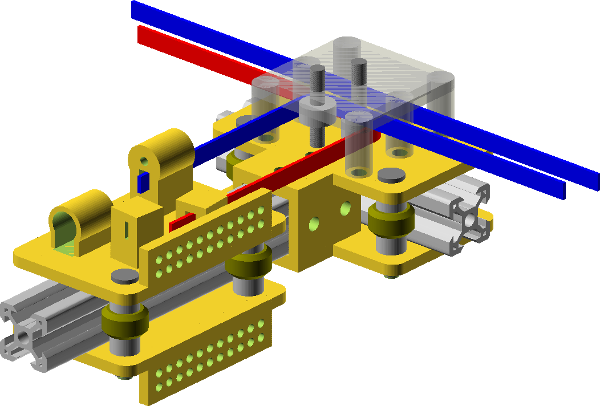
OK, new visualization with compact belt clamps and new belt positioning at same level as the X v-slot rail. This concept looks much better:
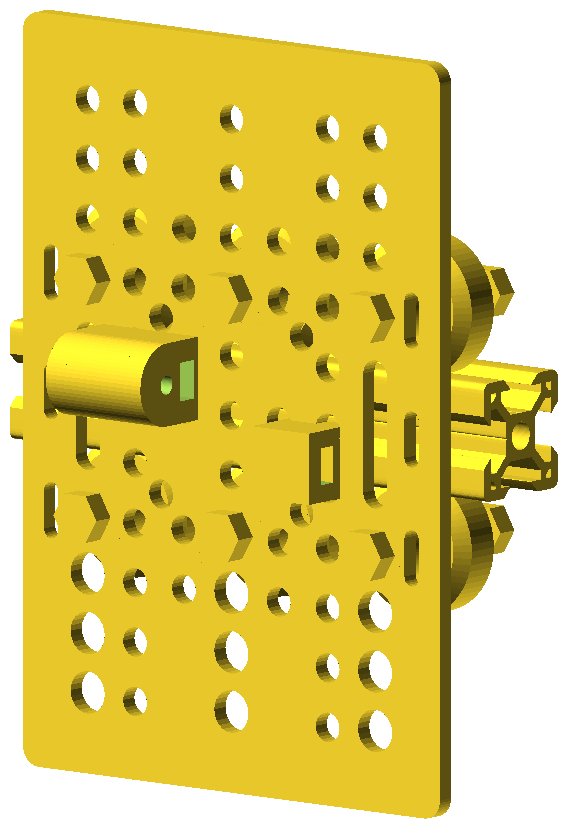
Of course all these images are only about 1/2 of the carriage. There will be another plate on the other side of the rail with similar belt clamps.
I've now designed a custom plate to use for the carriage and fiddled with the visualization to use it (and different colors):
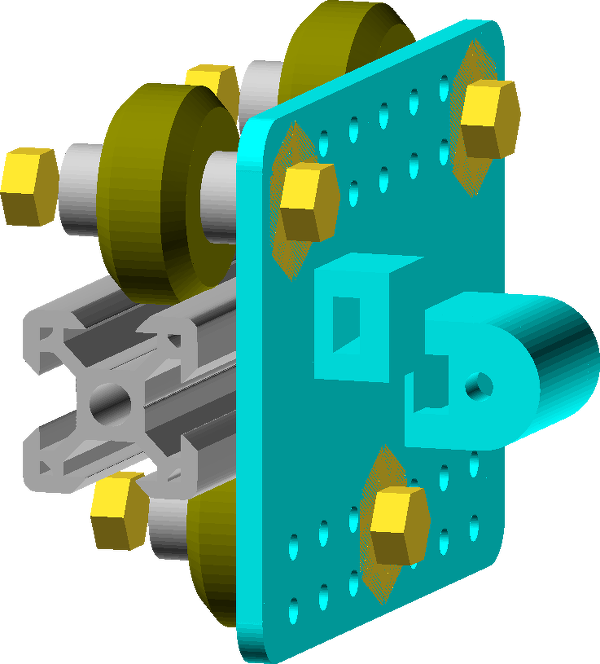
I'm only using 3 wheels because that keeps the weight down and makes it easier to grip the rail with all three wheels equally (I only need the middle wheel to be adjustable and the others will just naturally fit in their slots). I'm not going to be hauling around heavy things on the X carriage so this should work fine. I've also added lots of holes for M3 screws to mount things like the hot end and cooling fans, etc.
Another good reason to use 3 wheels is that the wheel kits are a bit on the expensive side when you start adding lots of wheels :-).
Thinking about the Y carriages, I may want to use the mini wheels there so the belts can run closer to the Y rail and still clear the wheels.
I've been designing the Y carriage:
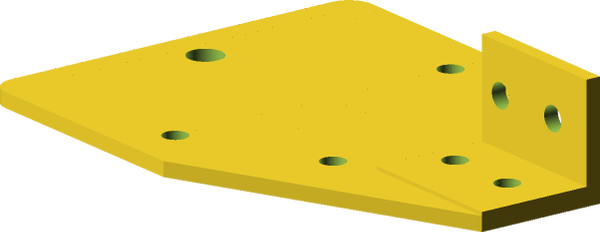
Even without rigging up a visualization, it is clear that I need a heck of a lot of space between the end of the X rail and the side of the Y rail. It would probably work OK, but I'd have to make the printer a lot wider to use this belt positioning.
I think it is time to start from scratch again for both carriages. This time run all the wheels along the sides of both the X and Y rails and position the belts just above the carriages. I think that will allow the most compact design while keeping the belts quite close to the carriages so there isn't too much torque being applied.
This new design is looking good. I don't see anything too awful about it yet. I may decide to flip everything over and run the belts on the bottom rather than the top, but I'll see how it goes...